
There is nothing like a crusty, chewy, tangy loaf of sourdough bread. Not only does sourdough have a unique flavor, but there is evidence that fermented breads like sourdough are healthier and easier to digest than other breads. To make your very own sourdough bread at home, all you need is a starter, some helpful tools and a little bit of practice! Here is everything you need to make your own sourdough at home.
Made with nothing more than flour, water and salt, sourdough bread is leavened by a fermented starter without any added yeast. If you want to tackle making bakery-style sourdough bread at home, your first task is to acquire a starter. Sourdough starter is a ferment made from flour, water and wild yeast from the air. The natural yeast in the starter is what causes the bread to rise.

You can make a starter from scratch with flour, water, and some fruit juice. There are numerous explanations in cookbooks and online of how to do this. However, if you start from scratch, you will need at least a week, and possibly more, to create a starter healthy enough to bake with.
But there may be an easier way: part of maintaining a healthy sourdough starter is discarding a portion of the starter before feeding it. That means that anyone you know with a sourdough starter will be happy to give you some of theirs. So ask around! Lastly, you can buy a frozen sourdough starter online. But considering that bakers are throwing out starter all the time, see if you can find one for free first.
Sourdough starters need to be fed with flour and water to stay healthy. To feed your sourdough starter, you add equal amounts of flour and warm water. You want a ratio of 1:4 or 1:5 starter to flour and water. So, for example, if you have 20 grams of starter add 100 grams of water and 100 grams of flour (I use half whole wheat flour and half all-purpose flour.) Stir that mixture together with your fingers, cover loosely and place it somewhere warm.
After 12 or 16 hours, the starter should be expanded and quite bubbly. But before you start baking with it, test the health of your starter by putting a little in a bowl of water: if it floats, it’s ready. If not, it needs more time and perhaps to be somewhere warmer. This may seem silly, but think of it this way: if the starter isn’t light enough to float in water, how will it make a loaf of bread rise?
You can keep your starter on the counter and feed it daily or keep it in the refrigerator and feed it as little as weekly — or less. How often you should feed your starter depends on how often you want to bake with it and what kind of time you have. The important thing to know is that you need to feed a starter 12 hours or so before you want to bake with it.
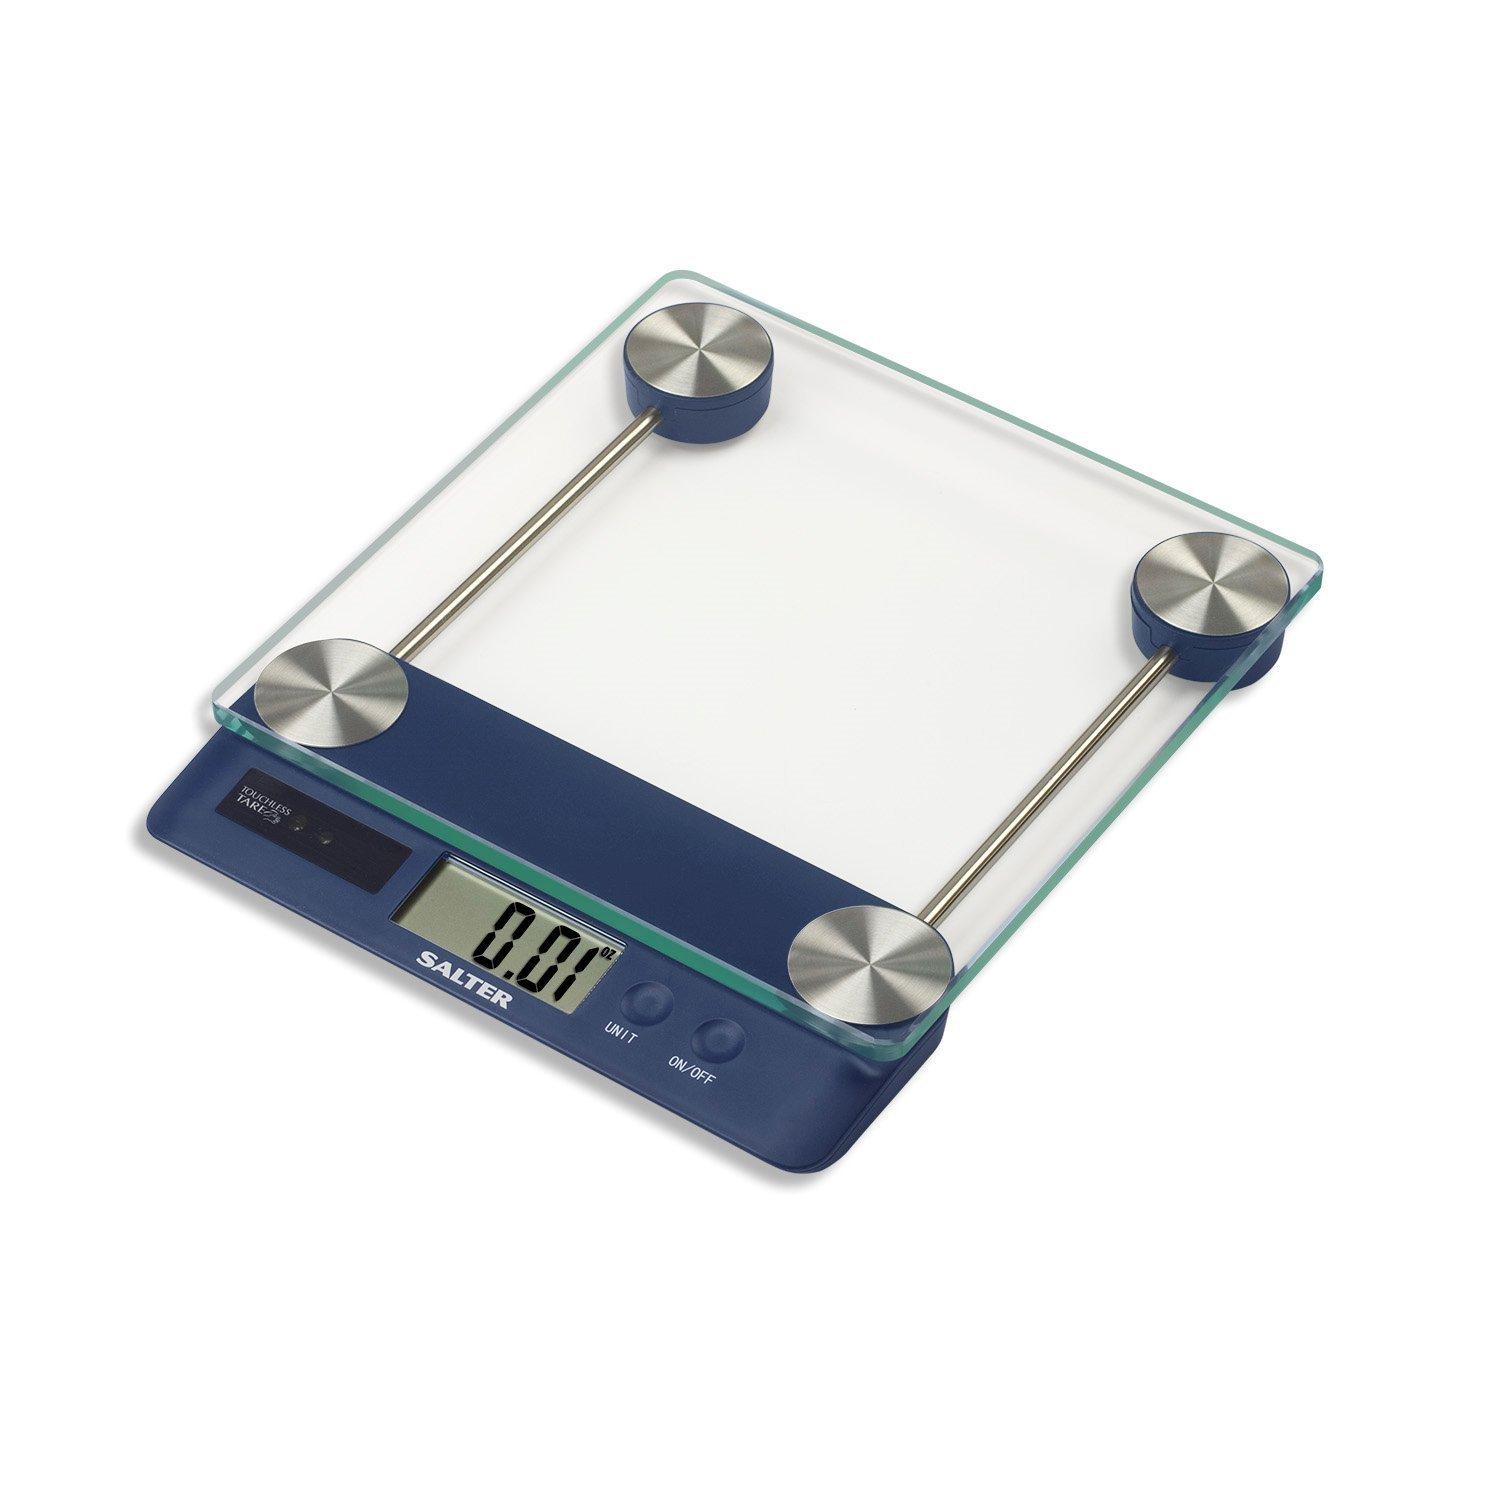
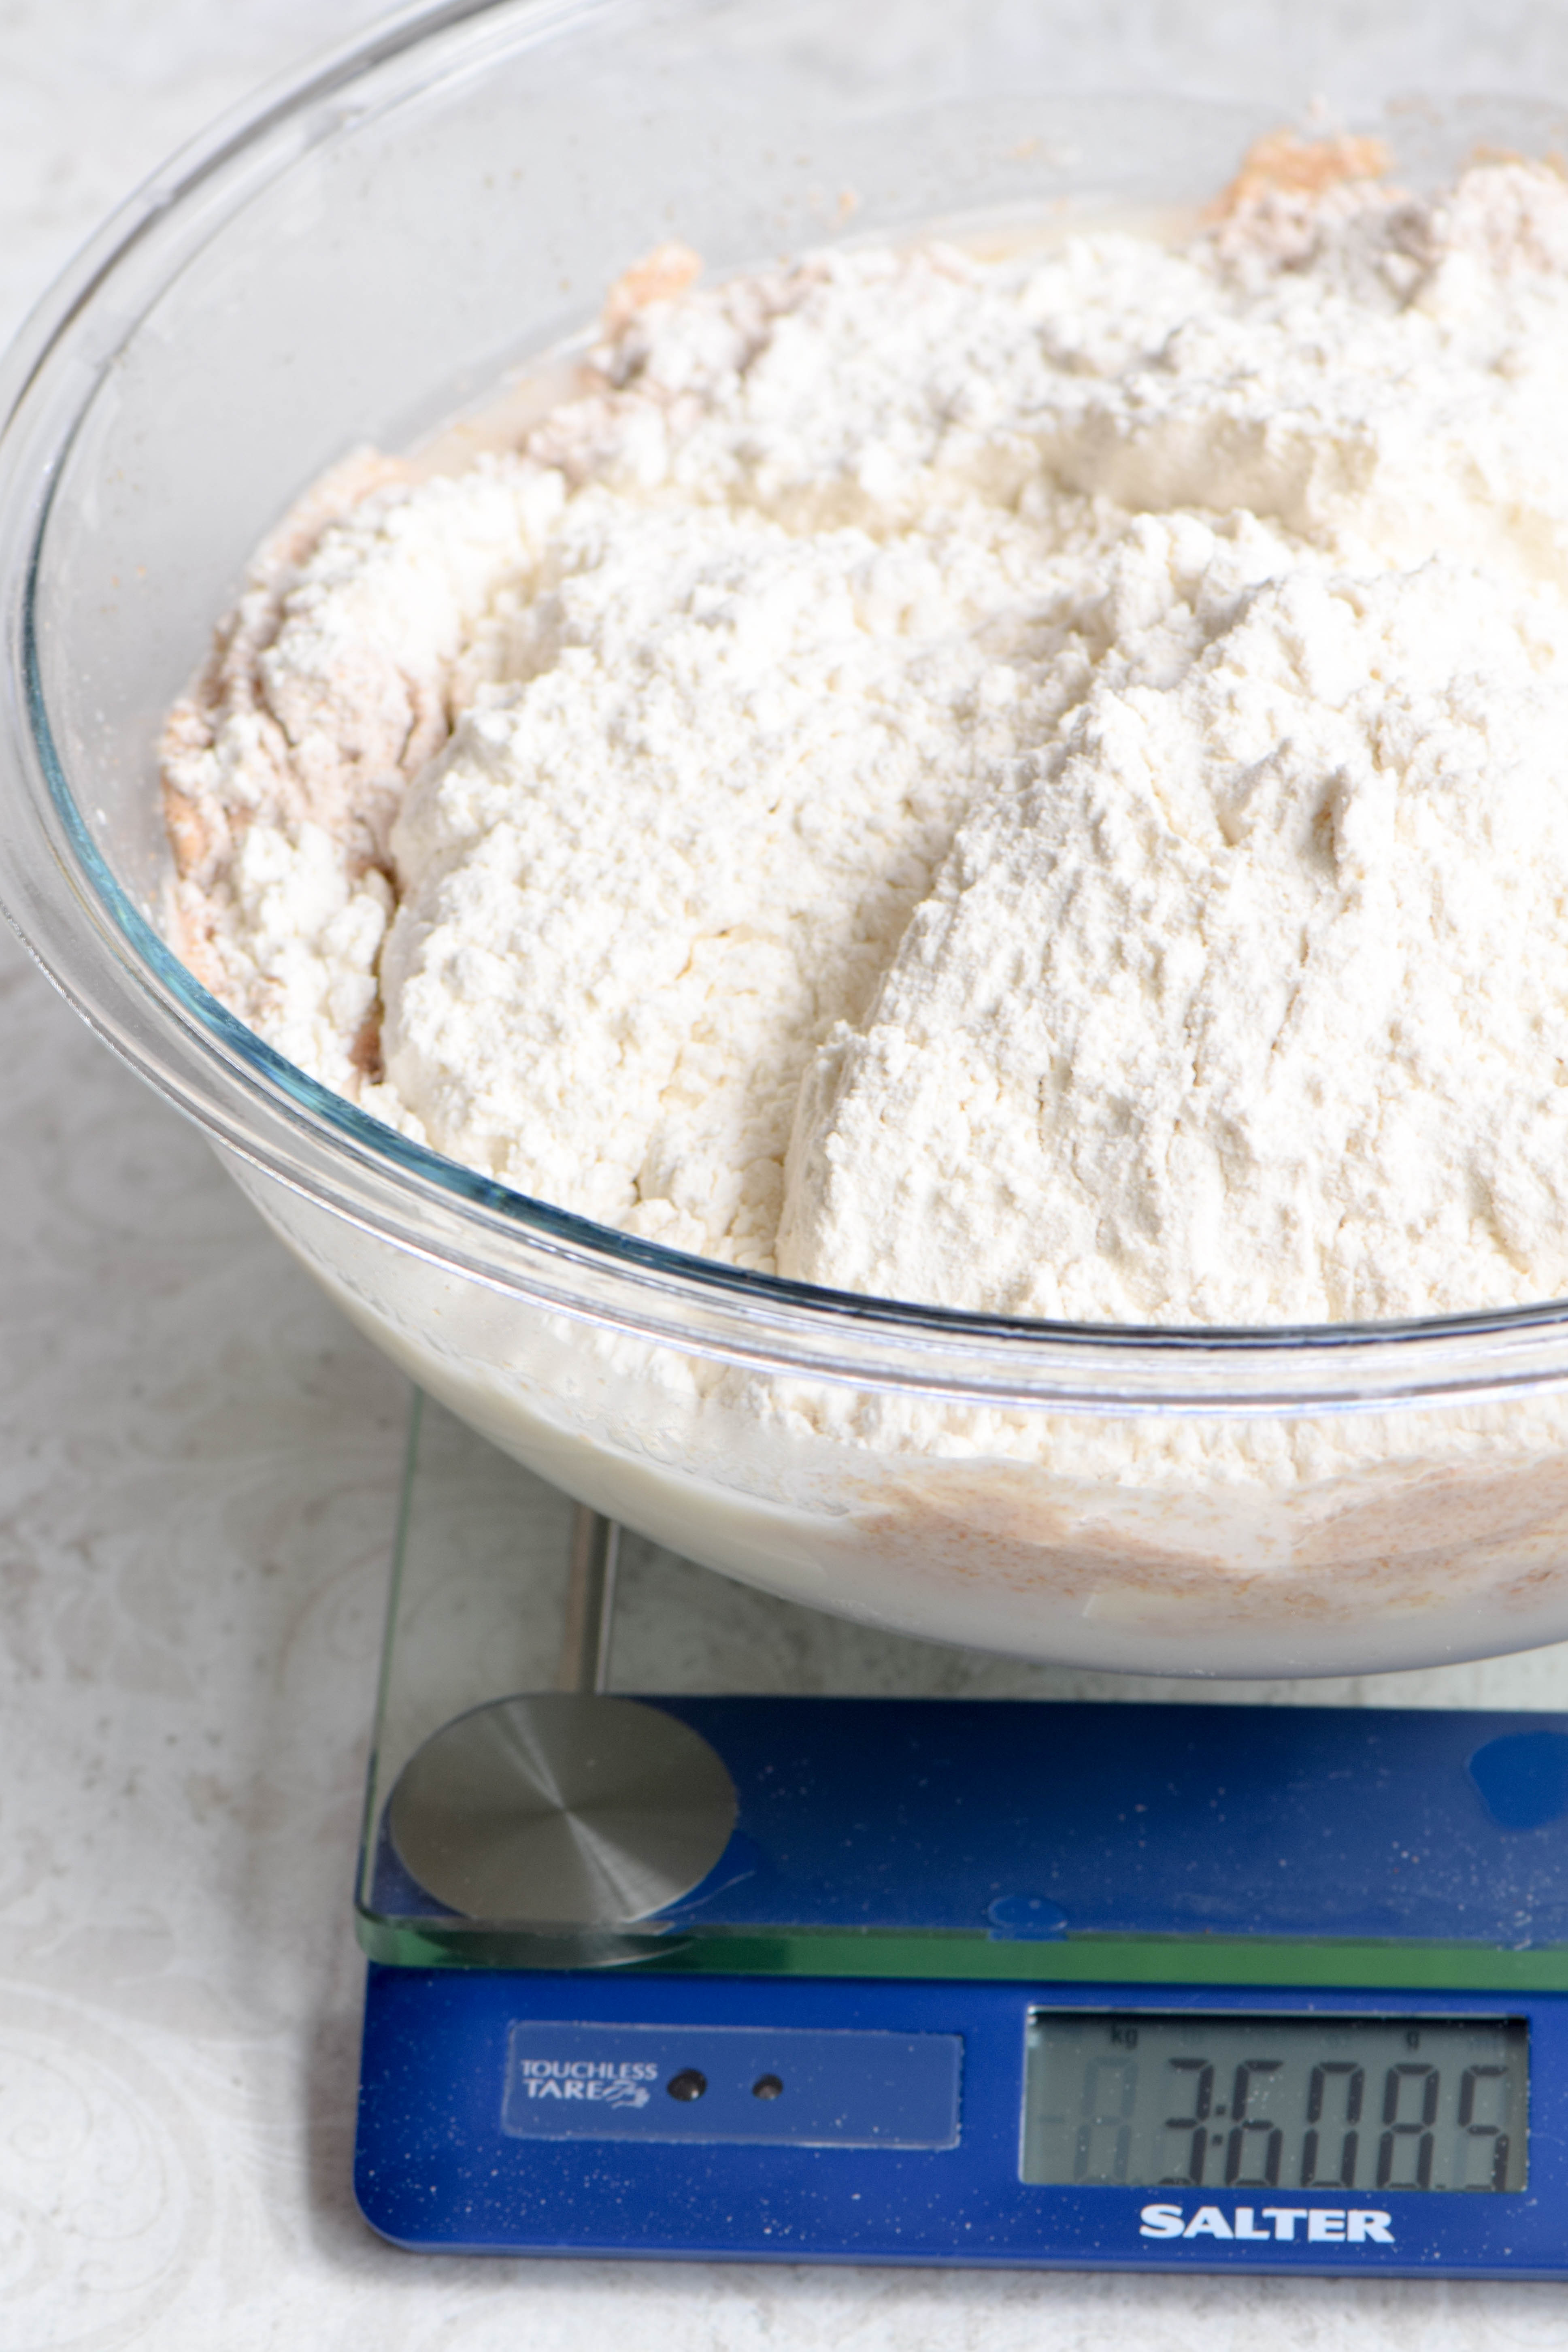
Before you start baking sourdough bread, there are a few pieces of equipment that are worth investing in. One is a kitchen scale. Measuring by weight is far more accurate than measuring by volume. So a digital scale is a very useful piece of equipment to have for all kinds of baking.
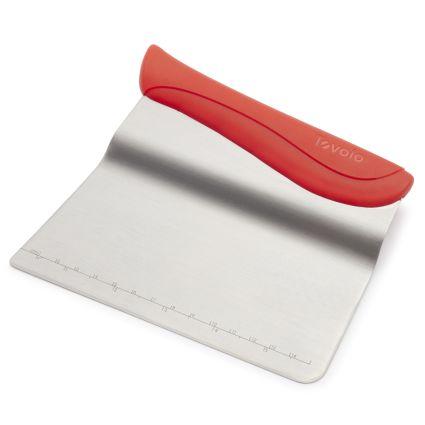
You will also need a bench scraper for dividing and shaping your loaves. This too is a kitchen tool which has many uses beyond baking bread, such as transferring items from a cutting board to a baking sheet or pan. This stainless steel version by Tovolo features an offset blade and a curved plastic handle for comfortable handling. The angled scraper slides easily under dough and baked goods.
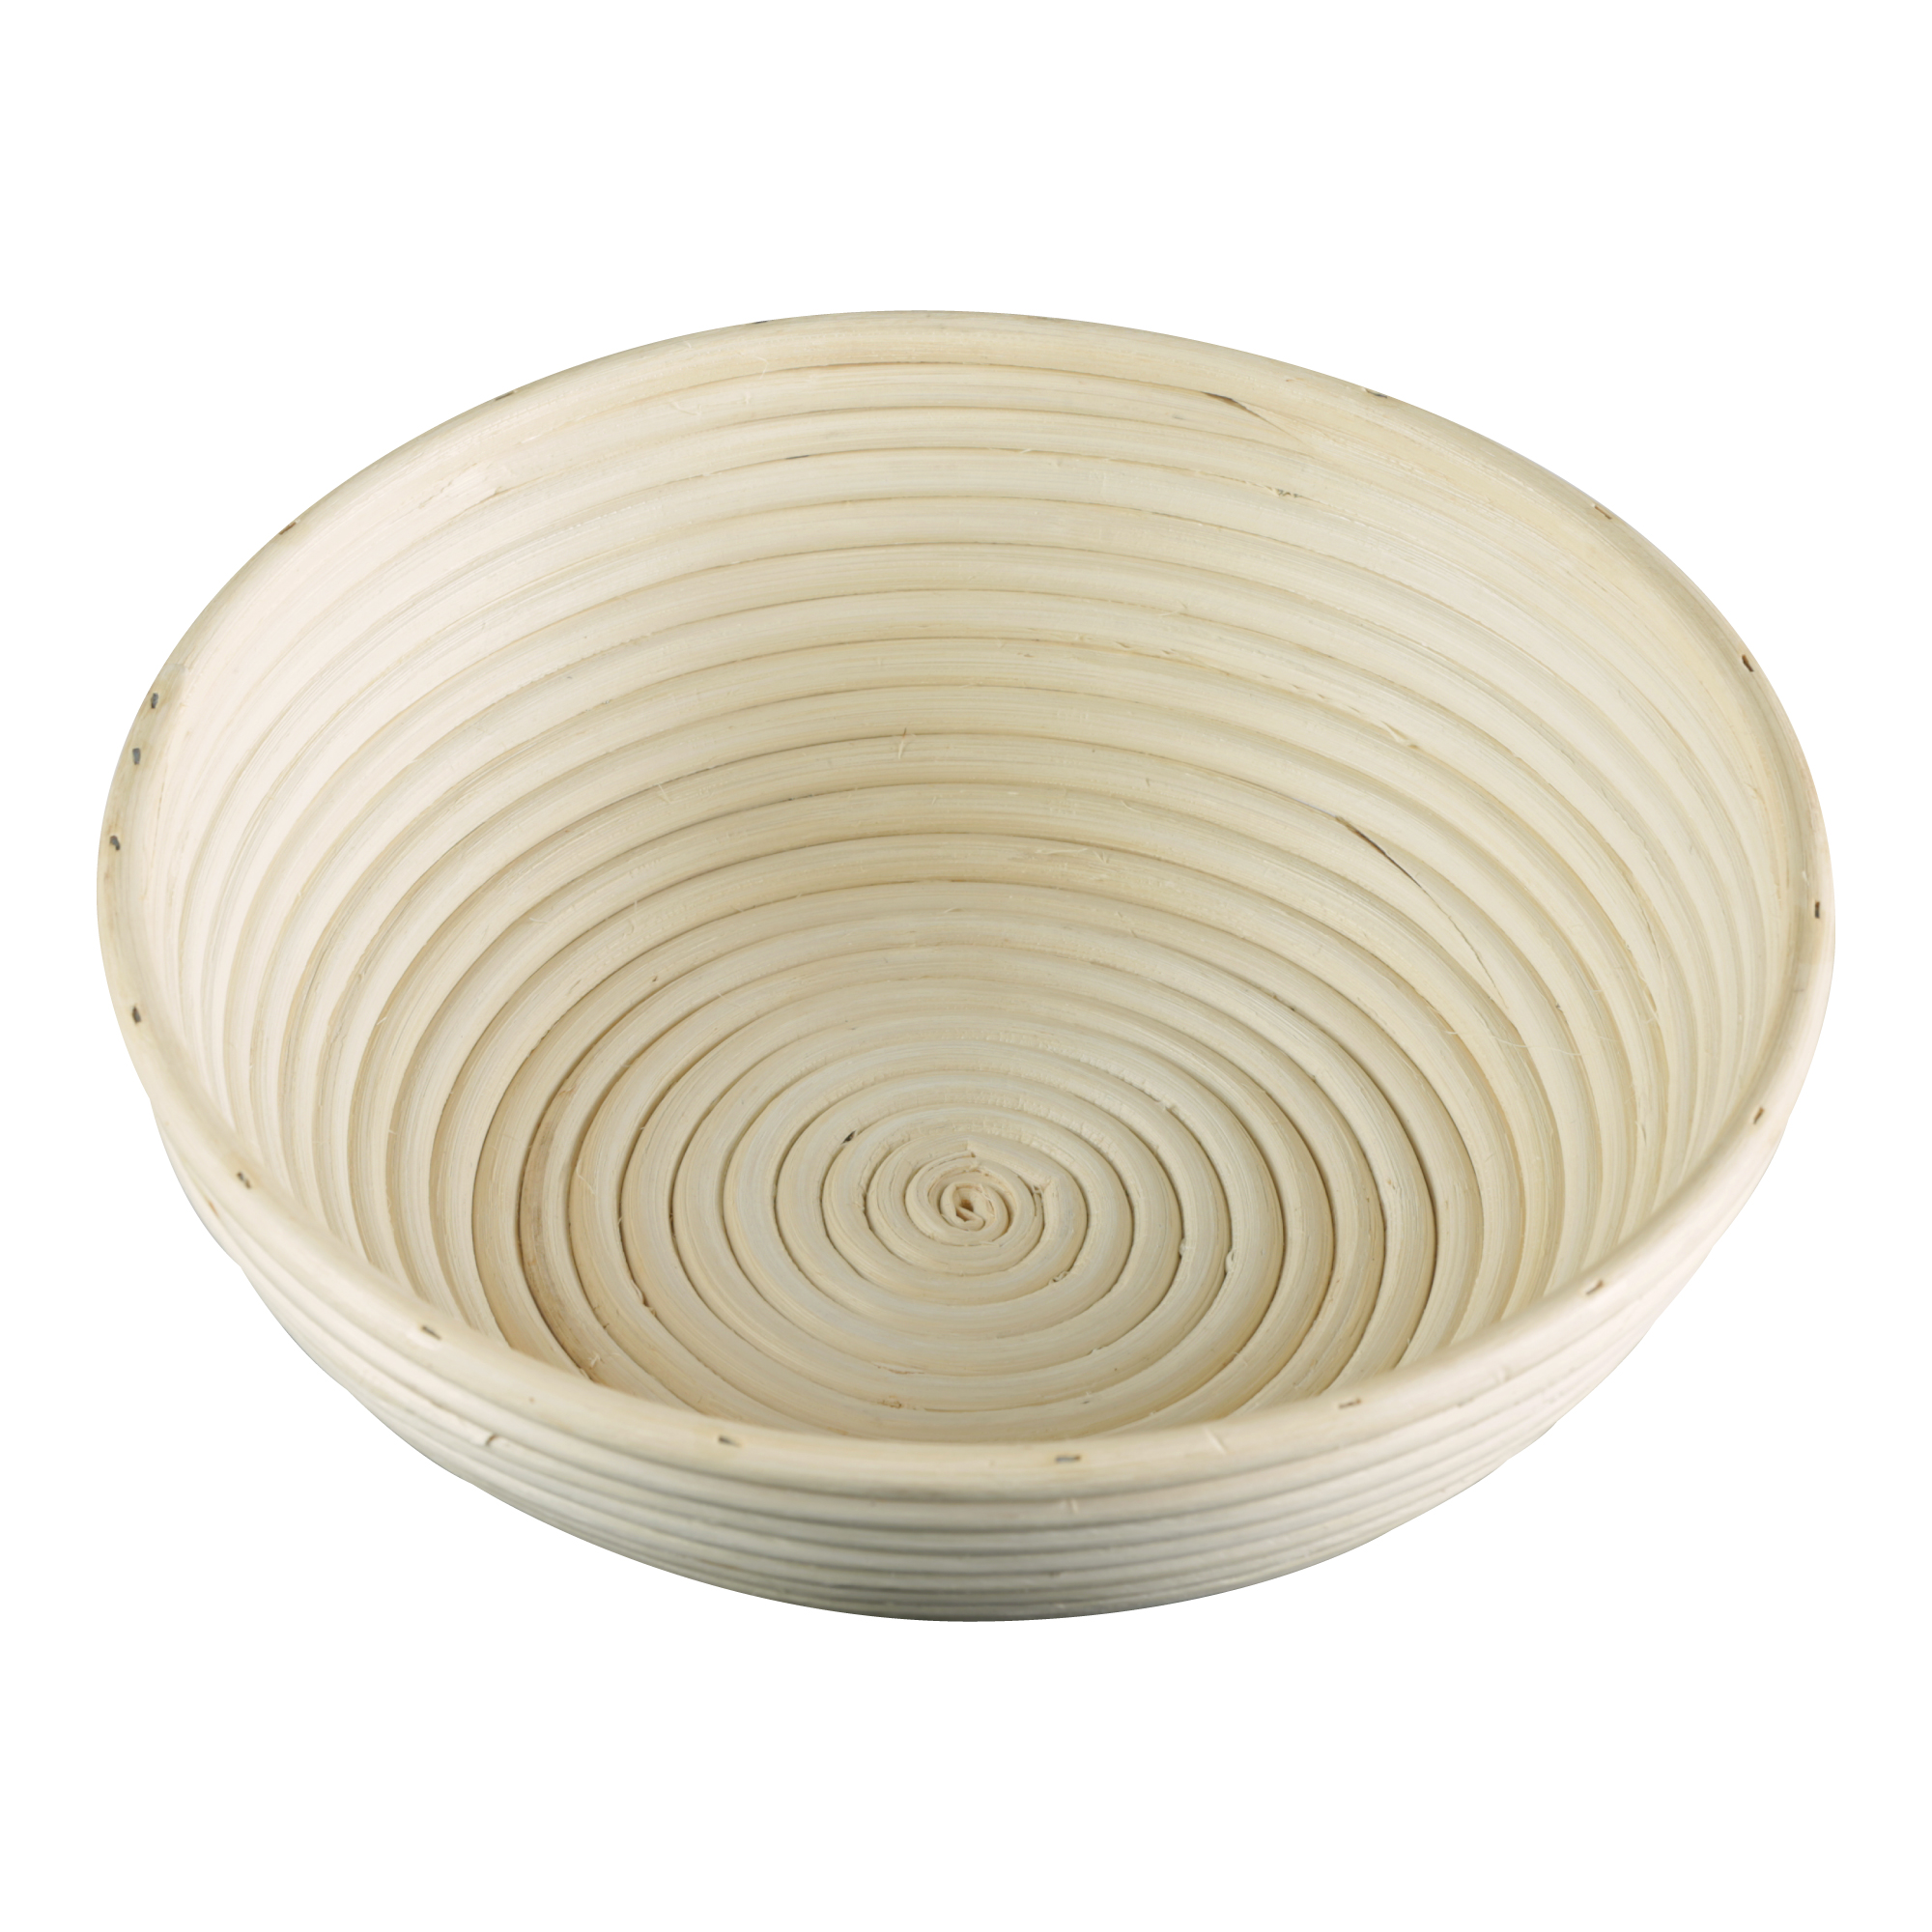
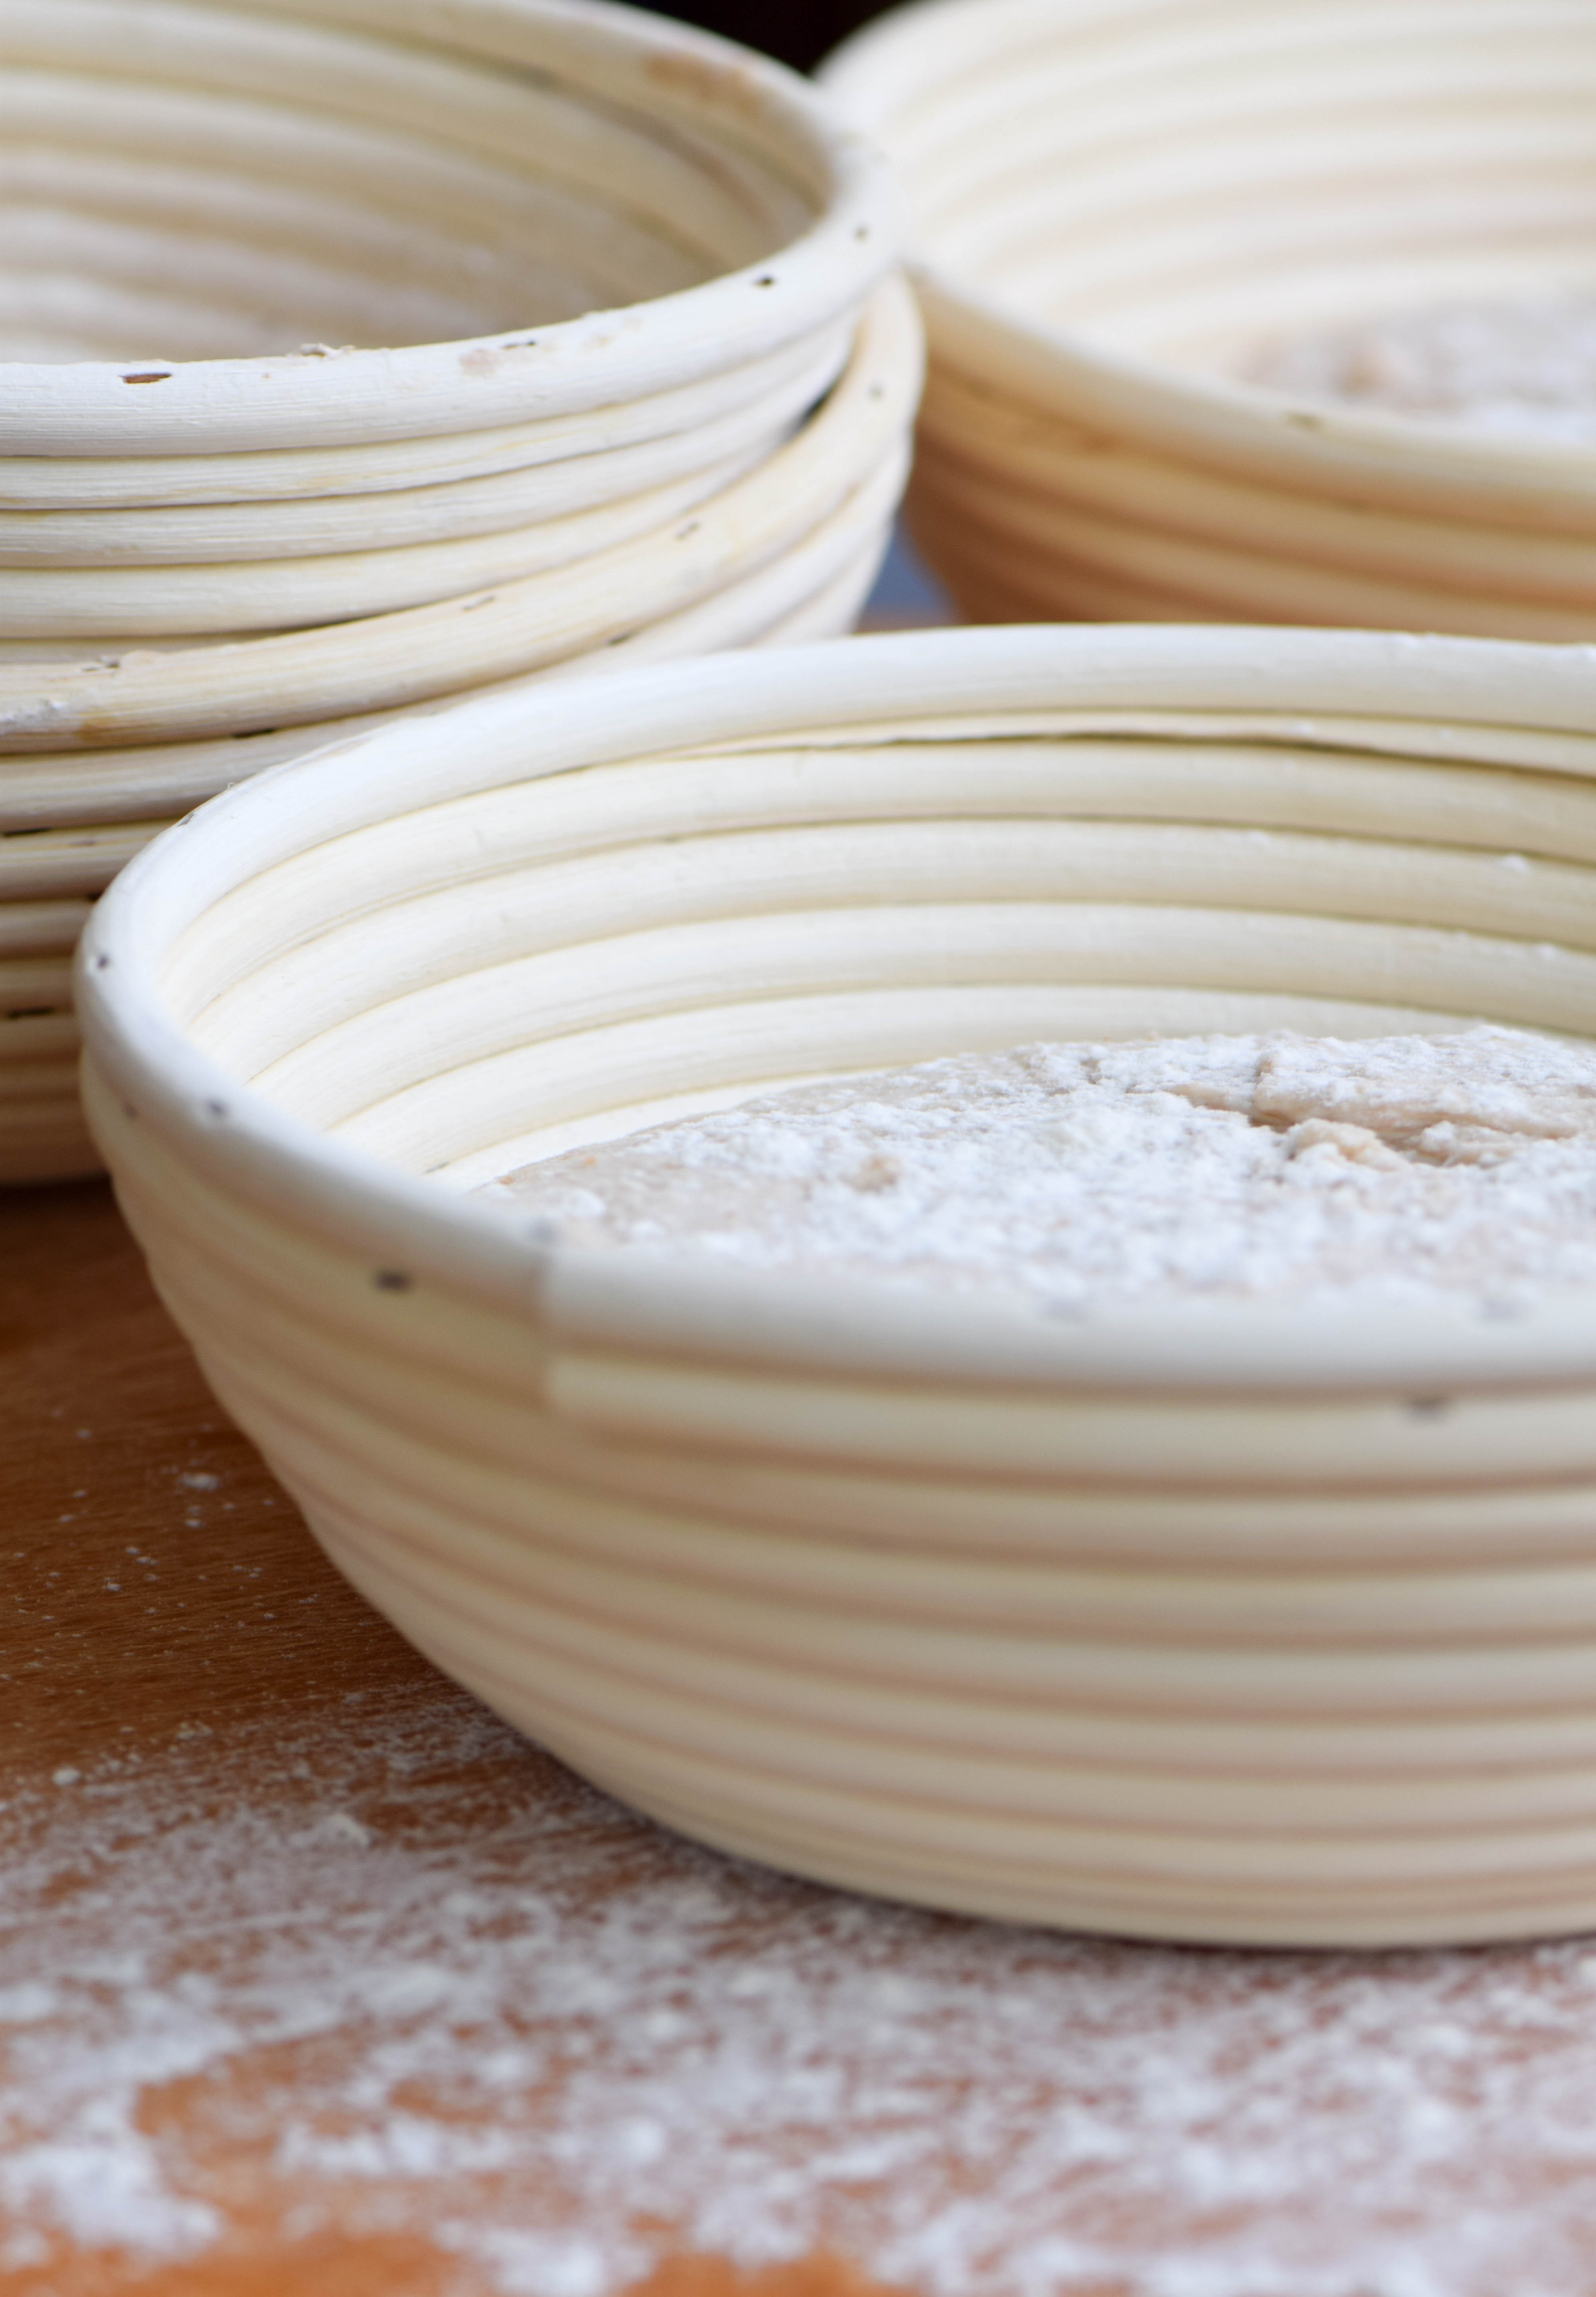
Optional equipment includes rattan baskets for proofing the bread. These baskets, which are responsible for the pretty lines on bakery loaves, are called brotform or banneton baskets and are used to support the dough and prevent it from flattening out as it proofs. They come in many shapes and sizes. You can purchase cloth liners for them, or rely on flouring the baskets well to prevent your dough from sticking to the sides.
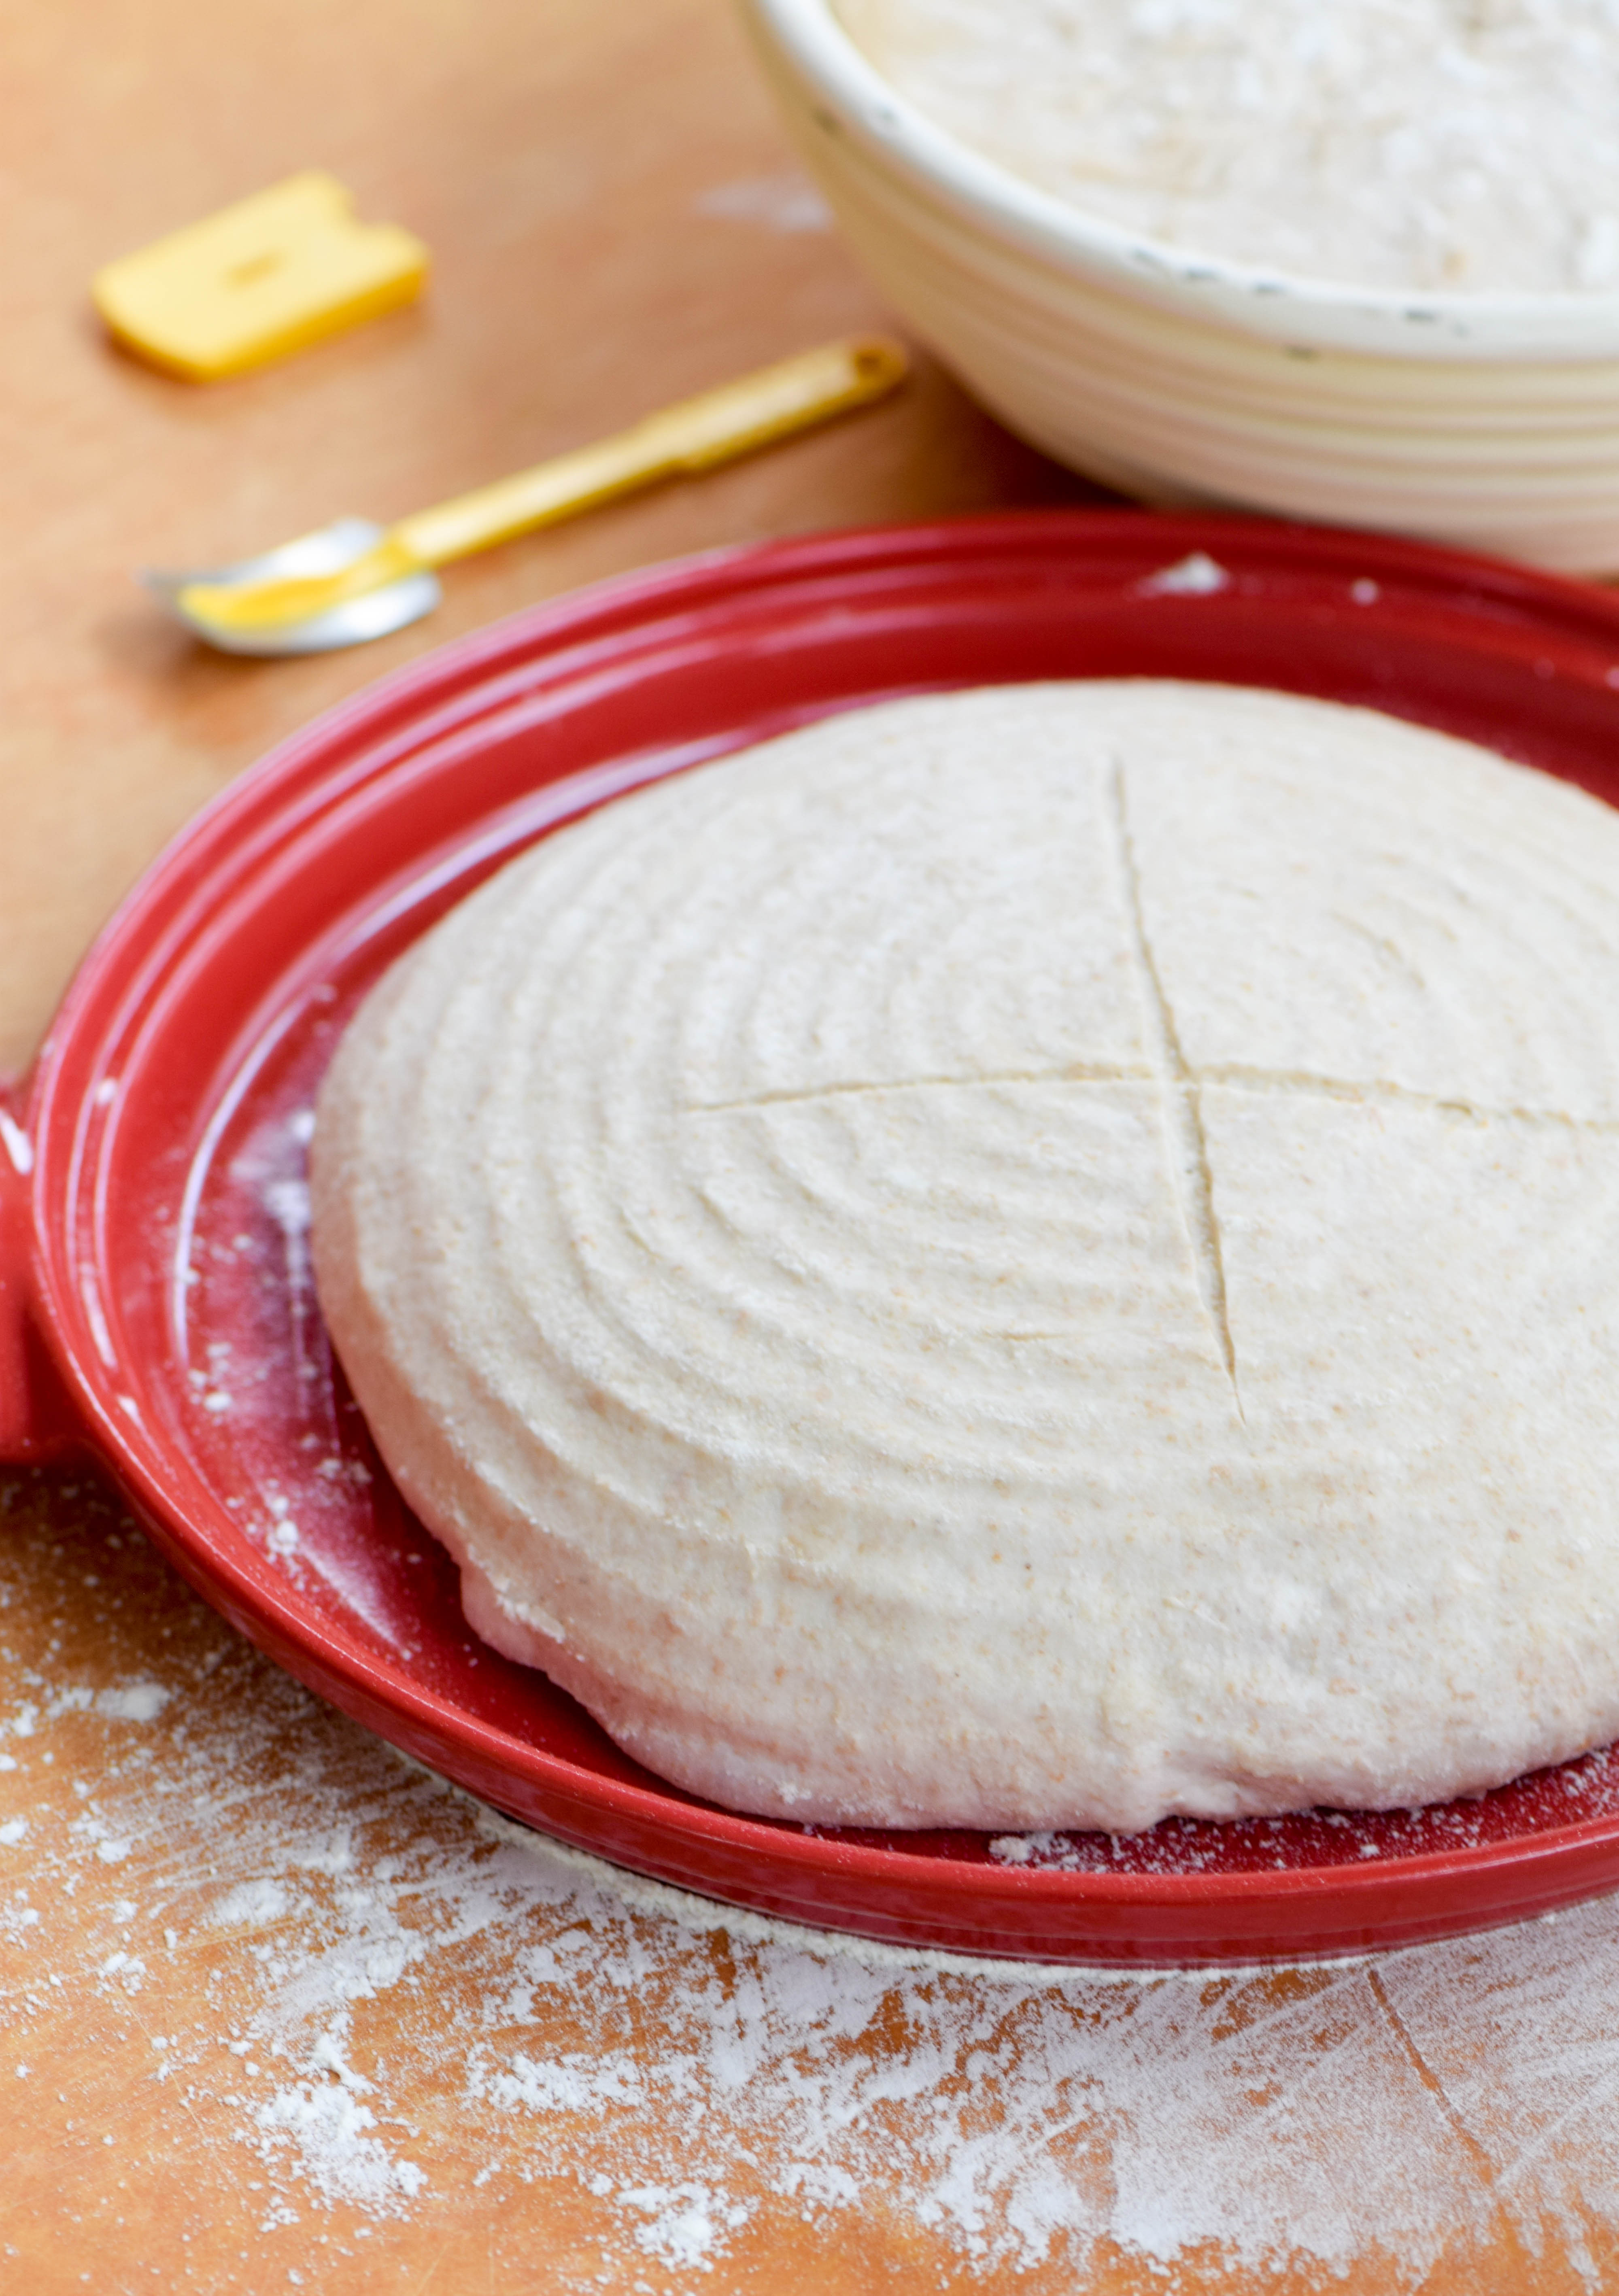
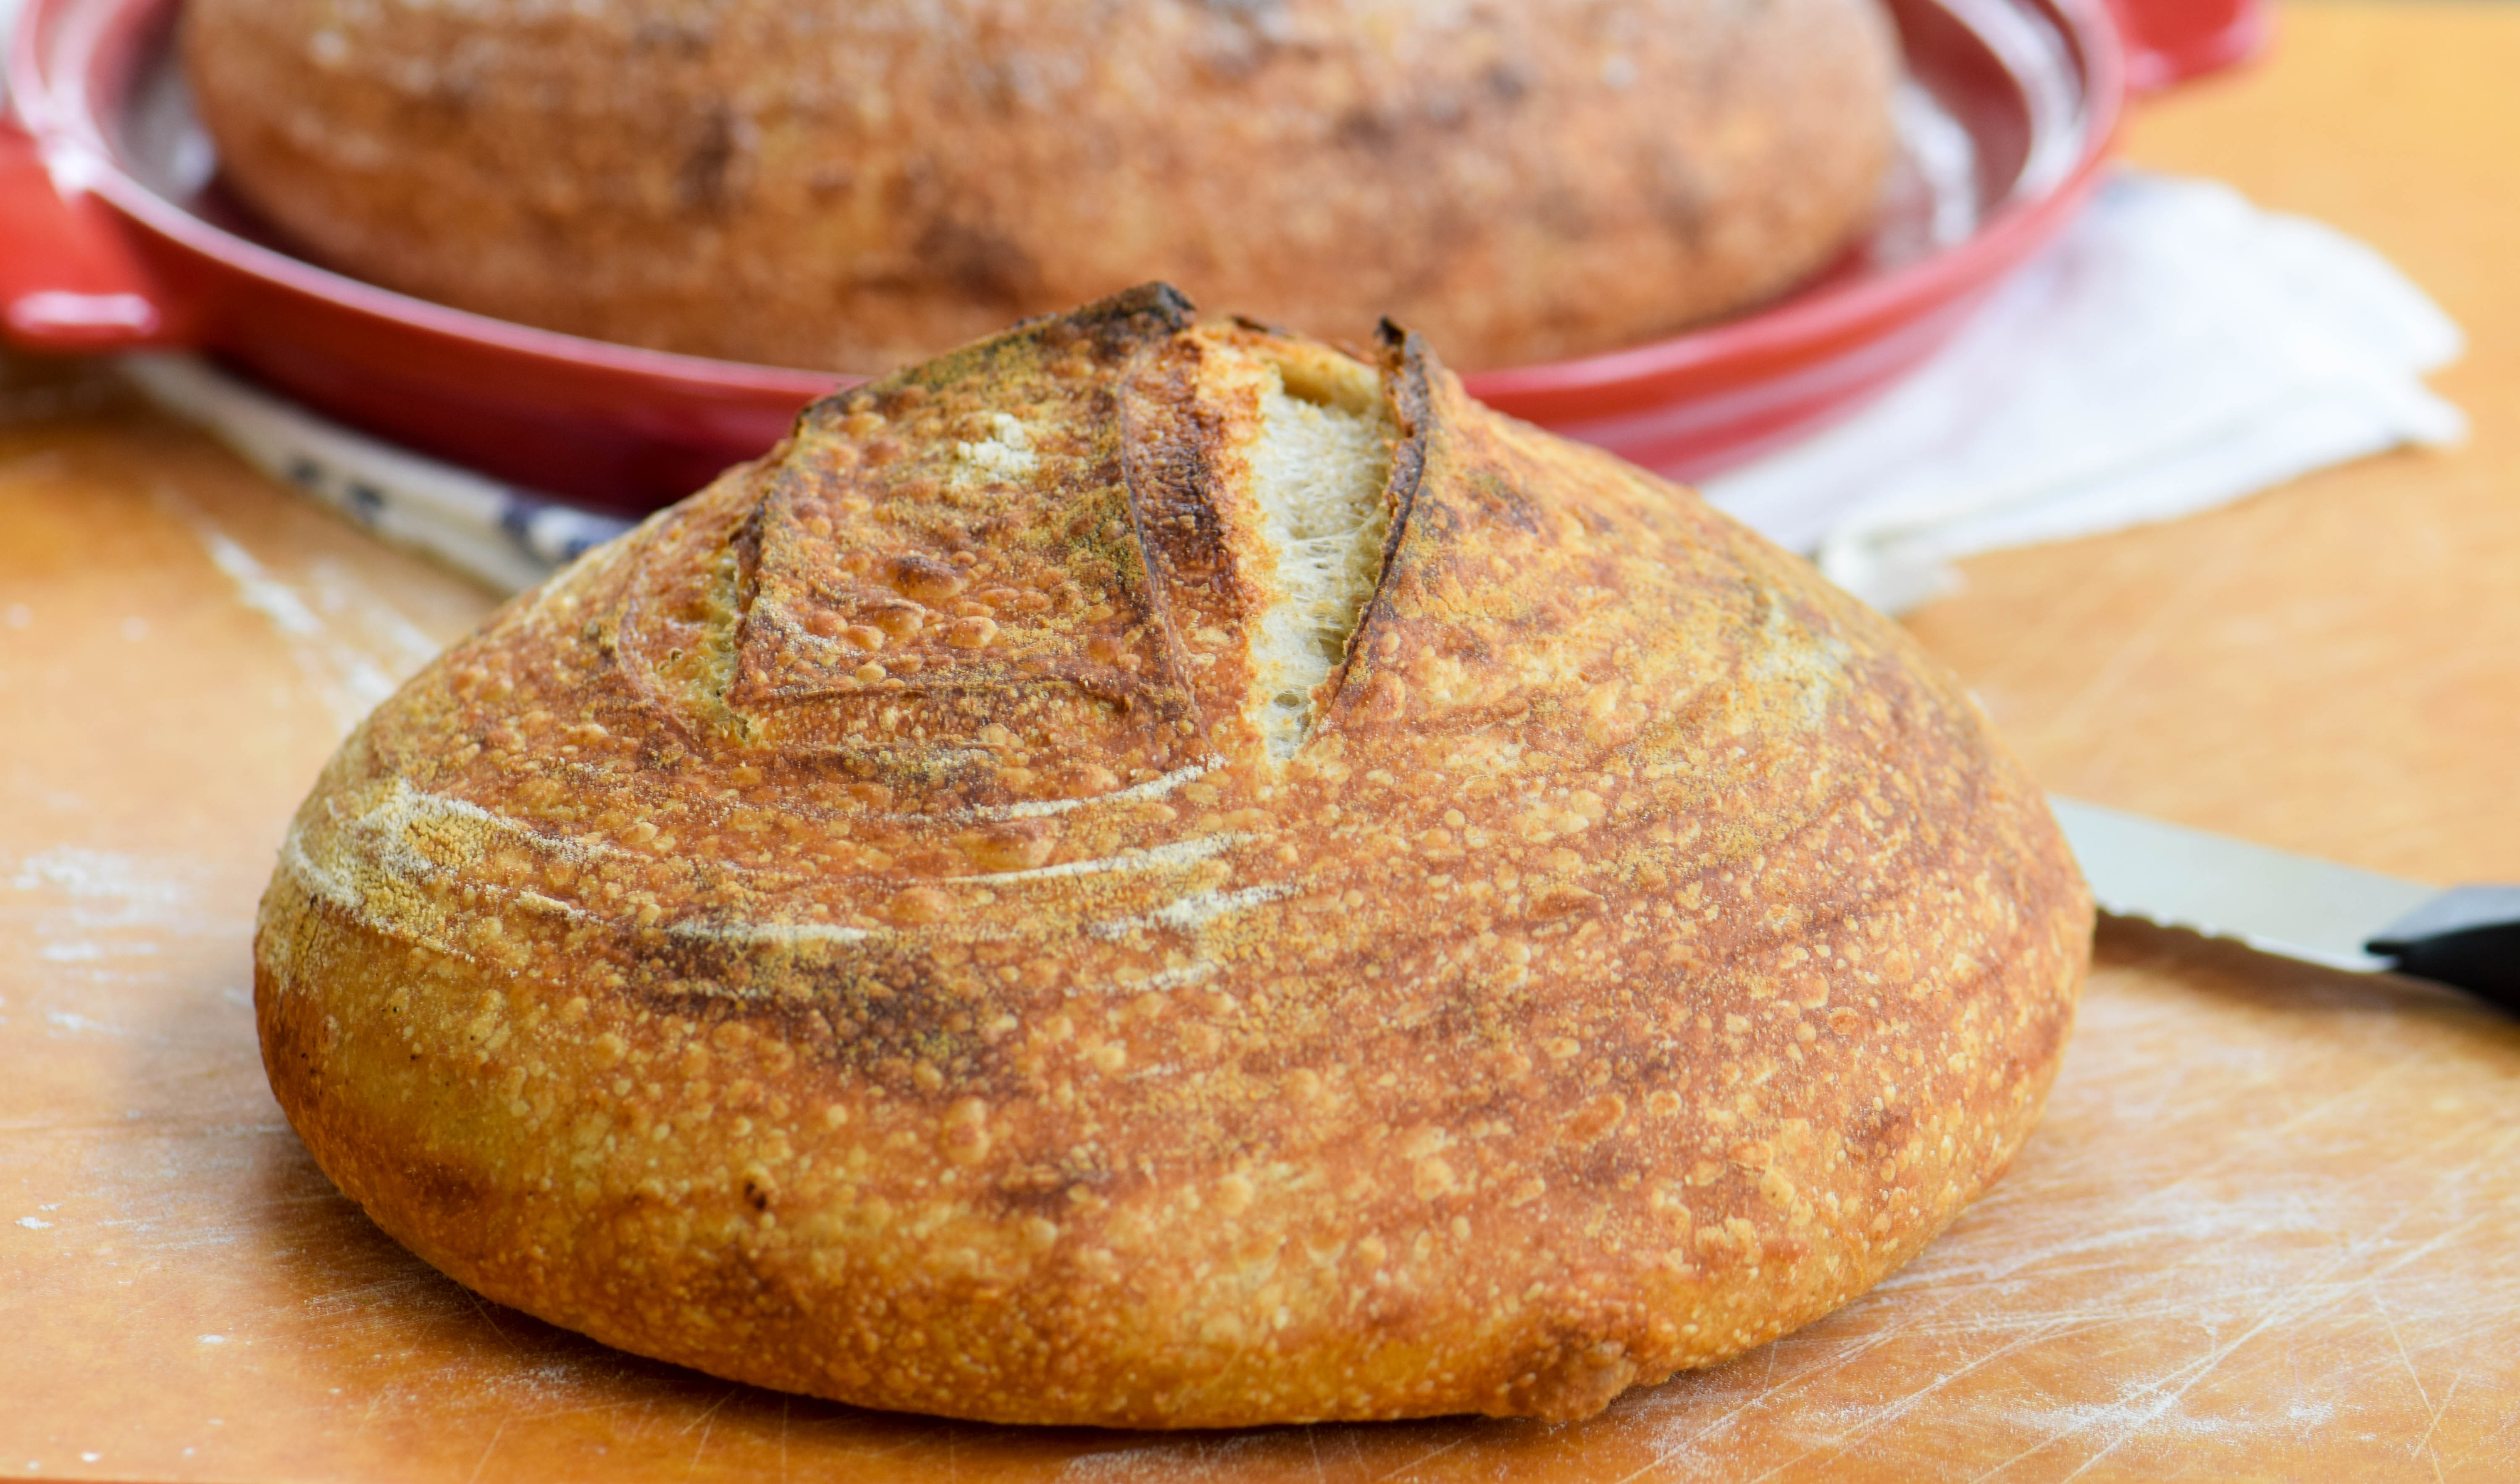
Also optional, but helpful, is a French tool called a lame, which is an extra-sharp razor that bakers use to slash their loaves prior to baking to release steam. Use the lame to make a plus sign on the top of your loaf, or get creative with different designs, such as a long slash down the middle with a short diagonal slash on either side.
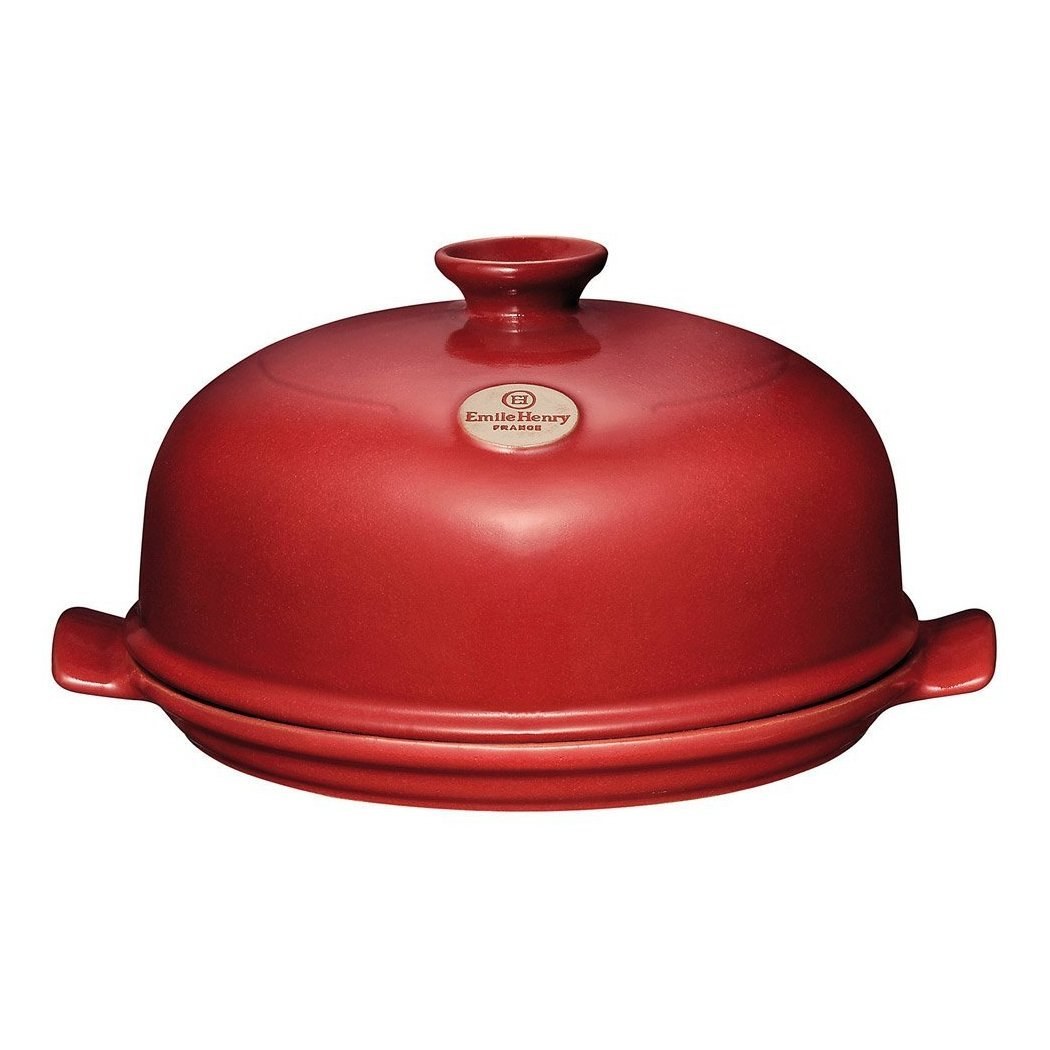
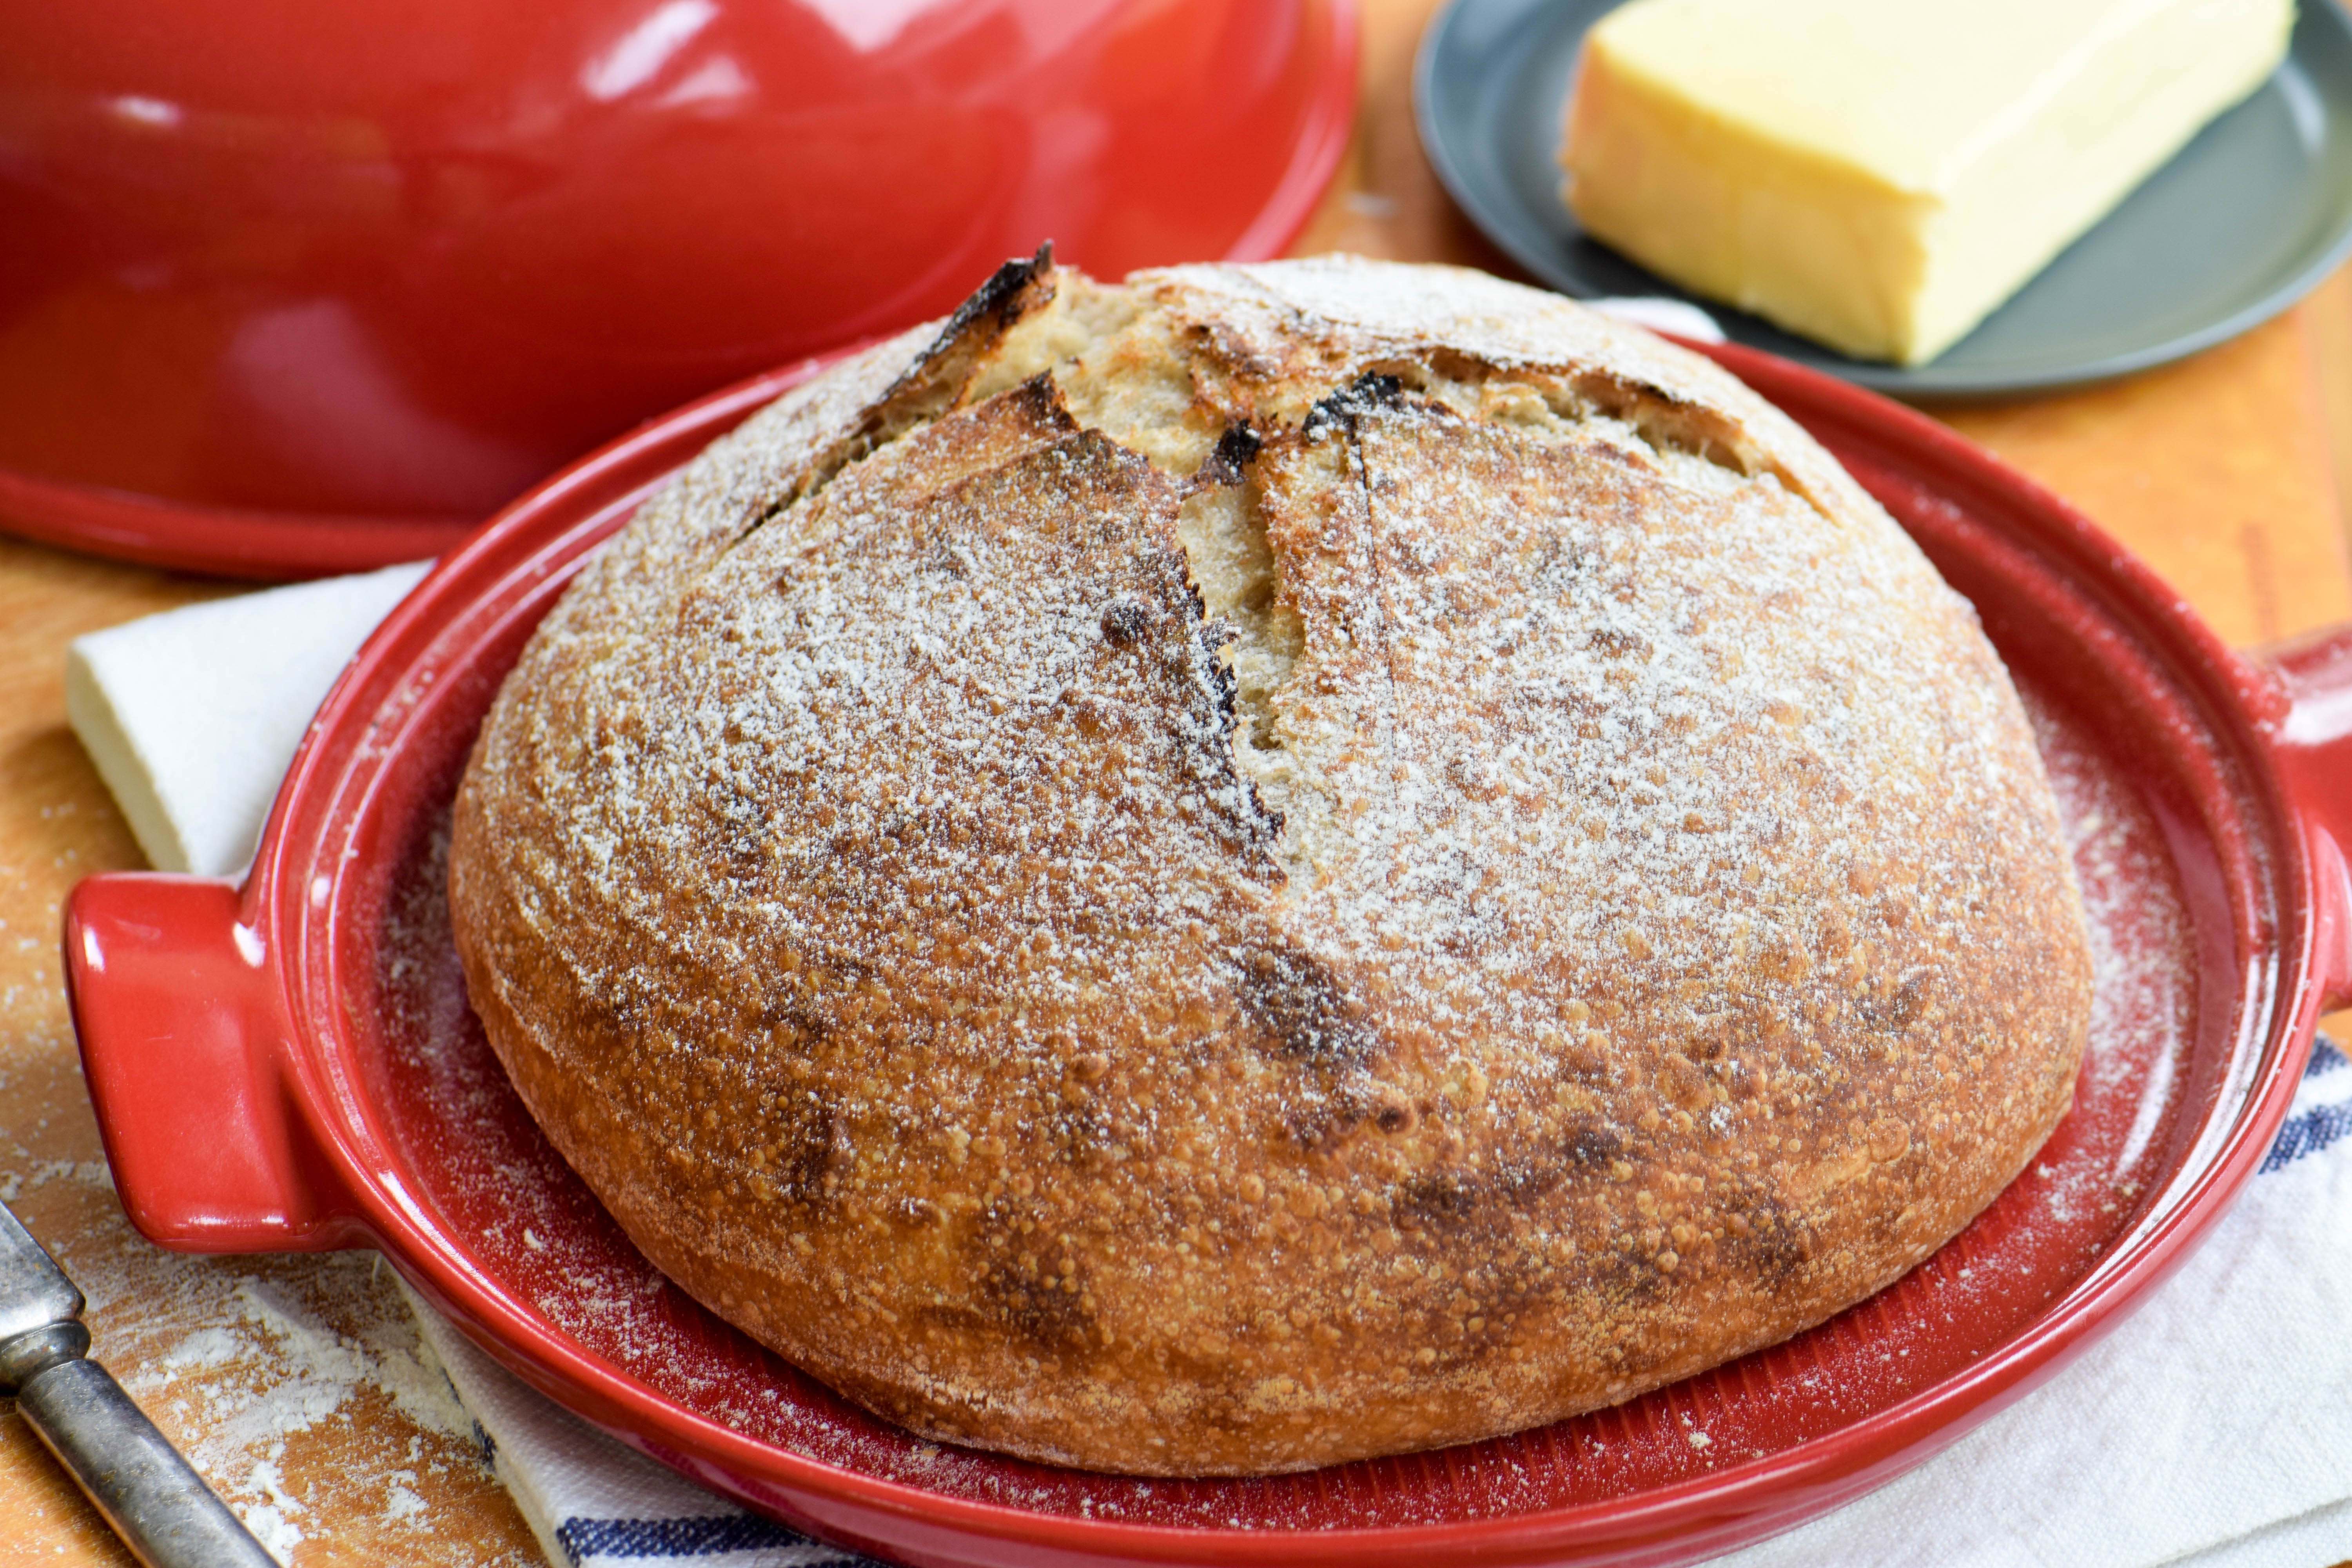
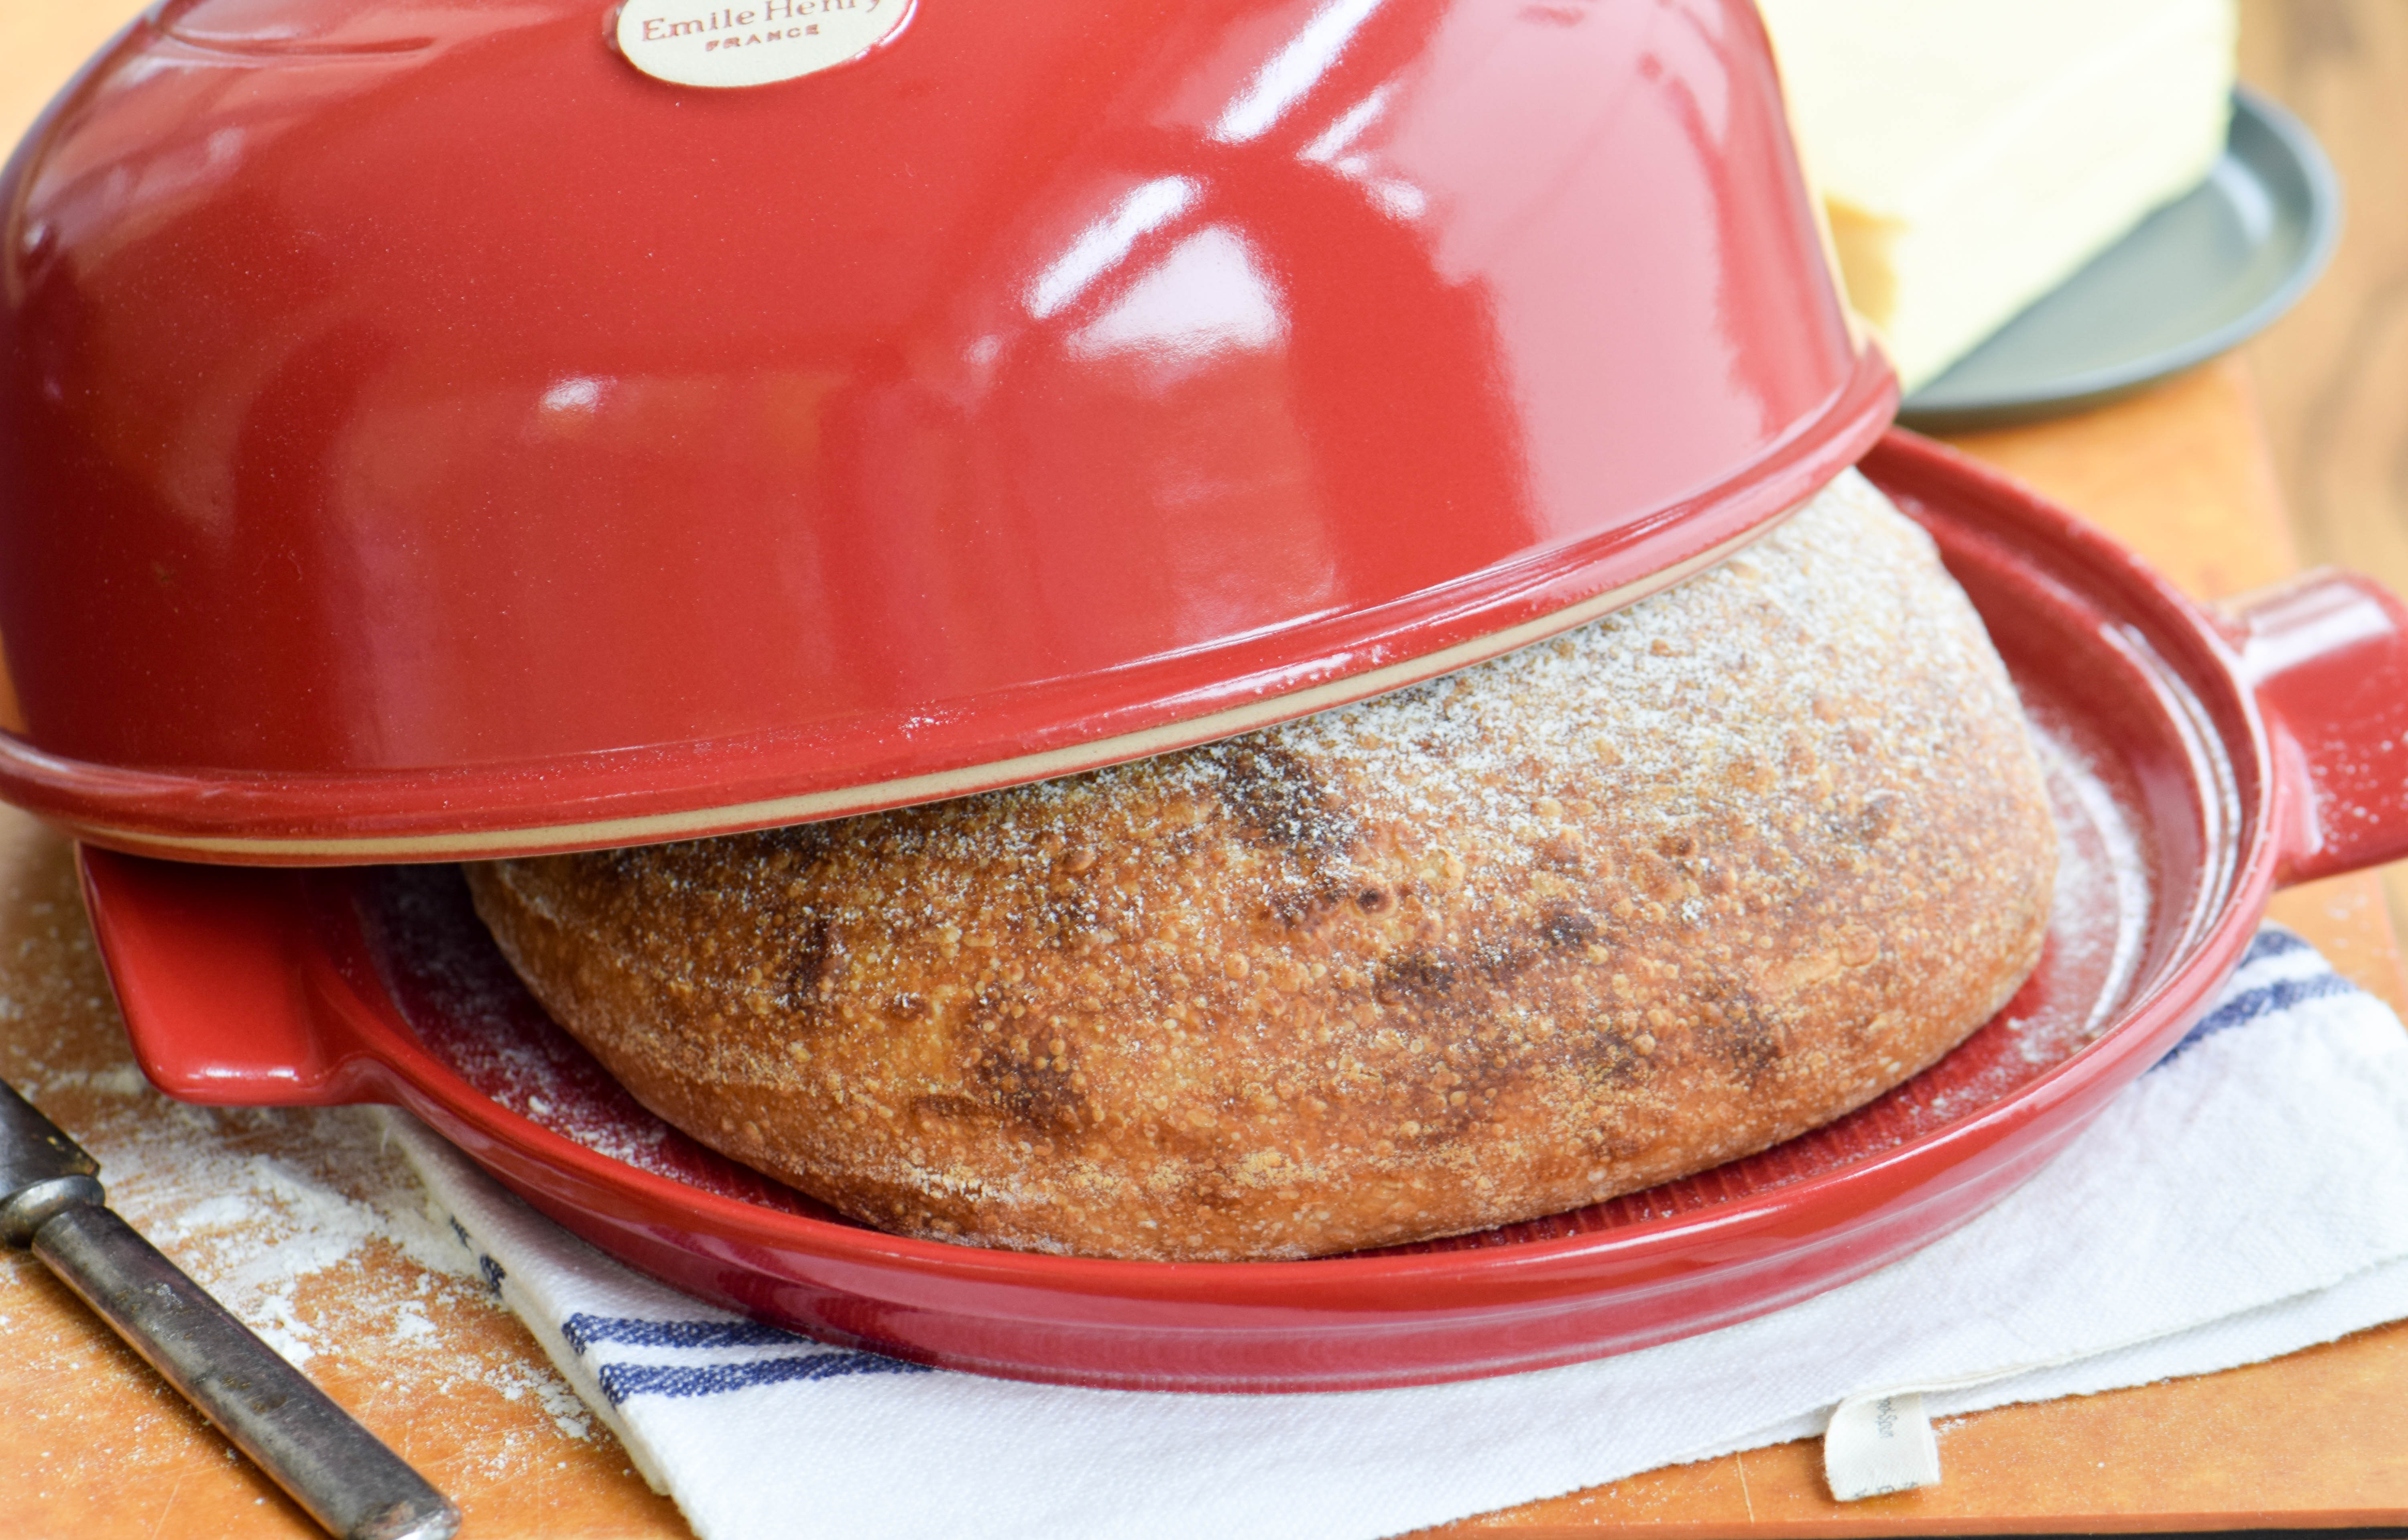
Lastly, you will need something to bake the bread in. Use a vessel with a lid for baking this kind of artisanal loaf because the lid will trap the steam given off by the loaf and mimic a steam-injected professional oven. For a true bakery-style loaf, invest in a ceramic cloche, such as those made by Emile Henry.
Baking sourdough is a long process. You need to be able to work on the dough at 40 to 45-minute intervals over a period of almost four hours. Instead of kneading the dough, you want to stretch and turn it. It’s a gentler approach to building structure in the dough without knocking out the air. Then, the dough needs to rise in the refrigerator overnight. In other words, making sourdough bread is a perfect evening or weekend project.
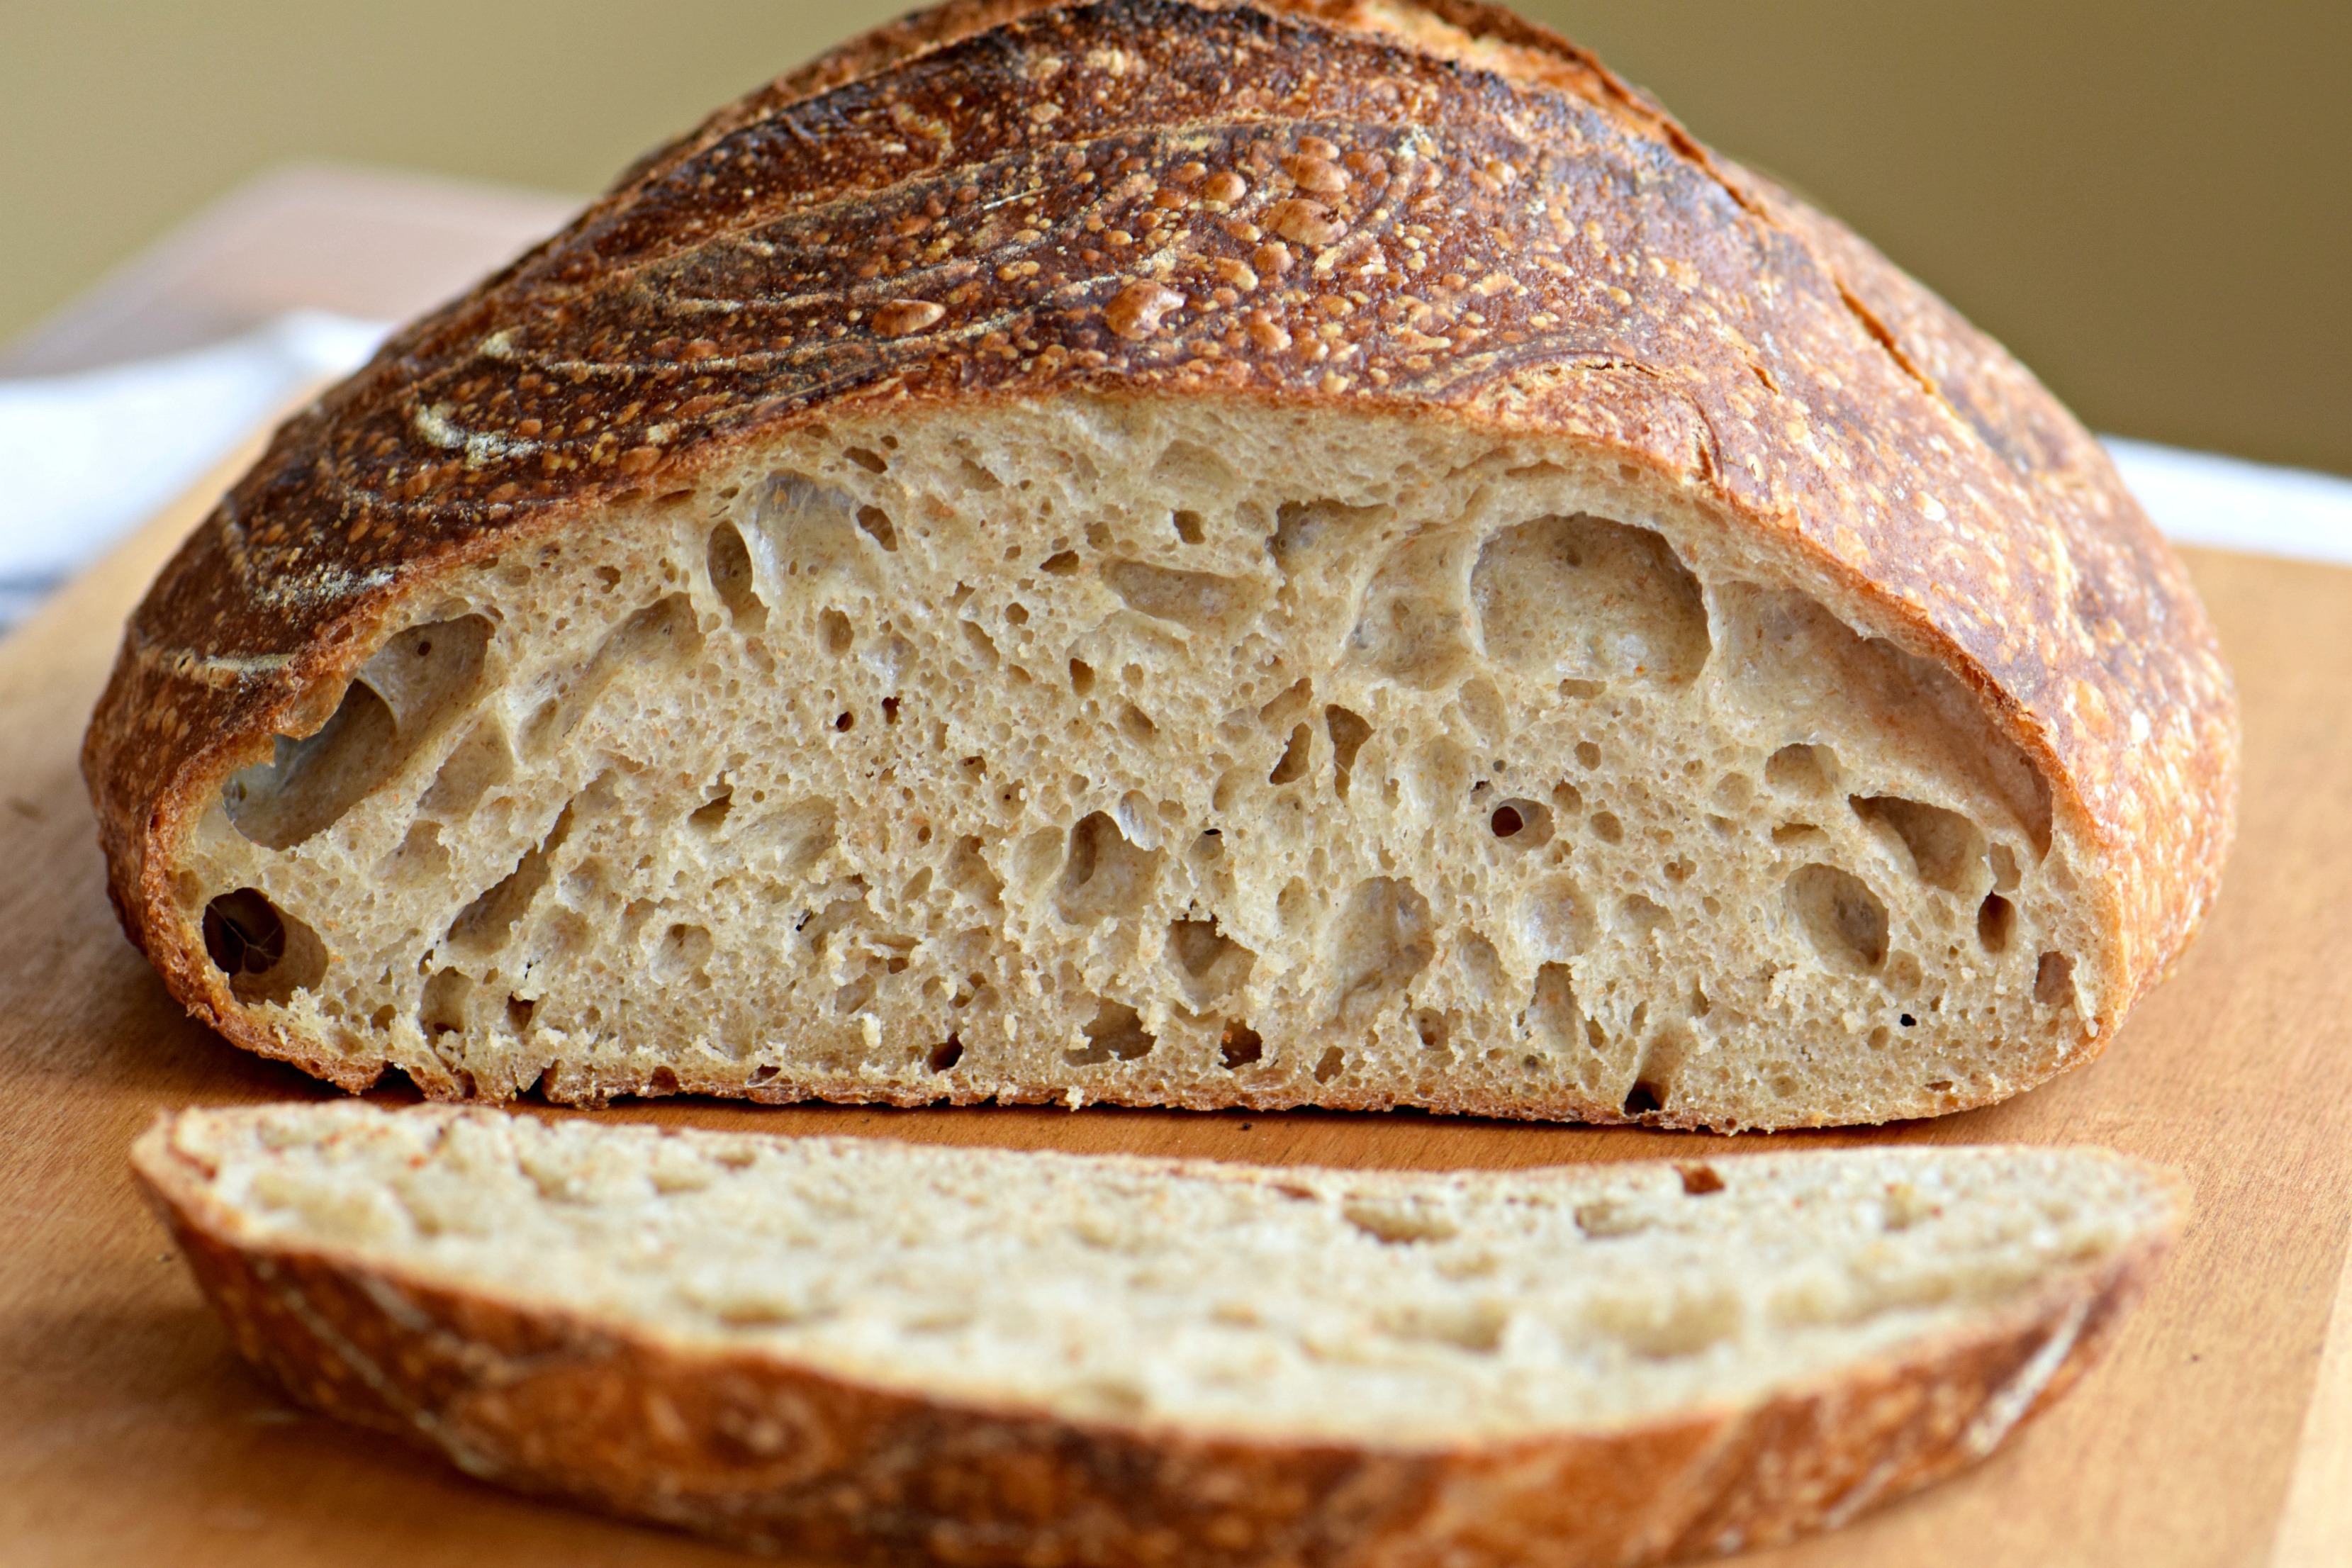
The results, however, are so worth it. This bread is as good as any you will ever have. Enjoy it plain, slathered with butter, alongside soups and stews, or as the foundation of a sandwich. Every batch comes out a bit different; sometimes more sour; sometimes denser or lighter. That’s the magic of working with a live starter.
A final tip: keep your sourdough in a warm place during the rising process. I have found that this is important. Room temperature is not warm enough. Try putting the dough on top of the stove when the oven is on, in a sunny room with the blinds open, or even on top of the radiator. It’s tricky because you don’t want the dough to get too warm either. The ideal temperature is around 76 degrees.
This sourdough bread recipe makes two loaves. Sourdough freezes well, so eat one loaf and freeze the other for another time! Or feel free to halve the recipe.
Sourdough Bread Recipe
INGREDIENTS
- 250 grams healthy sourdough starter (able to pass the "float test")
- 800 grams bread flour (approximately 5 1/2 cups)
- 200 grams whole wheat flour (approximately 1 1/2 cups)
- 29 grams fine sea salt
INSTRUCTIONS
- In a large bowl, combine the sourdough starter with 700 grams (around 3 cups) of warm, but not hot, water and mix together.
- Add the flour and mix with your hands or a bench scraper until all the flour is incorporated, but do not knead. (The dough may seem dry at this point.) Cover with a clean kitchen towel and allow to rest for 45 minutes in a warm place. This phase is known as autolyse.
- Add the salt and 55 additional grams of warm water to the dough and mix well to distribute the salt throughout the dough.
- Starting at the top of the bowl, pick up the edge of the dough and stretch it over the rest of the dough in the bowl. Turn the bowl 45 degrees and repeat this stretching and lifting process with the side that is now at the top. Do this two more times so that you have stretched each side of the dough ball. (These four "turns" is how we will build structure in our dough without kneading it.)
- Cover the bowl and place in a warm spot for forty minutes.
- Repeat the four turns again. Cover and allow to rest for another 40 minutes.
- Repeat this sequence two more times so that you have done the four turns four times, with a forty minute rest between each turn. By the end, the dough should be elastic enough that you can easily pull one side up high and fold it over the rest of the dough.
- After the fourth set of turns, allow the dough to rise or ferment, covered, in a warm place for 45 minutes to an hour.
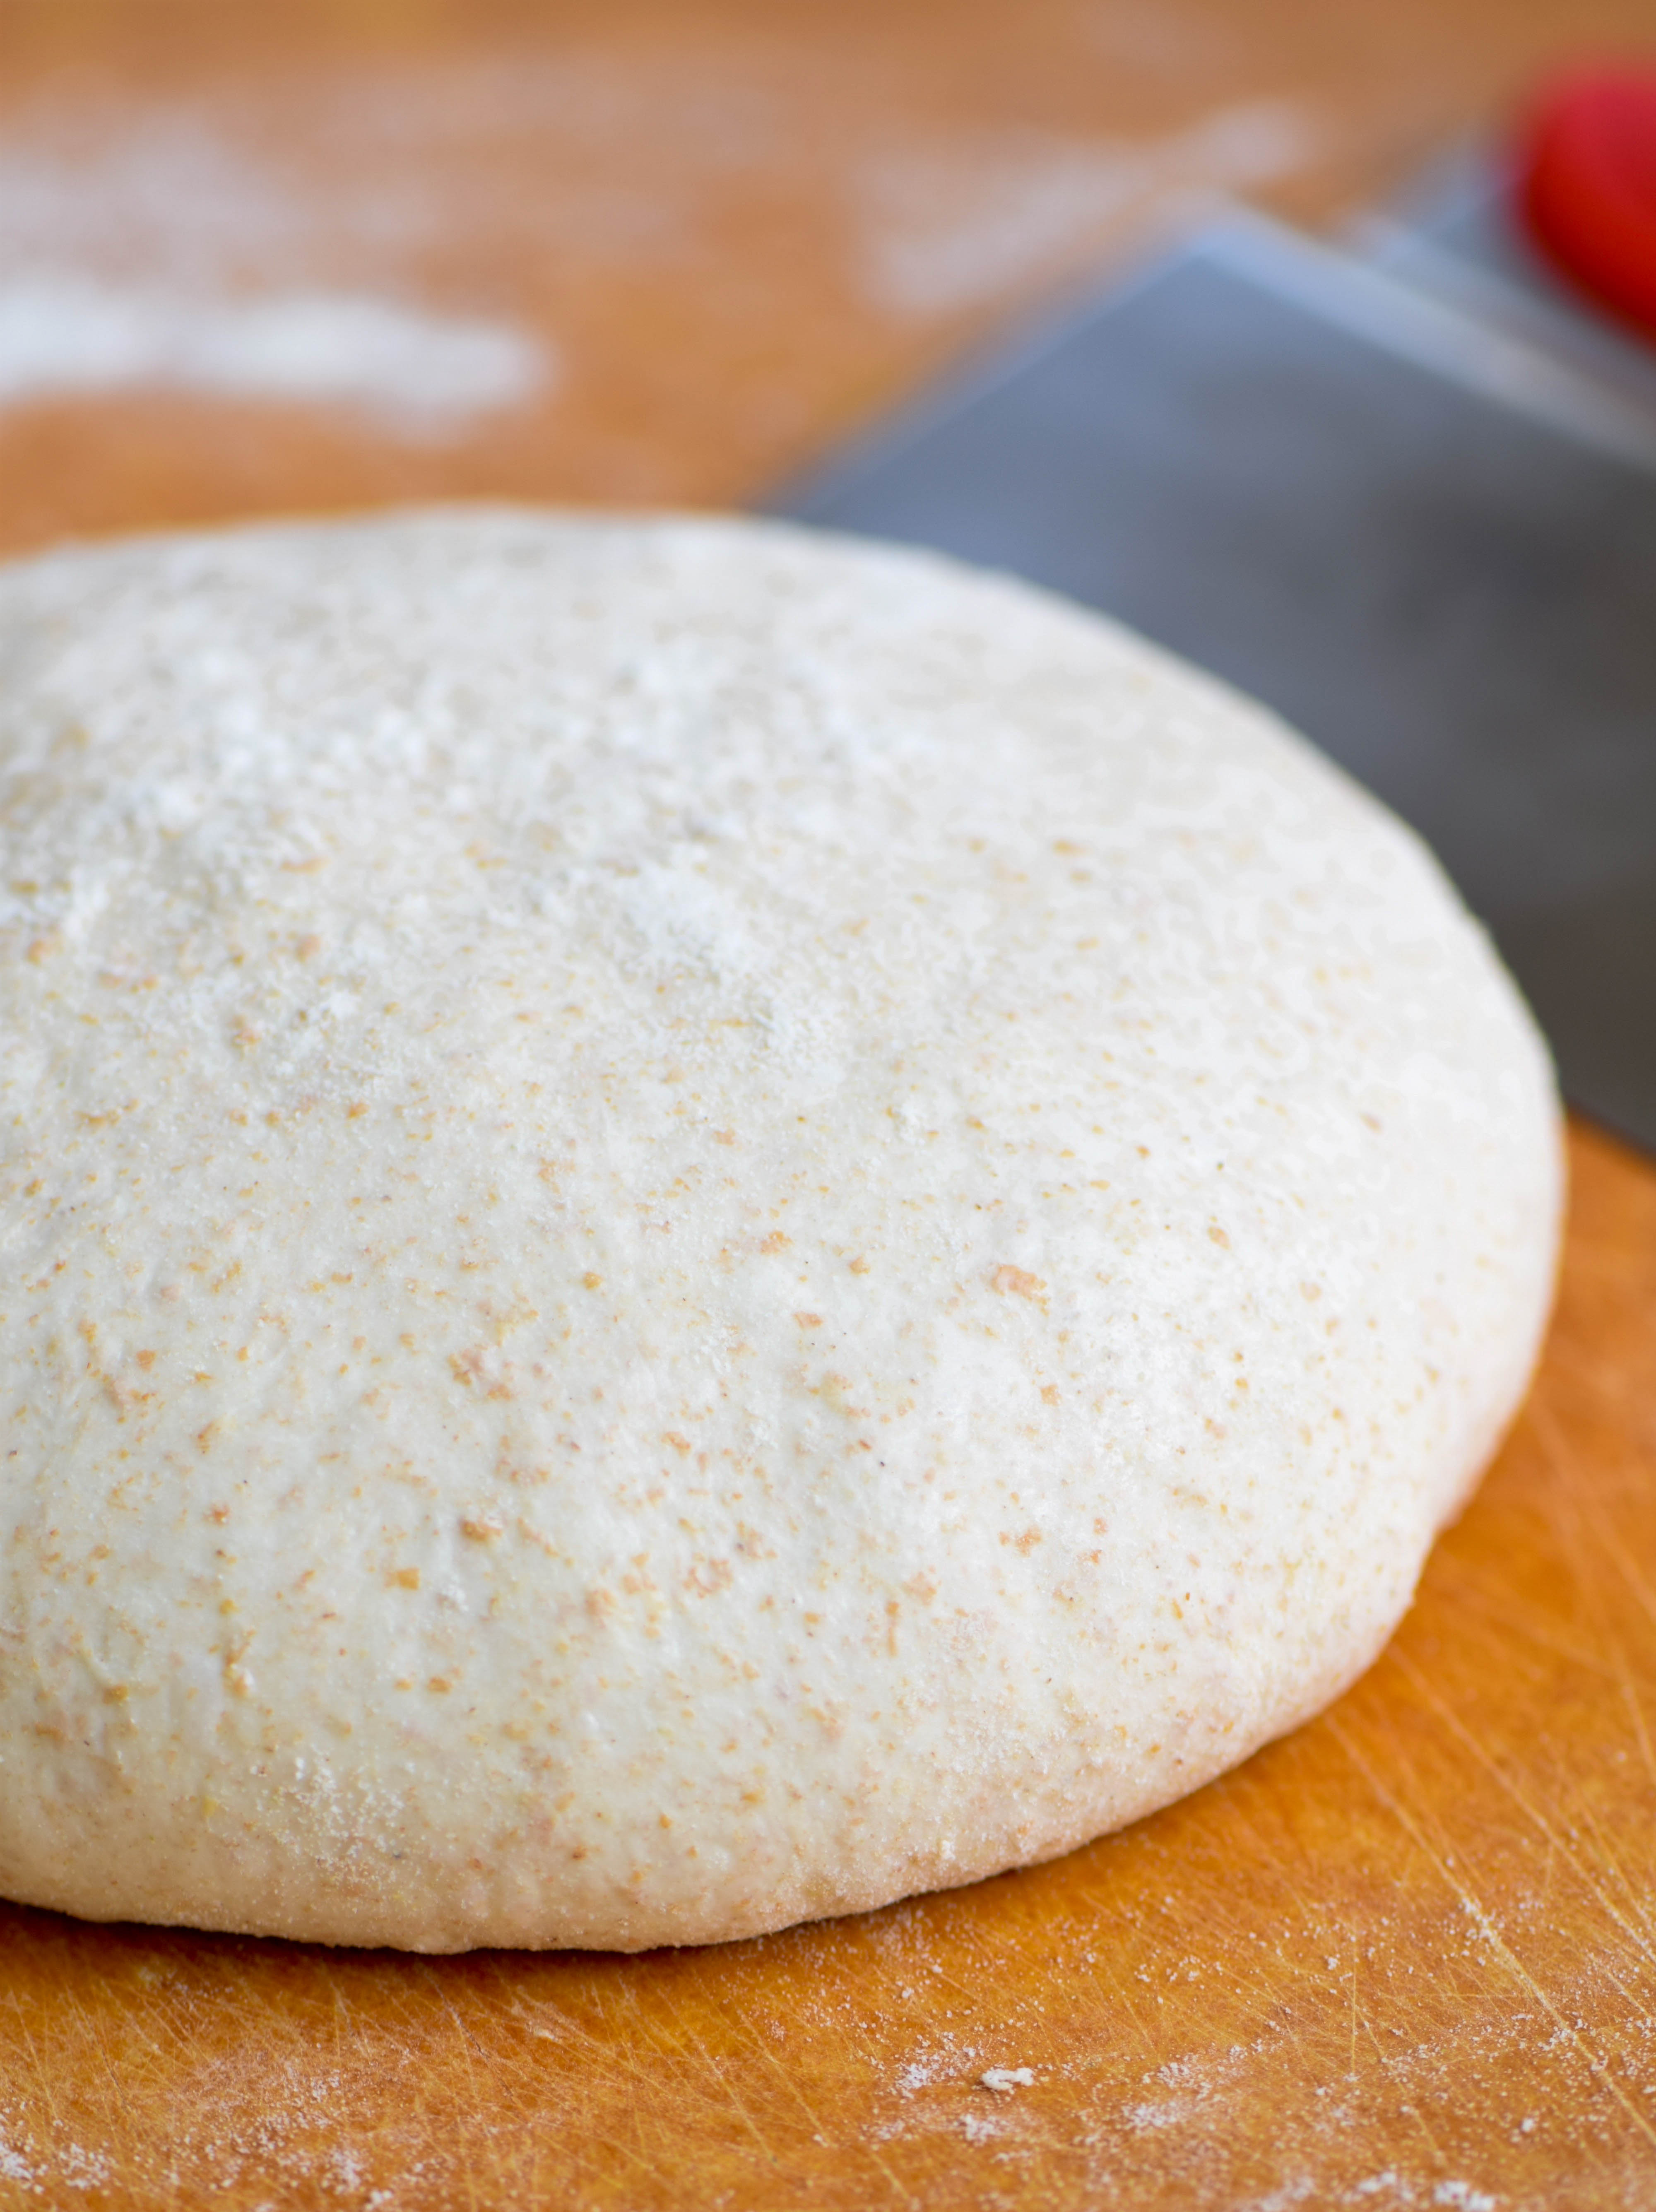
- Turn the dough out onto a well-floured board. Divide into two equal parts.
- Using your bench scraper, shape each piece of dough into a round shape. Use the edge of the scraper to push the dough into a round shape, tucking the edges under. Add more flour to the board or dough as necessary to prevent sticking.
- Allow the loaves to rest for 10-15 minutes and then shape again.
- Place the loaves top side down into a well-floured banneton basket OR a lightly oiled bowl. Cover with plastic wrap and refrigerate for 12 hours or overnight.
- To bake, preheat oven to 450.
- Turn out the loaf and place top side up in a lidded baking vessel, such as a ceramic cloche or Dutch oven. If the vessel does not have a dark or nonstick interior, coat the bottom lightly with oil and sprinkle with coarse flour, such as semolina, to prevent sticking.
- Slash the top to allow steam to escape. You can make a cross or another decorative design.
- Cover and bake for 30 minutes until loaf has risen.
- Remove cover and bake an additional 15 minutes or until you achieve the color you desire.
- Turn the loaf out onto a wire rack to cool. Repeat process with second piece of dough.
- To store your bread, do not wrap it! Allow the crust to develop and adapt. We store ours cut-side down on the cutting board.
- To freeze, wrap well in plastic wrap and then wrap again in foil. Thaw at room temperature wrapped to allow the moisture from the thawing process to be reabsorbed into the bread. Then store unwrapped.