There’s nothing quite like the unparalleled flavor of freshly squeezed orange juice, a spoonful of still-warm applesauce (stolen right from the pot), the intoxicating aroma of bread baking. Certain pleasures just can’t be bought from a store. Simply put, scratch-made food tastes better, costs less, and can be surprisingly easy to make.
Julia Child once said, “In cooking, you’ve got to have a what-the-hell attitude.” Armed with that spirit and a few simple ingredients, I’ve come to find that nearly everything in my kitchen is just better homemade.
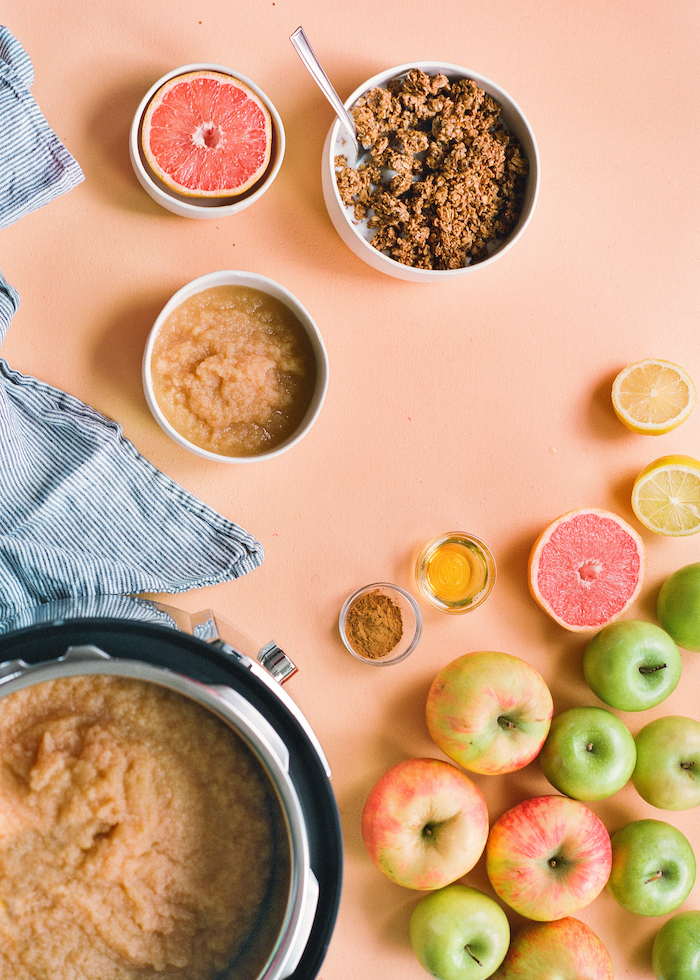
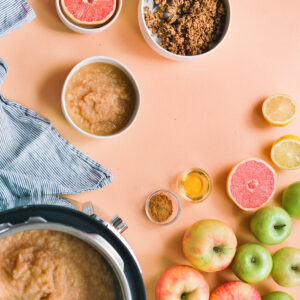
Multicooker Apple Sauce
Use your trusty multicooker or pressure cooker to make an easy homemade version of a classic favorite: apple sauce.

Multicooker Applesauce
Ingredients
- 4 lb apples of mixed varieties (about 8 large, we like a mix of Granny Smith, Golden Delicious, and Honeycrisp)
- 0.5 cups water
- 2 tsp fresh lemon juice
- 0.5 tsp ground cinnamon
- 0.5 tsp honey
- 0.25 tsp salt
Instructions
- Peel and core apples using a Johnny apple peeler, then roughly dice them into bite-size pieces.
- Add water, lemon juice, cinnamon, honey, and salt to a multicooker and stir to combine. Add apples and toss to mix.
- Secure lid and cook on manual (high pressure) for 8 minutes. Do a controlled quick release or allow the pressure to naturally release.
- Mash the apple mixture a few times with a potato masher, until the mixture reaches desired consistency.
- Transfer contents to a bowl and allow to cool completely. Stir in more cinnamon or honey, if desired, to taste.
- Enjoy warm or cold. Store in the refrigerator for up to 7 to 10 days.
Nutrition

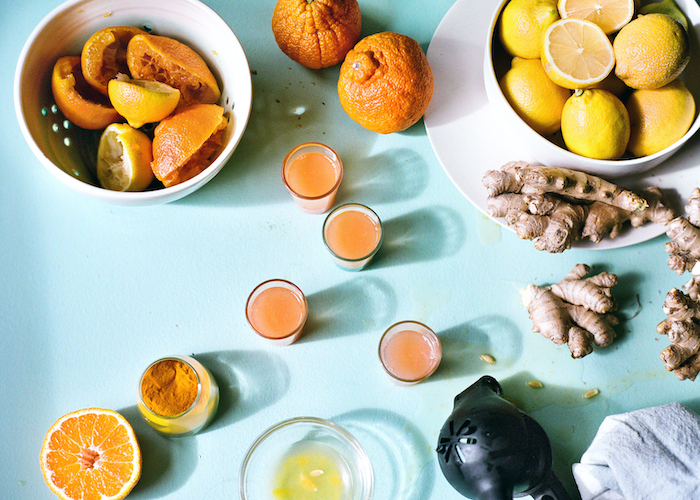
Sunrise Citrus Wellness Shot
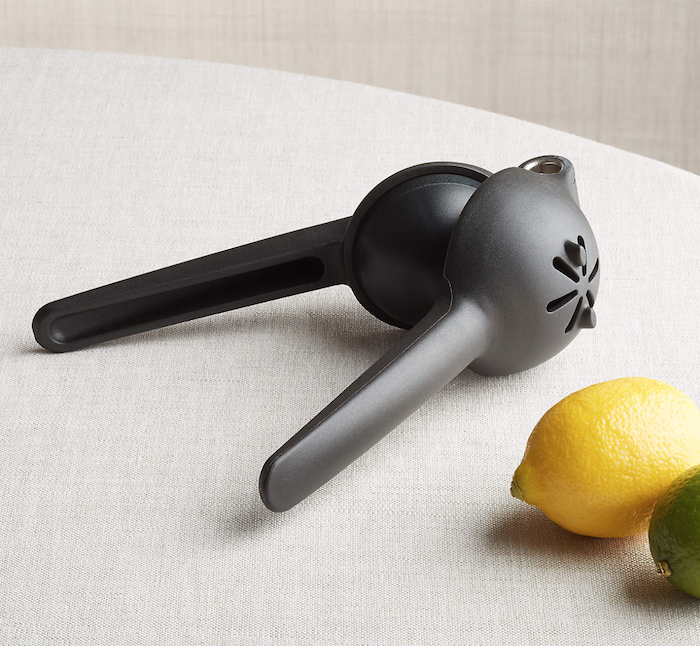
We could all use a little more wellness in our lives. This citrus shot will keep us all feeling our best, especially during cold and flu season. All you need is your favorite citrus juicer.
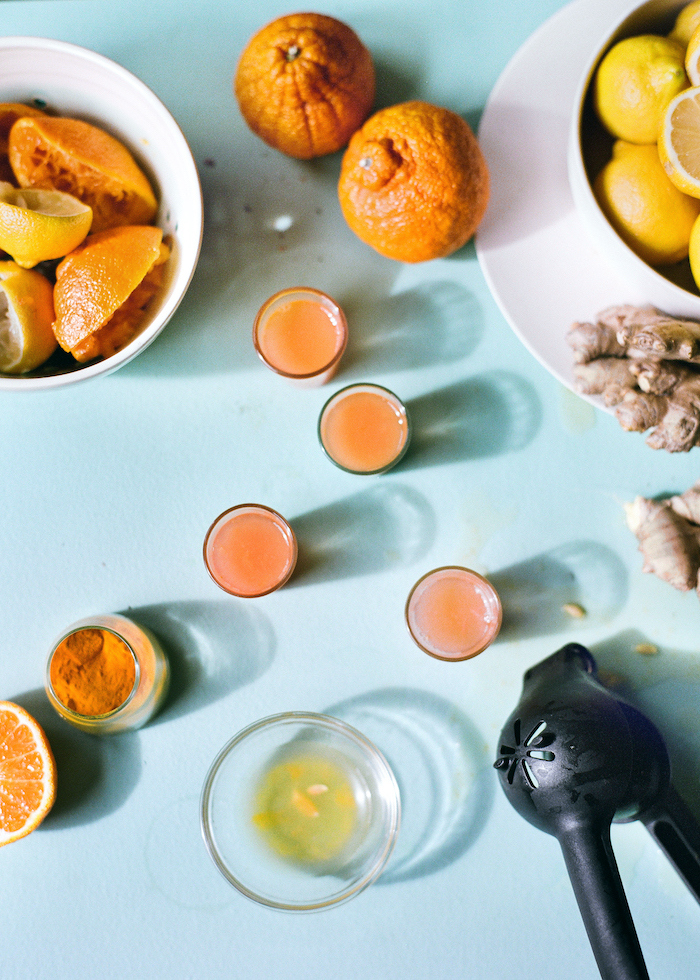
Tip: Dark, richly-colored honey is prized for its higher antibacterial and antioxidant power. Buckwheat and manuka honey are some of the darkest available but if you can’t find them, any high-quality honey will work in this shot.
Sunrise Citrus Wellness Shot

Ingredients
- 0.5 cups freshly squeezed orange juice
- 2 tbsp freshly squeezed lemon juice
- 2 tbsp dark honey, such as Buckwheat or Manuka
- 0.5 tsp finely grated fresh ginger
- 0.25 tsp ground turmeric
Instructions
- Combine all ingredients in a small bowl and whisk thoroughly until honey is completely dissolved and mixture is combined.
- Divide between shot glasses and enjoy immediately.
Nutrition
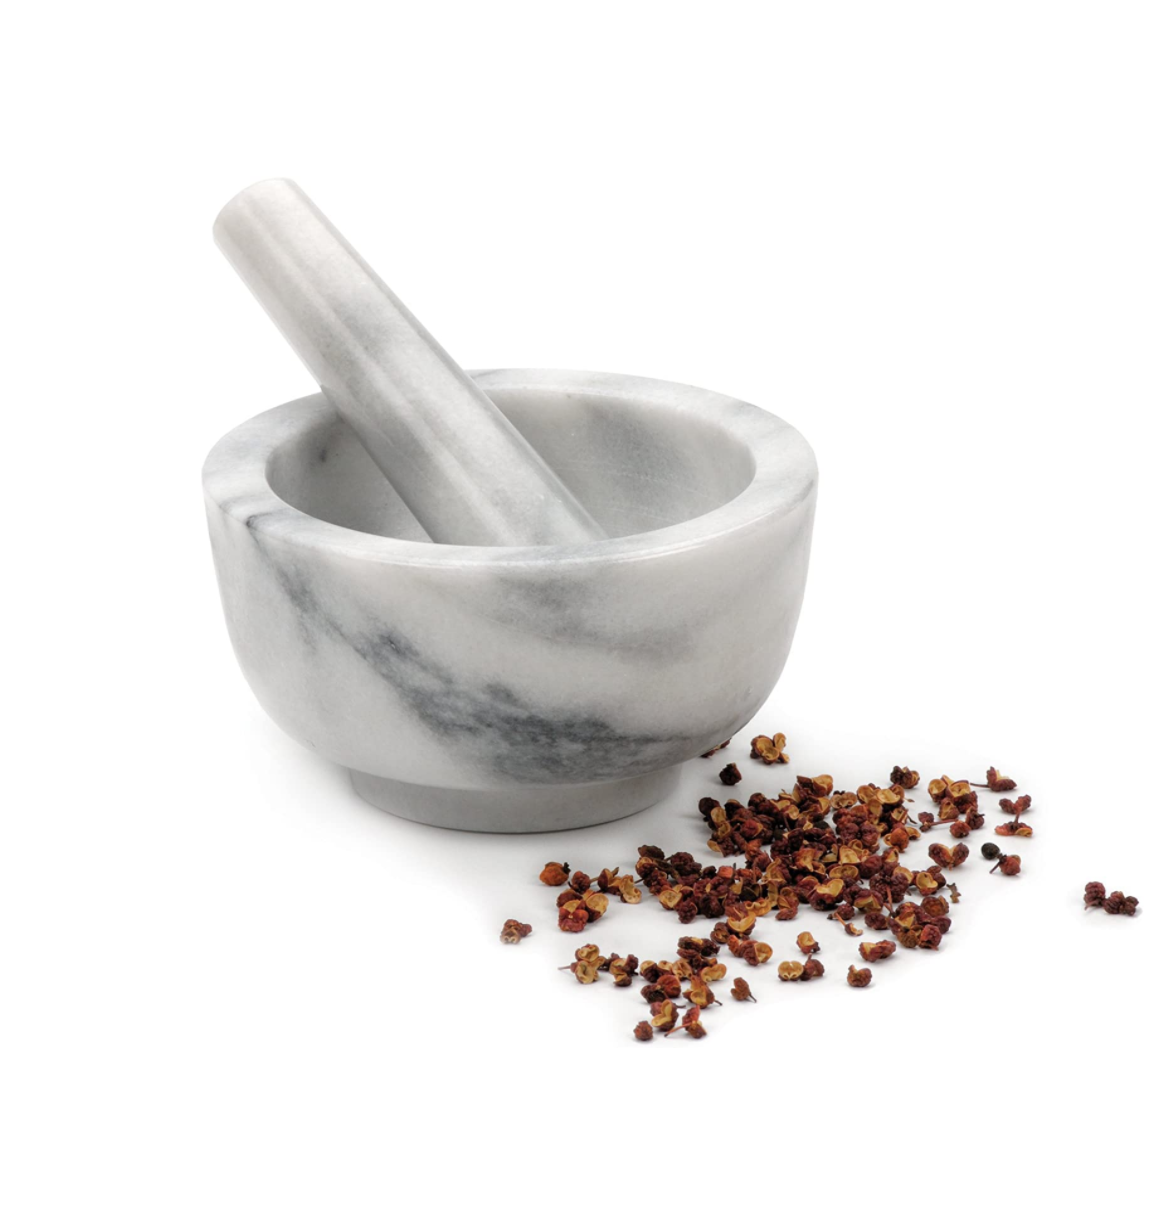
Stone-Ground Mustard
Mustard: a trusted condiment favorite. Grab your mortar and pestle and make this one at home next time!
Stone-Ground Mustard
Ingredients
- 6 tbsp brown mustard seeds
- 0.5 cups water (cold for mild mustard, hot for spicier)
- 1.5 tbsp white wine vinegar
- 0.5 tsp salt
- 0.5 tsp turmeric
- 1 tsp sugar, or to your taste
Instructions
- Crush mustard seed using a mortar and pestle until seeds just start to break, about 5 seconds.
- Slowly add water and continue grinding the seed. Cold water will produce milder mustard and hot water will result in spicier mustard. Grind until the water is incorporated, leaving some seeds whole.
- Add the remaining ingredients and continue grinding until the desired consistency is achieved. Store the mustard in a glass jar in the refrigerator for 24 hours before serving.
- Mustard will keep for up to one year in refrigerator.
Nutrition
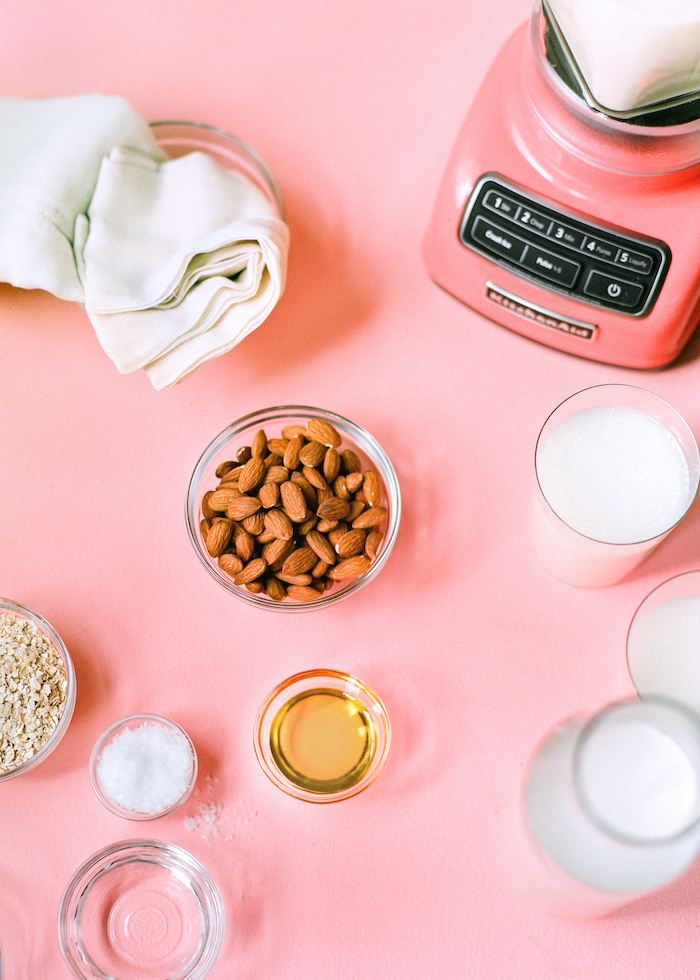
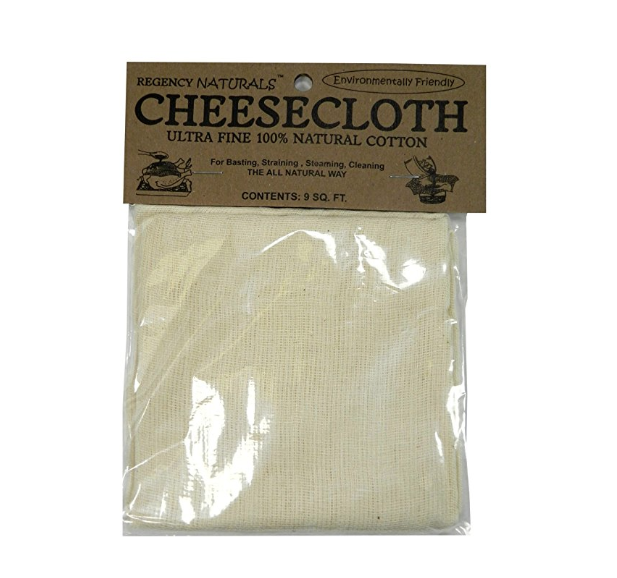
Almond Milk
As many of us have made the transition away from regular milk, we have all been searching for our favorite alternative. All you’ll need is a high-speed blender and a nut milk bag or ultra-fine cheesecloth.
Homemade Almond Milk

Ingredients
- 1 cups raw almonds (soaked overnight in cool water)
- 5 cups filtered water (less for thicker milk, more for thinner)
- 1 pinch sea salt
- 1 tbsp honey or maple syrup (omit for unsweetened)
- 1 tsp vanilla extract (optional)
Instructions
- Strain soaked almonds and discard soaking water. Add soaked almonds, filtered water, salt, honey, and vanilla (if using) to a high-speed blender and blend until creamy and smooth. Keep it running for at least 1 to 2 minutes.
- Strain using a nut a milk bag or ultra-fine cheesecloth. Then squeeze until all of the liquid is extracted. Discard pulp.
- Transfer milk to a jar or covered bottle and refrigerate. Almond milk will keep for several days, although it’s best fresh. Shake well before drinking, as it tends to separate.
Nutrition
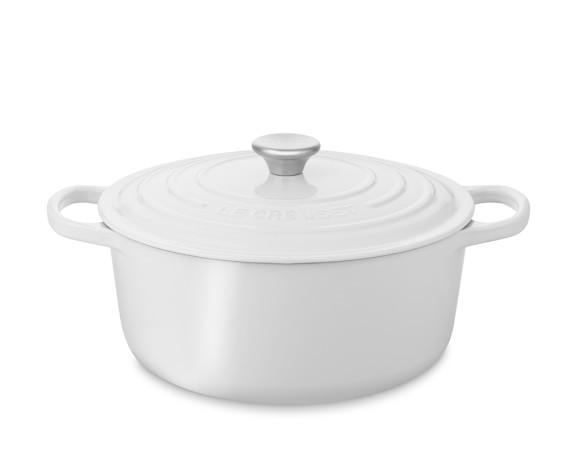
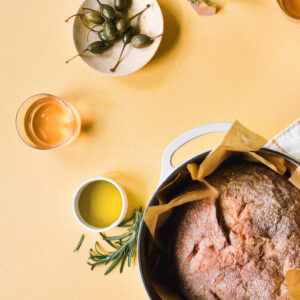
Sourdough Bread
Ahhh – bread baking. Everyone’s favorite quarantine pastime. If you haven’t tried making sourdough in your Dutch oven yet, you’re in for a treat!
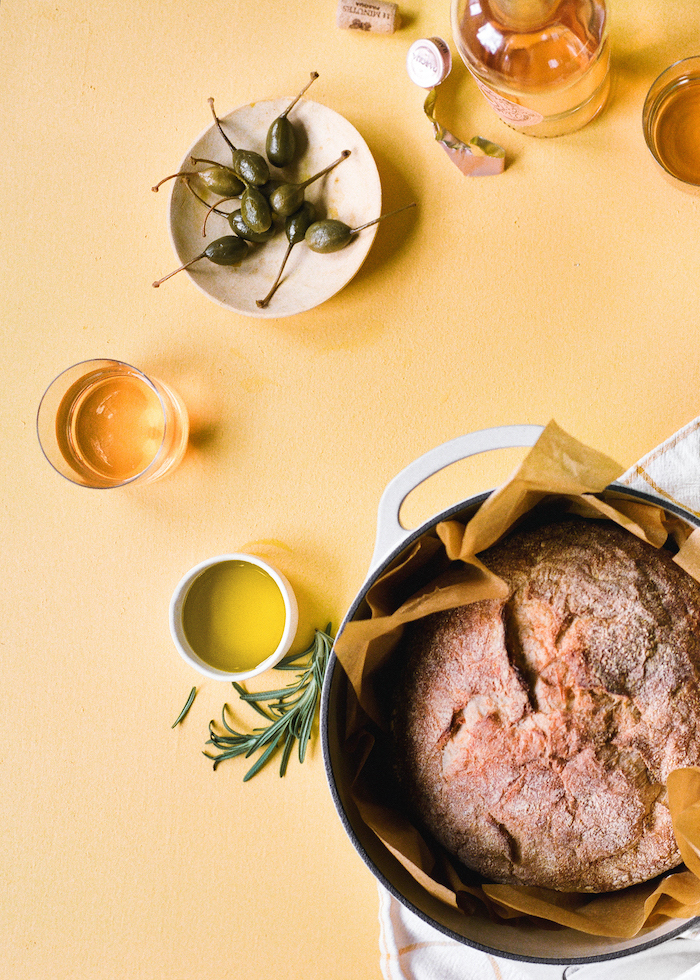
Tip: Sourdough starter can be made from scratch – or better yet – acquired from a friend. Any good “bread head” will gladly share their bounty. Once you have established or acquired your starter, you will need to feed it on a regular basis. The process is quite simple and can be done as little as once a week if the starter is stored in the refrigerator.
Homemade Sourdough Bread
Ingredients
- 0.75 cups prepared sourdough starter (ask a friend to “gift” you some starter or purchase online
- 1.25 cups plus 2 tablespoons unbleached all-purpose flour
- 0.67 cups whole wheat flour
- 1 tsp fine sea salt
- 1 cups plus 1 tablespoon 65-70 degree F water
- wheat bran or semolina flour, for dusting
Instructions
- In a large bowl, combine the white flour, wheat flour, and salt, and whisk to combine. In a small bowl, whisk the starter and water until the starter is fully dissolved. Pour the starter mixture into the flour, and use a spatula to mix. Cover the bowl loosely with a clean towel, and let the dough sit at room temperature for a half hour.
- Turn the dough, pulling it off the sides of the bowl and stretching it over the center as you turn; work it as little as possible. Cover loosely and let rest for 30 minutes before turning the dough again. Repeat this process for 2.5 to 3 hours, mixing the dough approximately five times. The dough will be ready when it easily peels off the bowl and stretches over itself when shaping.
- Shape the dough into a ball then set seam side down.
- Preheat the oven to 500 F.
- Preheat a cast-iron ovenproof Dutch oven with a tight-fitting lid in the oven. Carefully remove the lid and transfer the dough on the parchment into the pot. Slash the top of the dough with a serrated knife to allow steam to escape. You can make a cross or another decorative design. Cover the pot immediately and place the pot in the oven.
- Bake the bread for 35-40 minutes with the lid on the Dutch oven. Carefully remove the lid and tear off any excess parchment. Bake for another 10 to 15 minutes with the lid off, until the crust is a very dark brown. Remove the loaf from the pot. Cool the loaf on a wire rack. The loaf will continue to bake as it cools, so wait an hour before cutting into it.
- Tip: Sourdough starter can be made from scratch or – better yet – acquired from a friend. Any good “bread head” will gladly share their bounty. Once you have established or acquired your starter you will need to “feed” it on a regular basis. The process is quite simple and can be done as little as once a week if started is stored in the refrigerator.
Nutrition
Hand-Churned Butter
This cute Kilner butter churner is the perfect way to make butter at home. And once you’ve made butter, you can start making compound butters with your favorite toppings. Check out some of our favorite compound butter recipes to get you started!
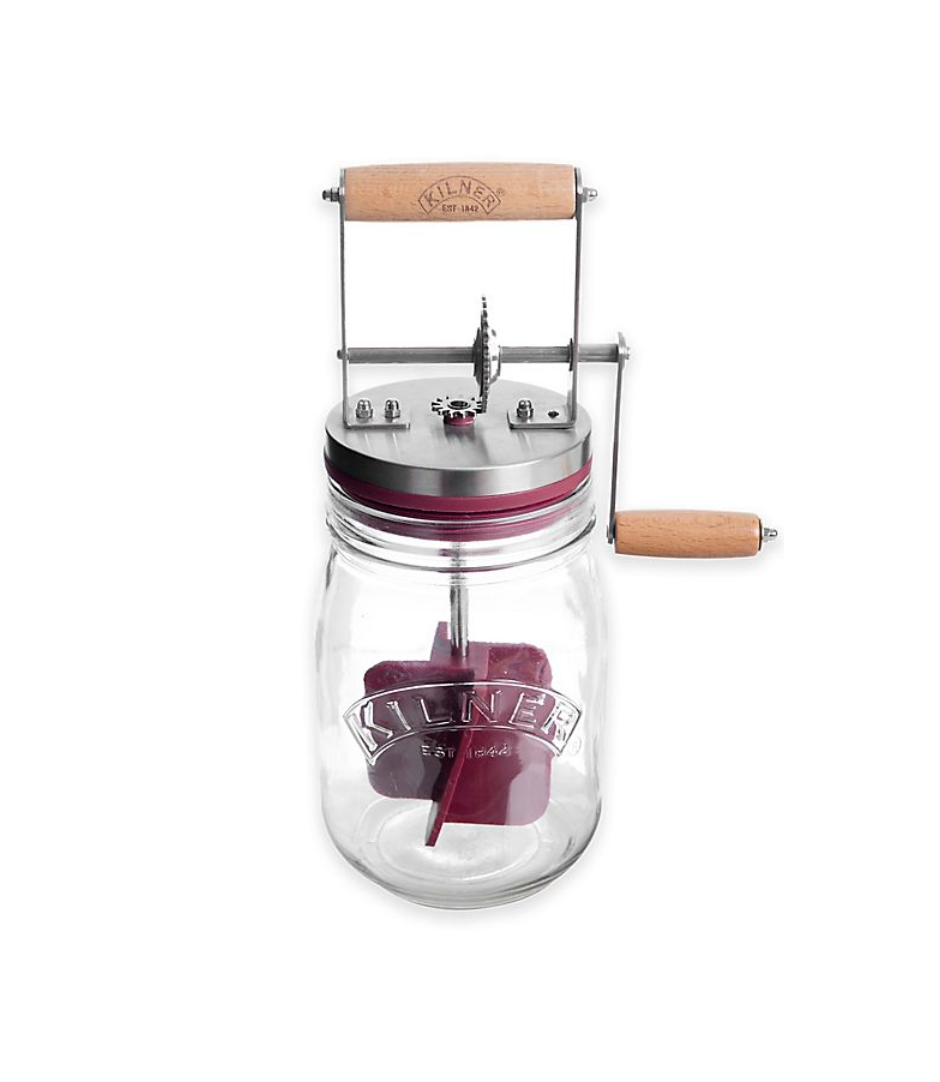
Hand-Churned Butter

Ingredients
- 10 oz fresh heavy, double or whipping cream at room temperature
- pinch of salt
Instructions
- Ensure that cream has been allowed to sit at room temperature for at least 2 hours before churning.
- Pour the cream into the base of the butter churner and place lid on top to seal. Turn the handle to begin churning. Continue churning for 10 to 12 minutes or until the handle becomes hard to turn and then suddenly it loosens and becomes easier. The cream will be pale yellow and separated to form butter and buttermilk.
- Remove the lid from the churner and carefully drain the buttermilk into a separate container. Save buttermilk for another use, such as making buttermilk pancakes. Pour the butter into a mixing bowl and pour cold water on top. Use butter paddles to squeeze out any remaining buttermilk. Remove butter from water and place on a clean, flat surface.
- If desired, sprinkle a pinch of sea salt over butter and use butter paddles to mix then mould butter into a square shape.
- Cover butter with waxed paper or store in a butter dish. Store in the refrigerator until you are ready to use. Consume within 2 weeks.
Nutrition
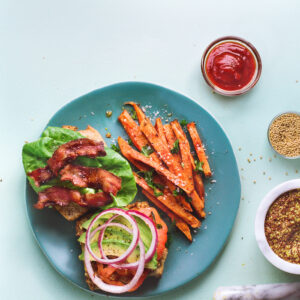
Air Fryer Sweet Potato Fries
An air fryer has quickly become one of our favorite tools in the kitchen. You can’t get any better than crispy fresh-from-the-air-fryer fries!
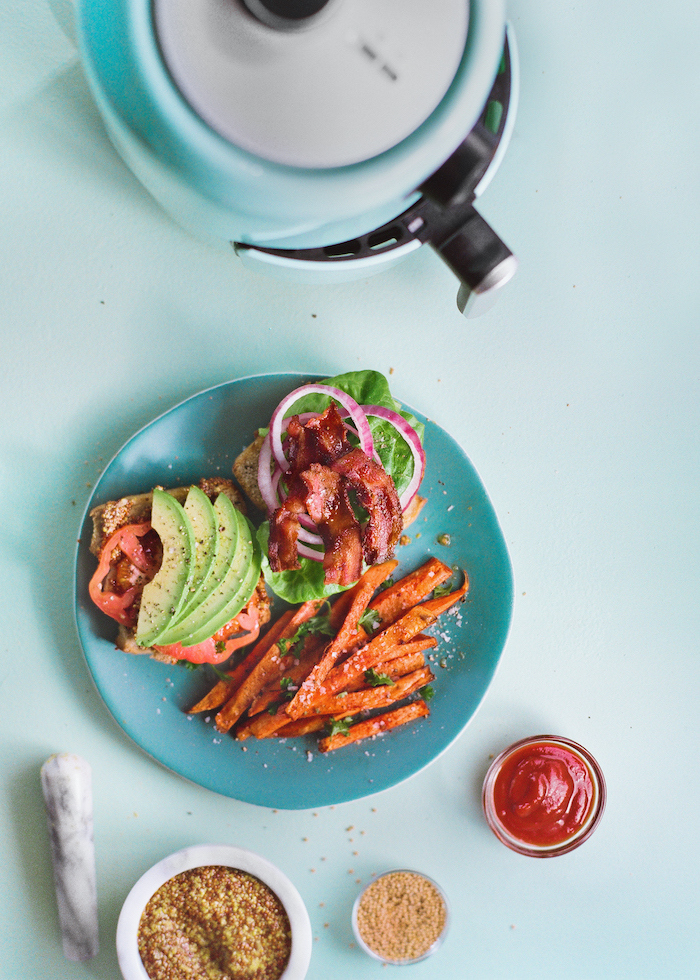

Air Fryer Sweet Potato Fries
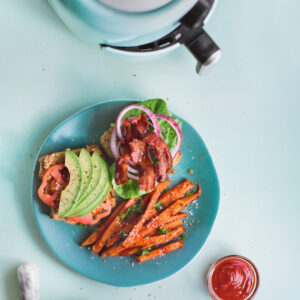
Ingredients
- 2 medium sweet potatoes, peeled and cut into 1/4″ strips
- 0.5 tsp Kosher salt
- 0.25 tsp cornstarch
- 0.25 tsp sweet paprika
- olive oil spray
Instructions
- Soak sweet potato strips in cold water for 30 minutes. Drain and pat sweet potatoes dry with paper towels.
- Preheat air fryer to 350F for 8 minutes.
- Combine salt, cornstarch, and paprika, and toss with sweet potatoes to evenly coat.
- Lightly spray the air fryer basket with olive oil spray. Place sweet potatoes in basket in a single, even layer and fry at 350F for 10 minutes.
- Remove basket from air fryer and shake lightly to toss fries. Replace basket in fryer, increased temperature to 400F and continue frying sweet potatoes for 5 more minutes.
- Serve immediately.
Nutrition
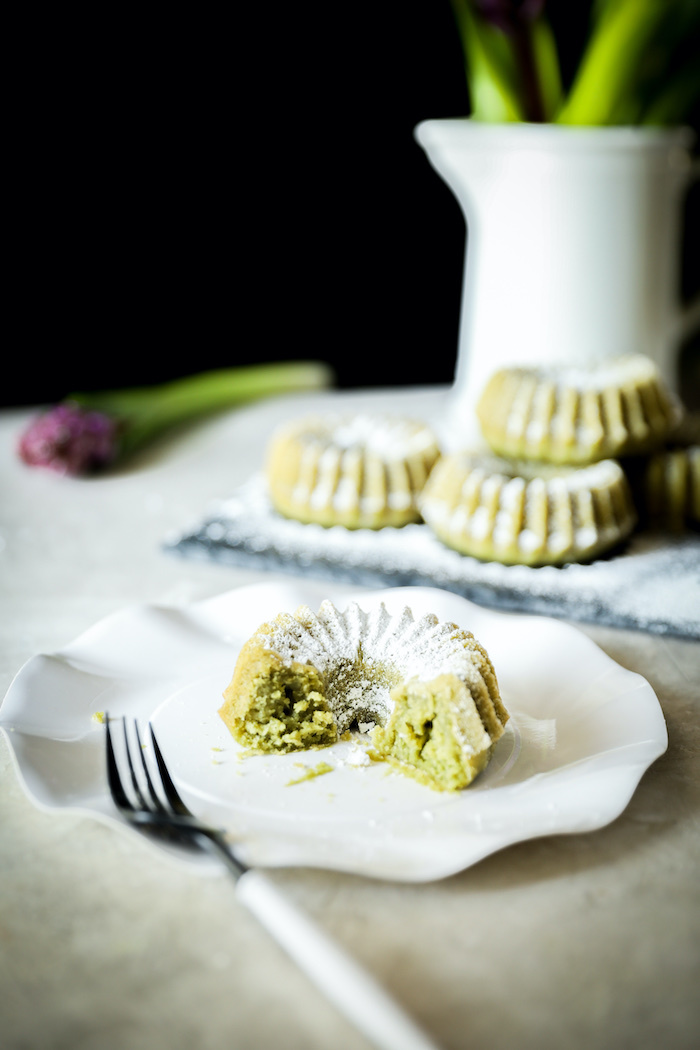
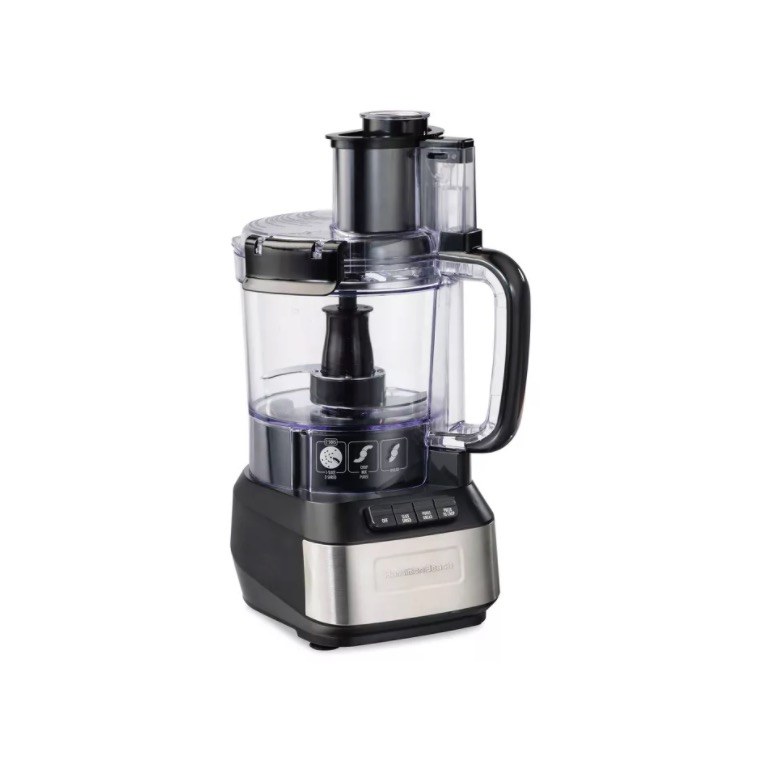
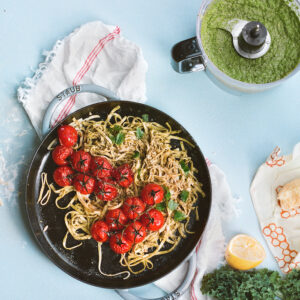
Kale Pesto
A great twist on your classic basil pesto is a kale pesto! Get those extra greens in. Pesto is also a wonderful medium for experimentation, not to mention a great way to use extra produce. Replace the kale with cilantro, arugula, or beet greens as desired.
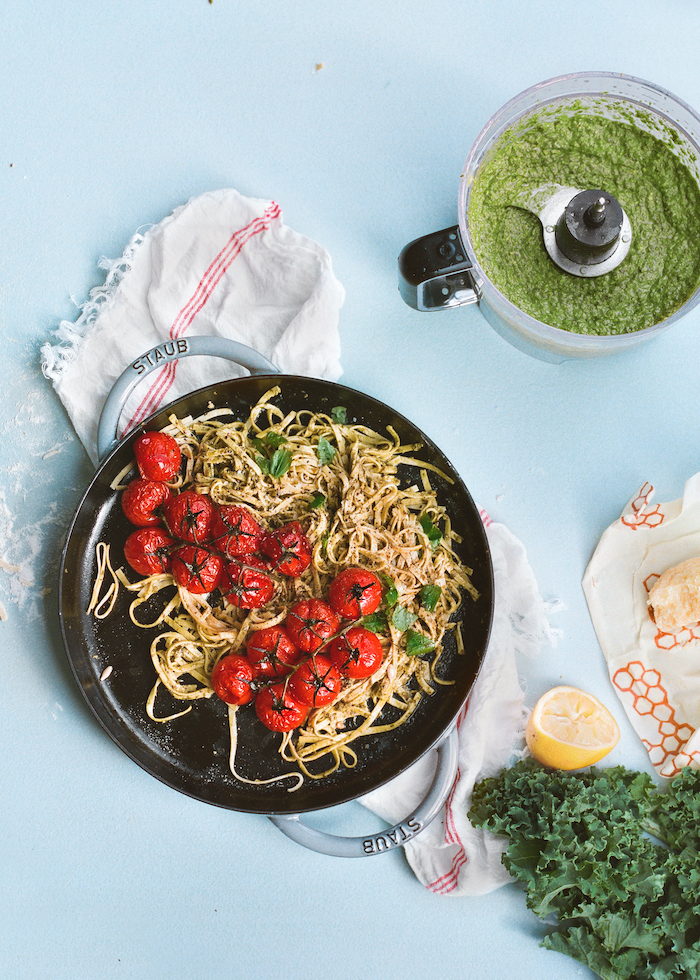
Tip: Pesto is a wonderful medium for experimentation, not to mention a great way to use extra produce. Replace the kale with cilantro, arugula, or beet greens as desired.
Kale Pesto
Ingredients
- 2 cups packed torn kale leaves, stems removed
- 1 cups packed fresh basil leaves
- 1 tsp sea salt
- 0.25 cups extra virgin olive oil
- 0.25 cups toasted almonds
- 3 cloves garlic, chopped
- 1 tbsp lemon juice
- 1 tsp freshly grated lemon zest
- 0.5 cups grated Parmesan cheese
Instructions
- In a food processor, combine the kale leaves, basil leaves, and salt. Pulse 10 to 12 times, until the kale leaves are finely chopped. With the motor running, drizzle in the olive oil. Scrape down the sides of the processor. Add the almonds, garlic, lemon juice, and zest and process again, then add the cheese and pulse to combine.
- Serve immediately or store in an airtight container in the refrigerator for up to 2 days. To serve, toss with your favorite pasta or use as a topping for grilled meats, fish, or vegetables.
Nutrition