When Peter Cottontail comes hoppin’ down your bunny trail,
make sure he’s carrying the best Easter baskets ever this year. Hop right past
those sad looking pre-filled plastic baskets at the drugstore and assemble a
handmade assortment that your little chicks will love. It’s easy to do by following
a few simple rules.
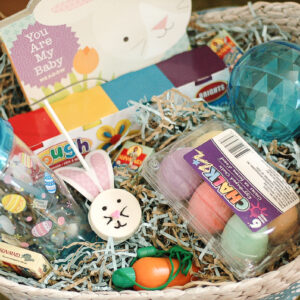
1. Start with a gorgeous basket
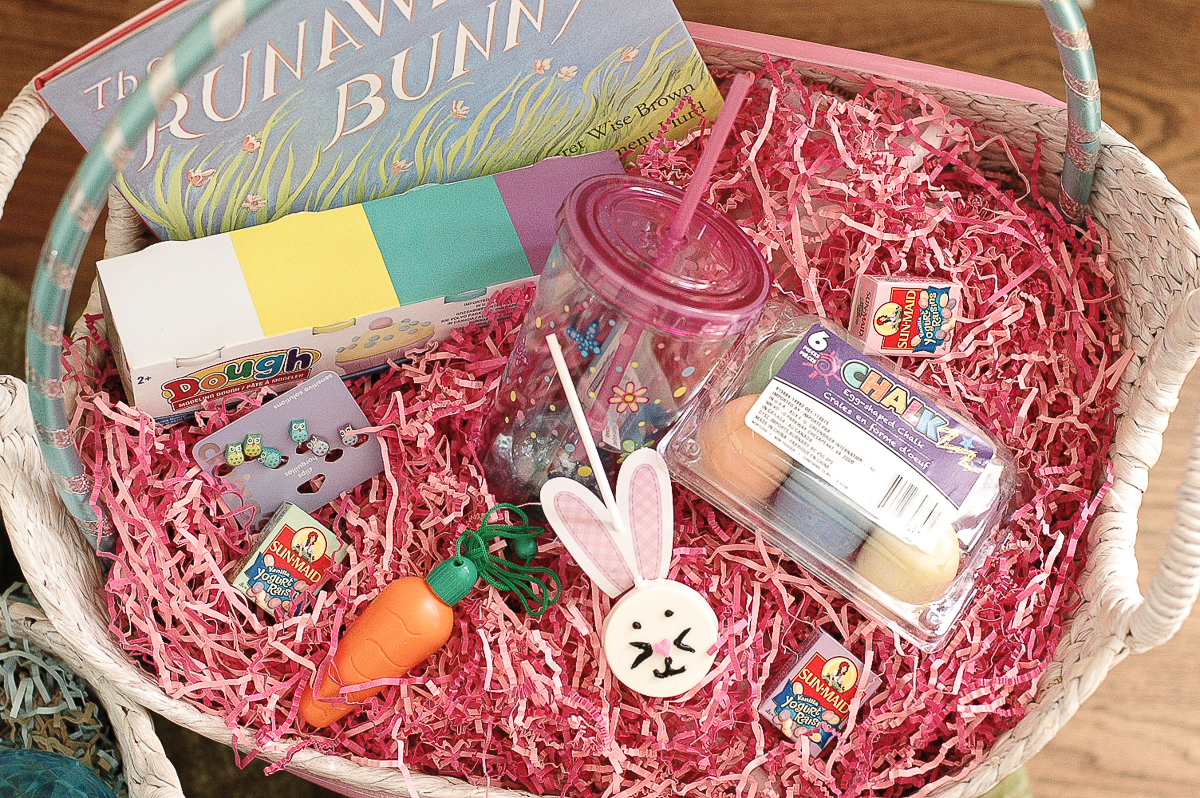
Traditional “Easter baskets” are likely to end up as clutter in a dusty corner of your closet (or the landfill). Instead, choose a basket, bin or other container that will serve a useful purpose long after the Easter grass is gone. You can use anything from a sand pail to a storage crate. Let your imagination be your guide!
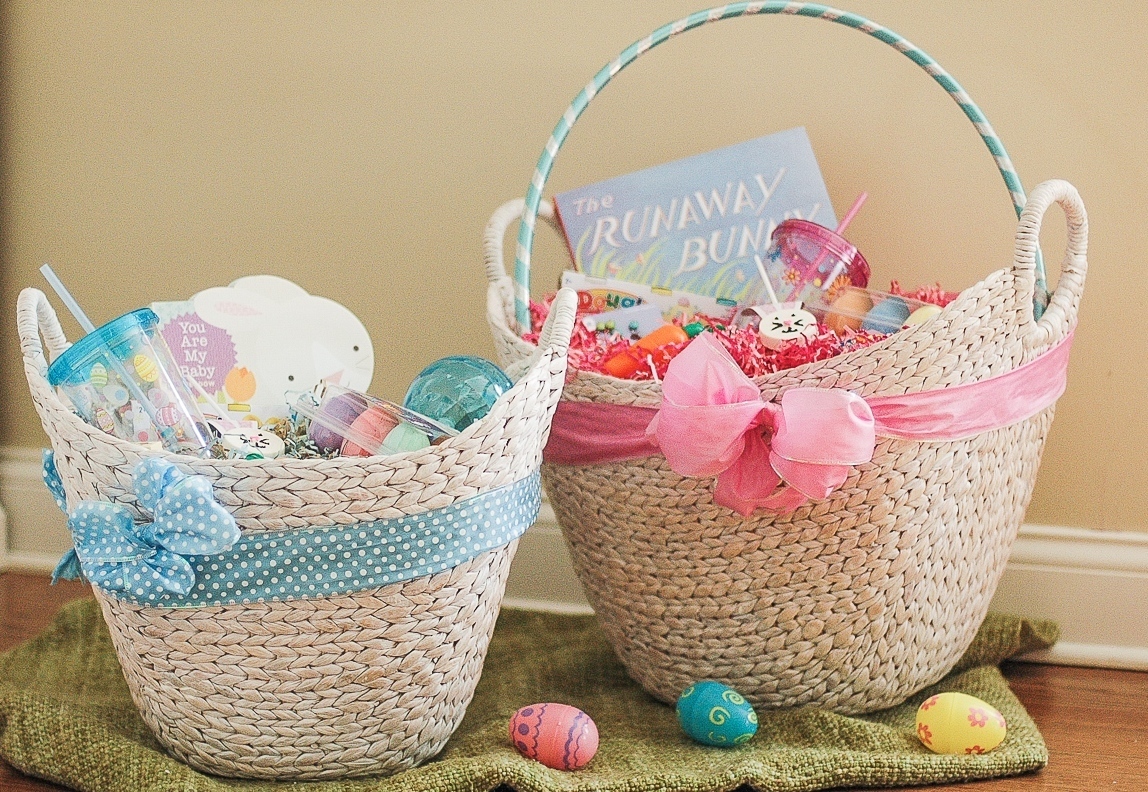
I absolutely love these white woven storage baskets from Creative Co-Op. Sold as a set of three, I plan to use them for storing
toys and books in our living room. To give them a “full” look, I stuffed an old
pillow into the bottom of each basket before adding a layer of paper Easter
grass and nestling in all the goodies. Speaking of which…
2. Add something practical
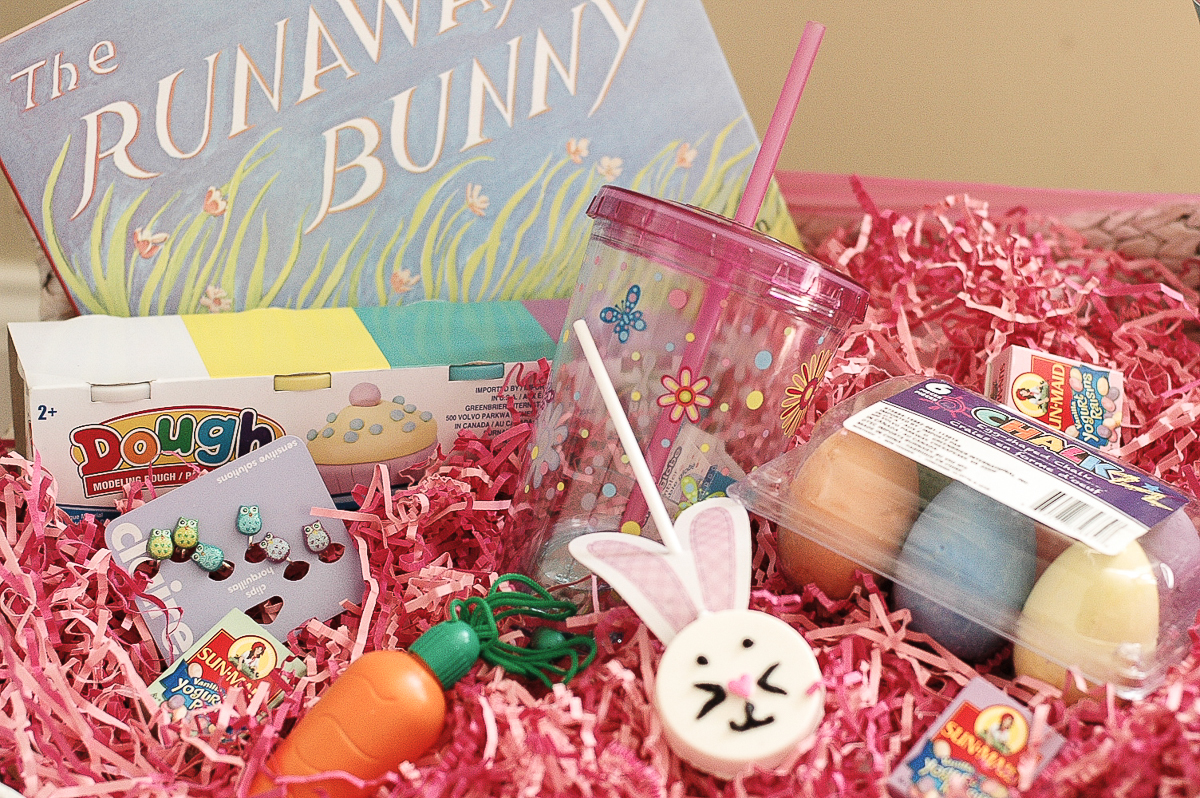
Instead of loading my kids’ Easter baskets with candy, fill
them with a variety of festive items that also have a practical purpose.
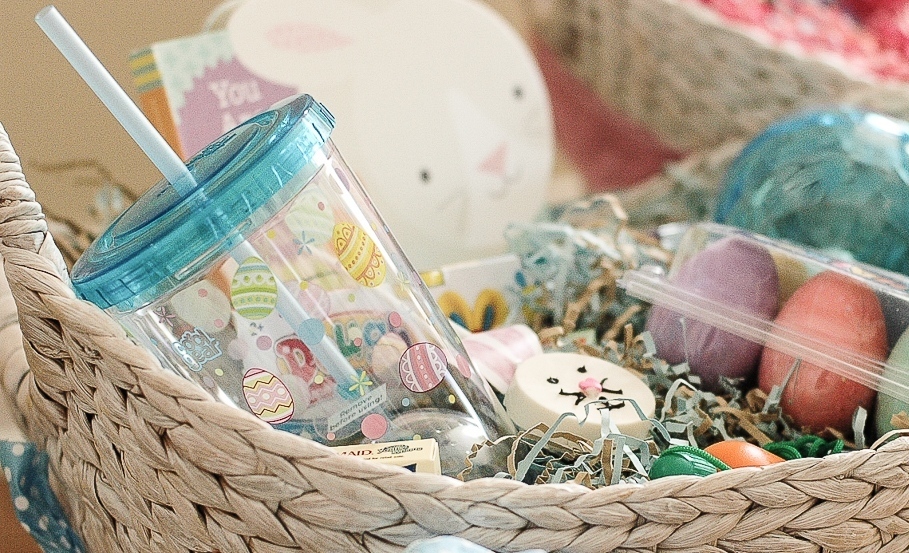
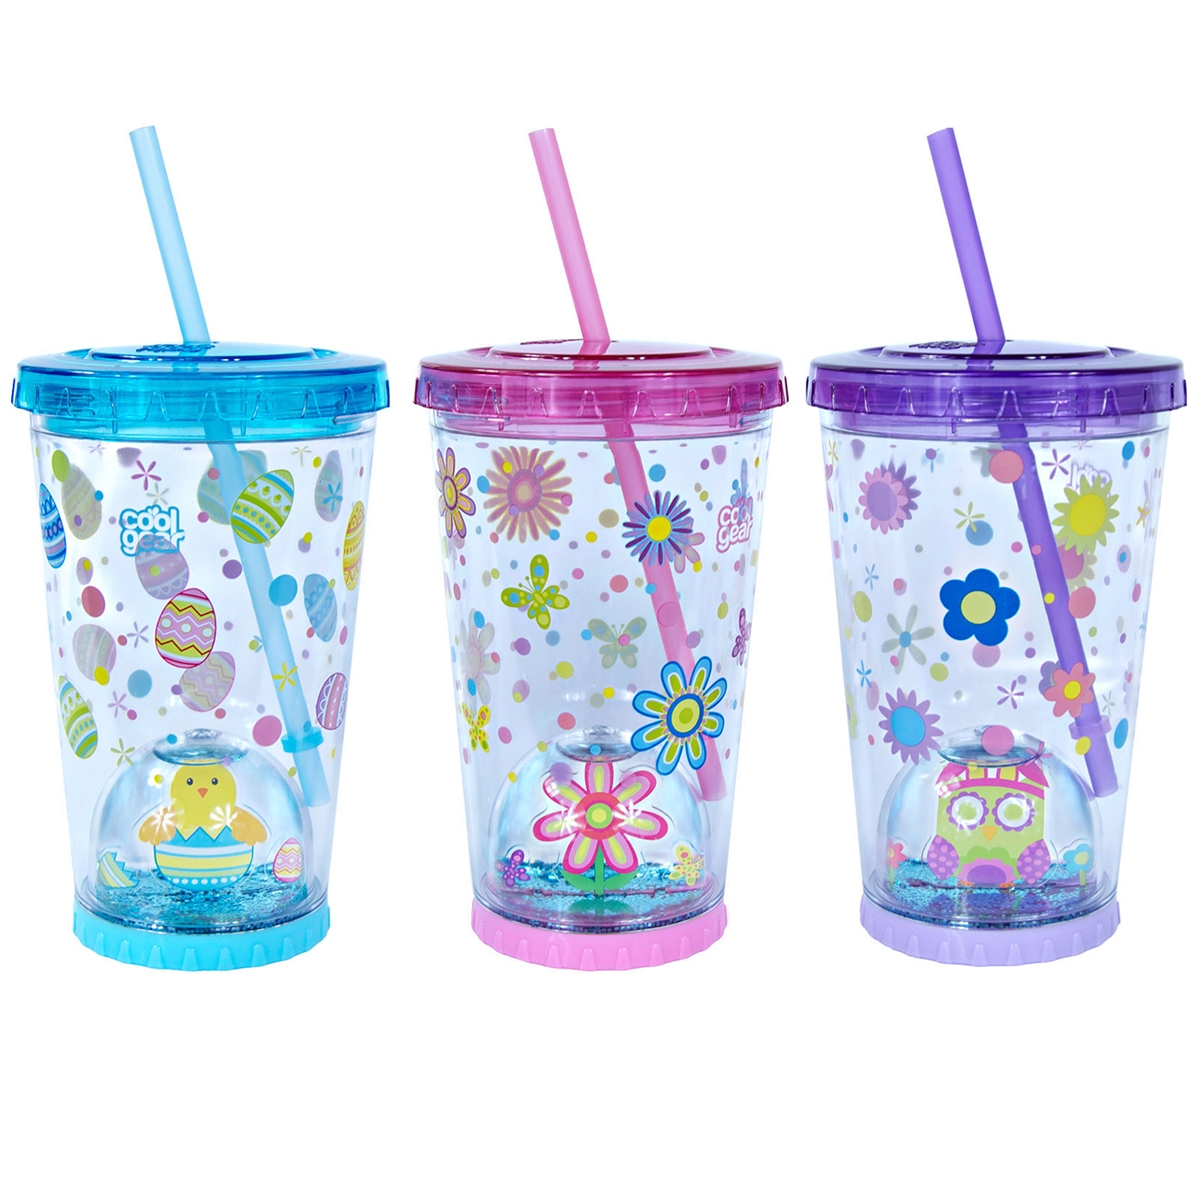
These adorable lidded tumblers from Cool Gear will help encourage water breaks when the kids are playing outside this spring. Plus each one features a removable snow globe in the base, so it’s like getting a cup and a toy in one.
3. Fill with FUN
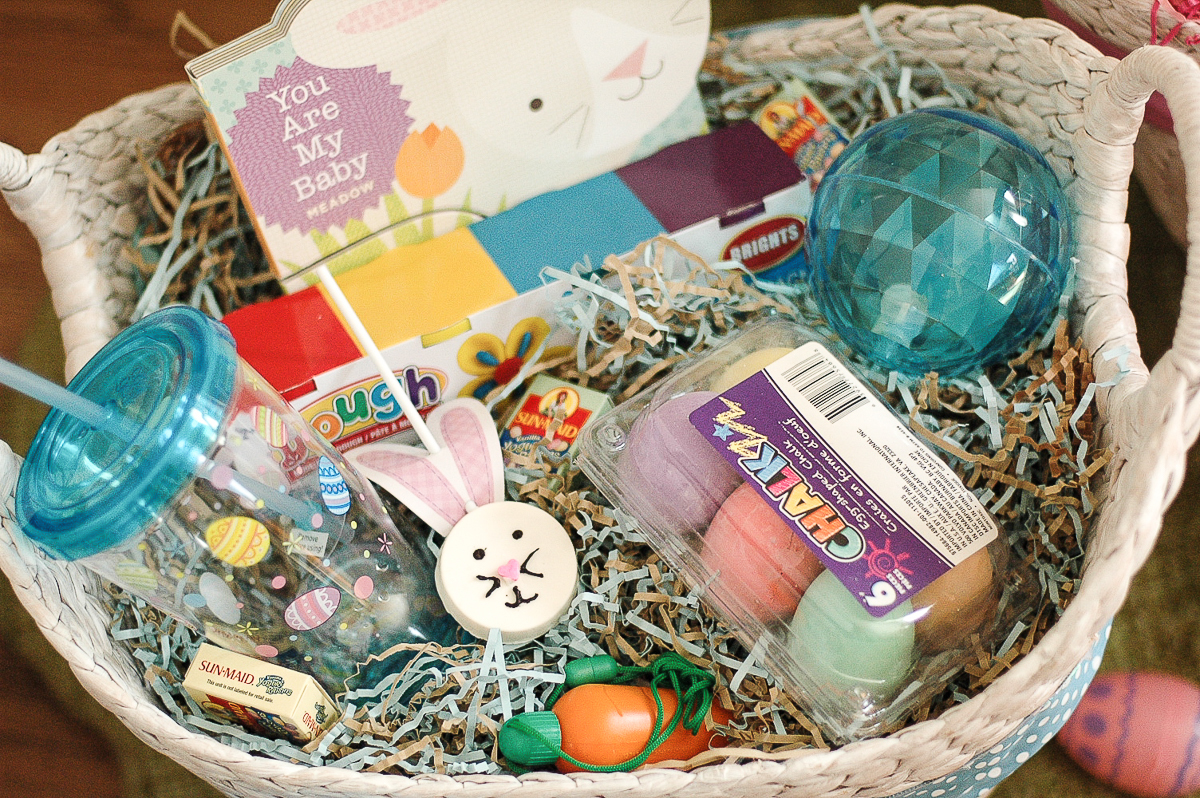
Easter is a great time to replenish your stash of outdoor toys. Shop the dollar section of your favorite big-box retailer for sidewalk chalk, bubbles, bouncy balls, perhaps even a hula-hoop or kite. Not only do they make inexpensive basket fillers, they’re also great for encouraging little ones to get outside and get moving. Round things out with a book, coloring book or playdough for indoor fun during those inevitable April showers.
4. Finish with a unique sweet treat
Although I try to limit the candy in our family’s baskets, Easter wouldn’t be complete without at least a few sweet treats. Yogurt-covered raisins are my healthier alternative to jelly beans. And as an extra-special treat, I tucked a homemade bunny-shaped white chocolate and Oreo lollipop into each basket.
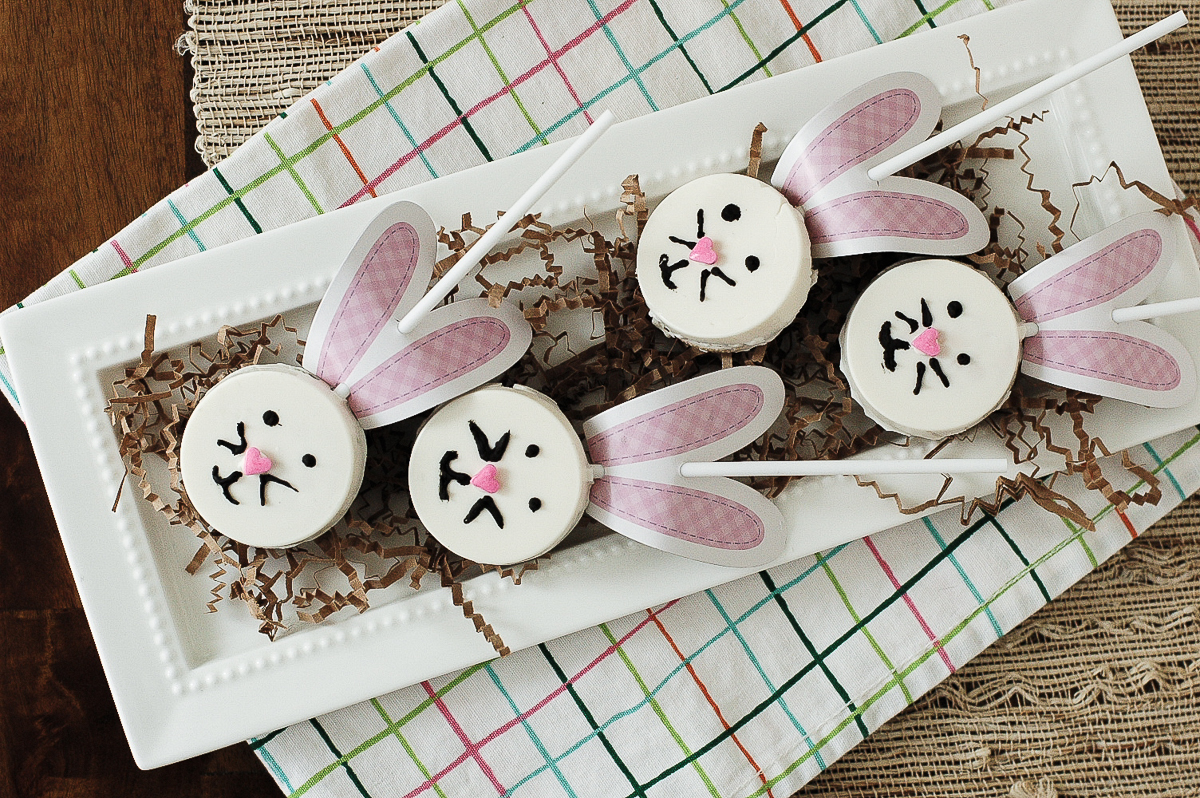
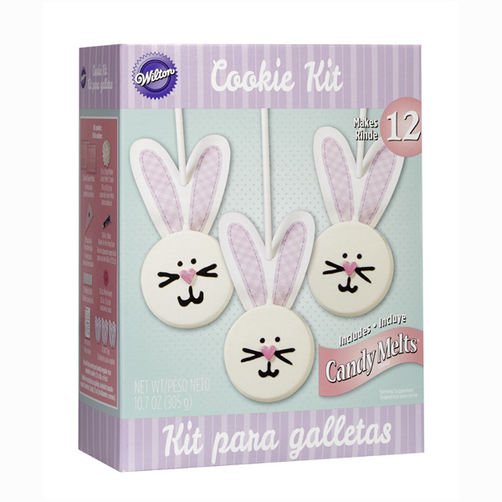
The bunny pops were so easy to make and incredibly delicious. I plan on making another batch with the kiddos this weekend. I made them using a candy making kit from Wilton but they could easily be replicated using a few readily-available candy-making supplies. The most crucial item in the kit was the flat circle candy lollipop mold. You can pick them up in the candy making section at most craft stores. Simply fill the mold half full with melted white chocolate, add a sandwich cookie (I used Golden Oreos) with a lollipop stick inserted. Allow the chocolate to dry, pop them out and decorate. The Wilton kit came with pre-cut cardboard bunny ears that threaded on the lollipop stick, but you could easily make your own using cardstock, a hole punch and a marker. I made the faces using heart candies for the nose and a black icing pen for the eyes and whiskers. Your kids will be hopping with joy when they bite into one of these!
Wishing you a very “hoppy” Easter!
White Chocolate Oreo Bunny Pops
INGREDIENTS
- 2 flat circle cookie/candy lollipop molds
- 1 disposable plastic decorating bag
- 12 lollipop sticks
- 12 sets cardboard bunny ears (cut from cardstock)
- 10 oz. white chocolate candy melts or white chocolate chips
- 1 tube ready-to-use black icing
- 12 small pink heart candies
- 12 sandwich cookies such as Oreos or Golden Oreos
INSTRUCTIONS
- Carefully insert lollipop sticks into 12 sandwich cookes.
- Melt white chocolate in microwave according to package instructions and pour into decorating bag. Snip off tip of bag.
- Pipe melted chocolate into candy molds until about half full. Press sandwich cookie into each mold. Add additional chocolate over the top as needed and smooth chocolate until it is level with the top of the mold. Place molds in the refrigerator or freezer for 15 minutes, until candy is completely set.
- Gently push lollipops out of mold and flip to decorate smooth side. Thread cardboard ears on each lollipop stick. Use a small drop of melted white chocolate to attach a heart in the center of each pop as a nose. Use black icing to make eyes, whiskers and mouth. Allow pops to try completely before serving.