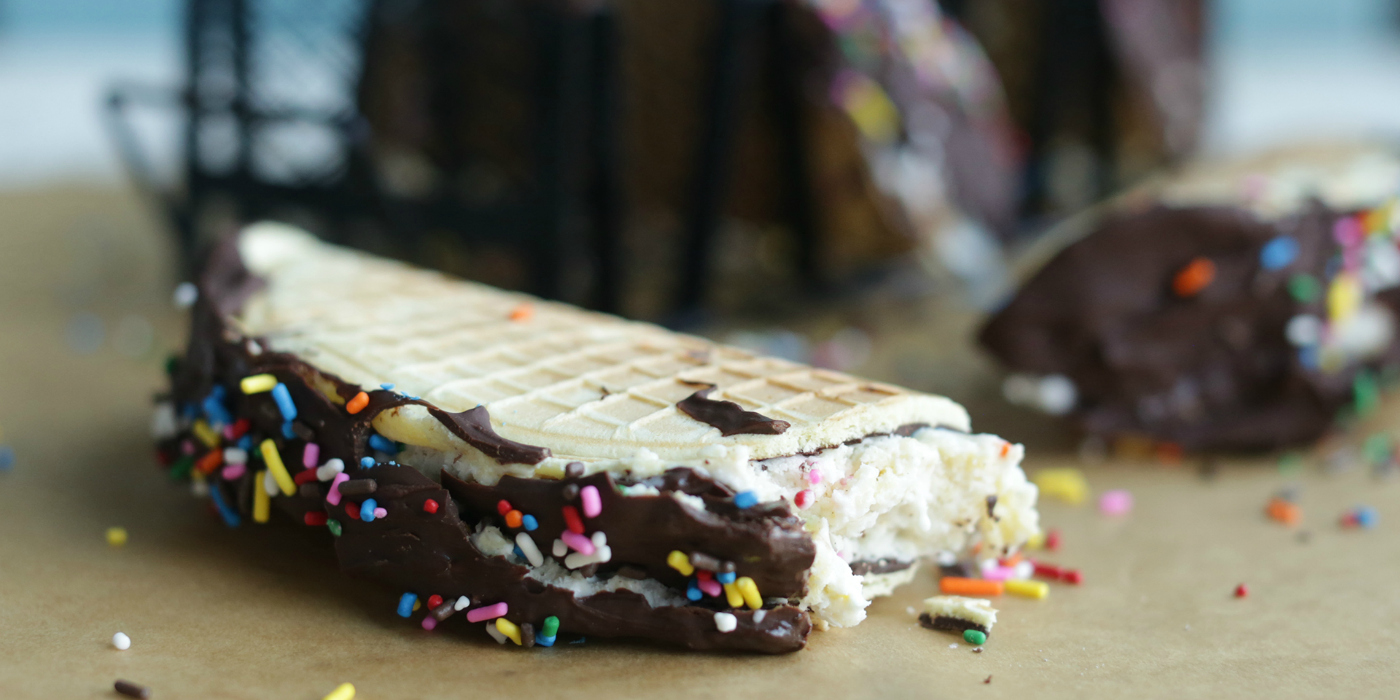

Talk about nostalgia! These Funfetti Ice Cream Tacos sent me straight down memory lane while making them. While this recipe is a bit more upscale then the one’s you may buy from the local ice cream man, they’re nothing short of delicious.
The food world is pretty crazy right now with all of the mash-ups and fusions, but one thing I have always been a sucker for is when people twist up classics. One, you already know they will be tasty because the original recipe is so good, but now it has a bit of a change-up.
I do want to warn you that this recipe for funfetti ice cream tacos does take a little bit because of all of the melting and refreezing taking place, but it is super easy to make. The first thing you must do is melt the store bought vanilla ice cream down. I suggest leaving it out the second you get home from the store, because if your ice cream is anything like mine, it’s half melted already by the time you get home. Second is place the homemade or store bought vanilla cake into the freezer. Don’t worry I’ll explain why later.

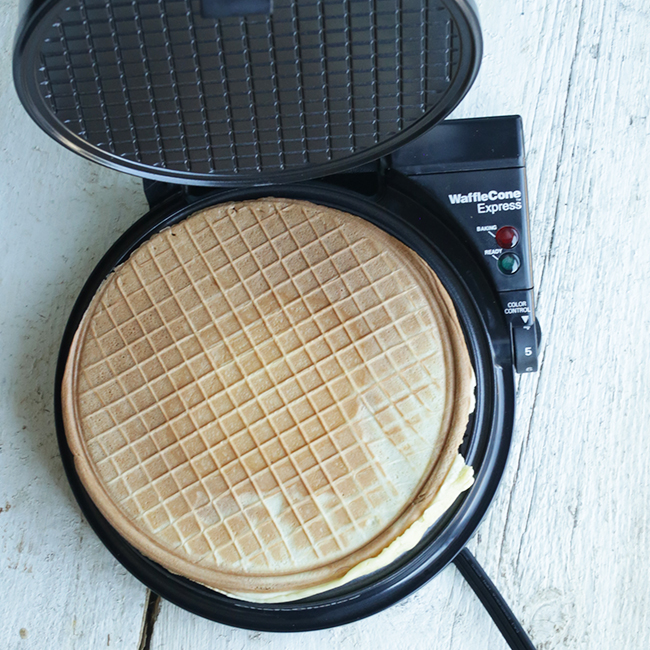
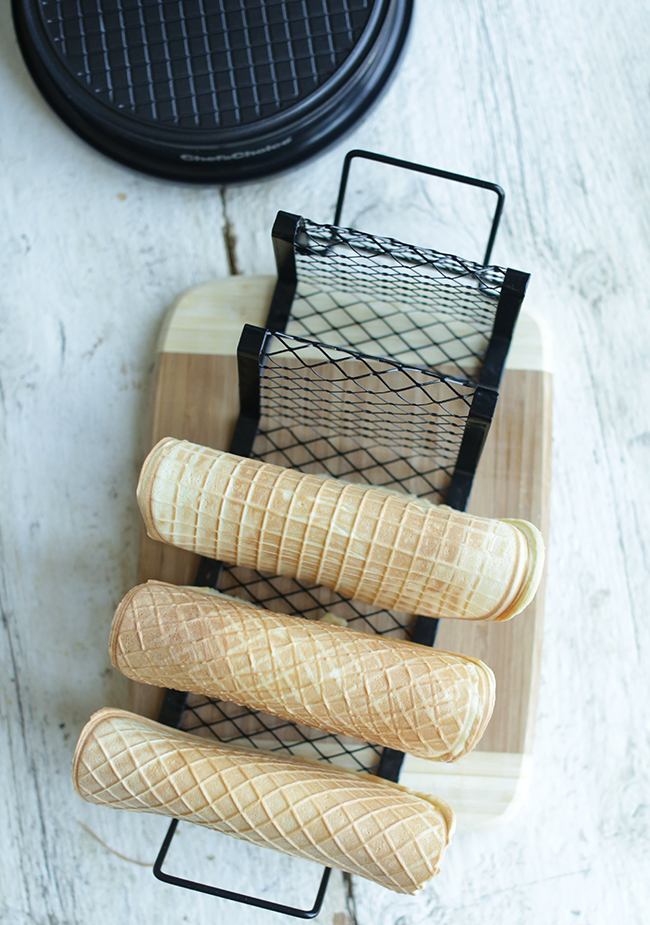
Now for the actual dessert taco recipe making part. The recipe for the waffle cone is short and simple, and I feel confident enough that you have everything you need already in your home. Eggs, salt, sugar, flour and melted butter, that’s it. It is important however to ensure there are no lumps so run the dry ingredients through the sifter. Waffle cones are extremely easy to make thanks to the Chef’s Choice waffle cone maker.
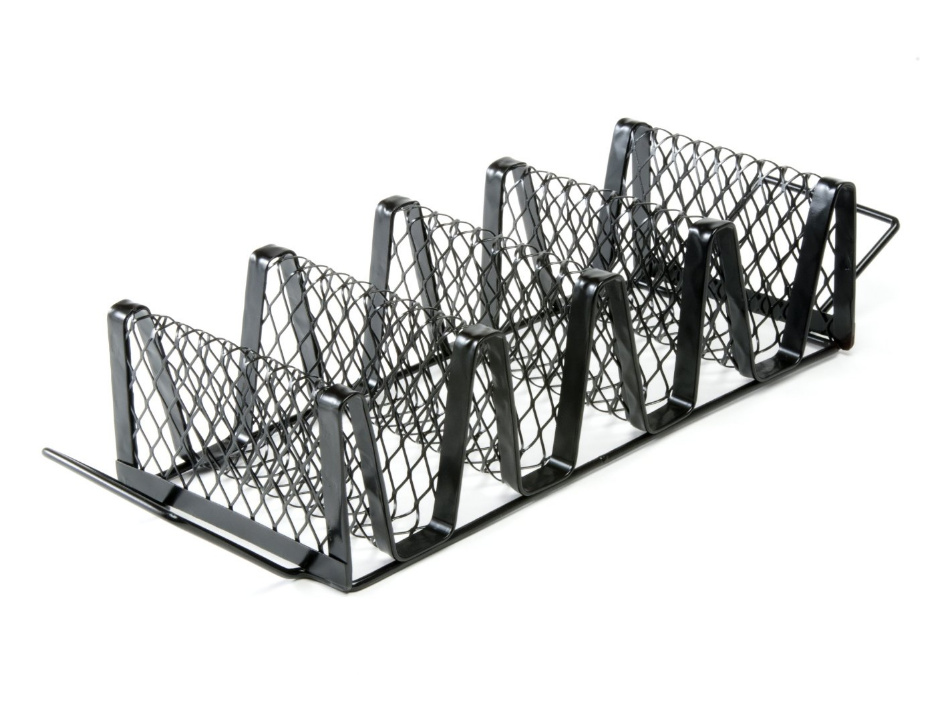
You can make a traditional waffle cone or set them on the Charcoal Companion taco rack that you see in the pictures. Obviously one will be an ice cream cone and one will be a taco, but both will taste the exact same so you decide which way you’d like!
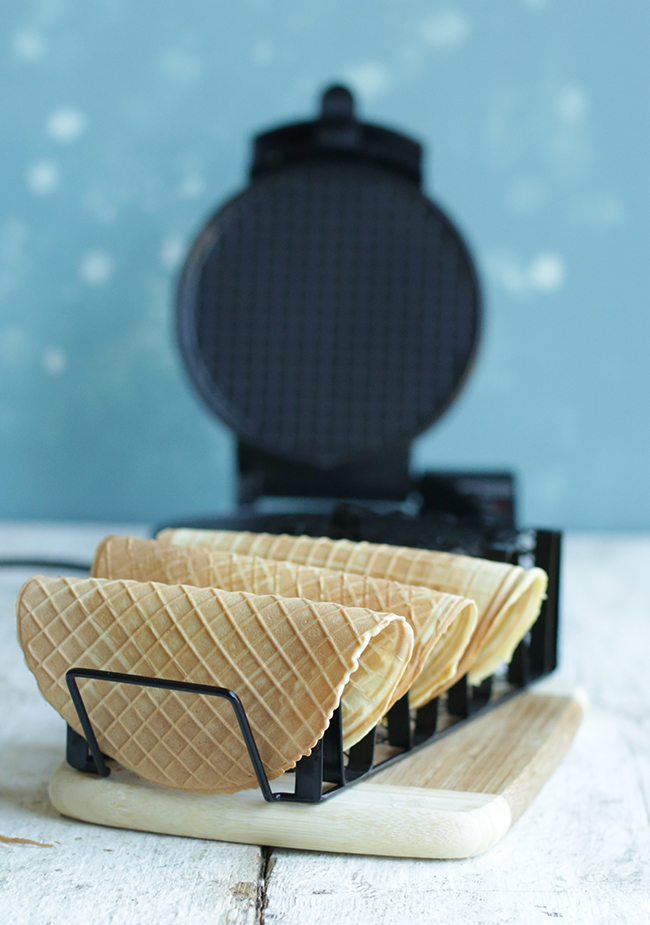
Once the waffle cone comes out of the waffle cone maker immediately begin to mold it because it hardens up very quick. I would suggest using two utensils or gloves when molding the taco because these things are pretty hot once removed from the iron.
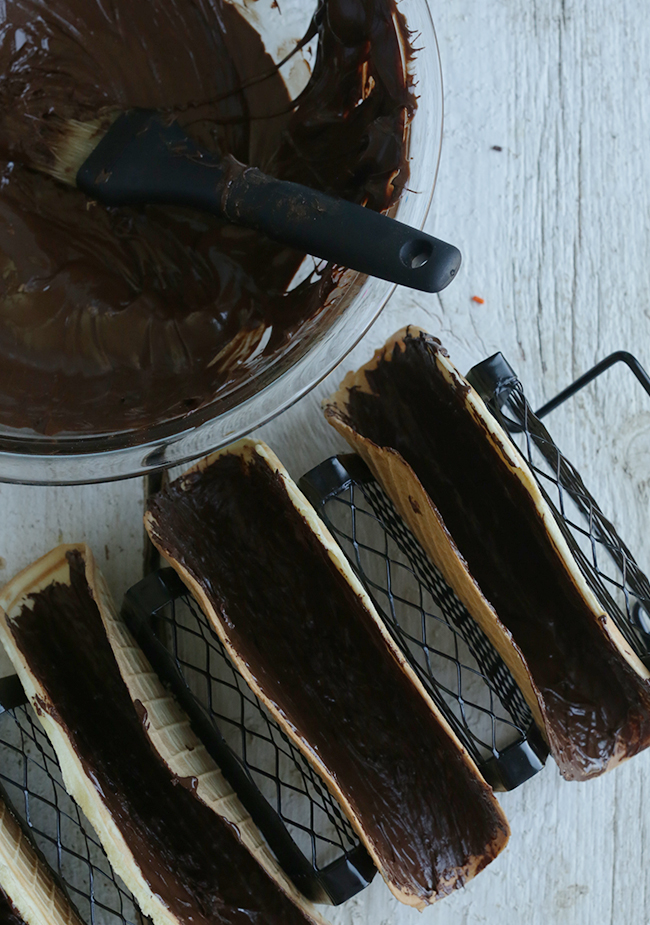
Now because these waffle tacos can get soggy because of the ice cream taking time to freeze in them, I brushed the inside of each taco with a little melted chocolate and immediately froze them. This will stop any liquid from ruining that shell as well as provide even more delicious sweet chocolatey flavor! SCORE!
Once your ice cream is melted (yes, it can have a few lumps in there) transfer it to a really large bowl. Now go grab the pieces of yellow cake out of the freezer and slice it into ½” thick pieces. I chose to remove the icing, but I’ll leave that part up to you.
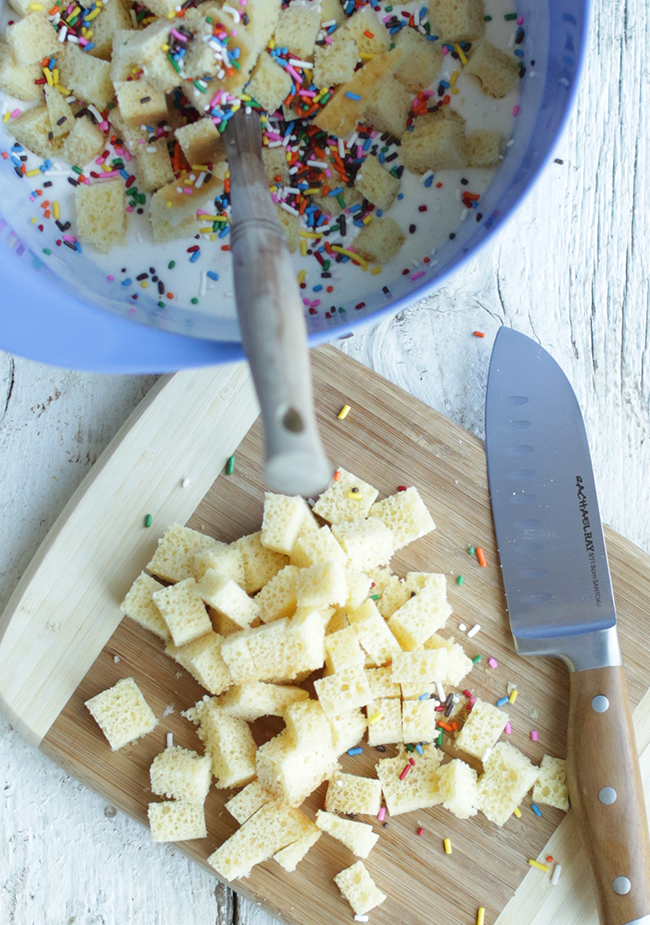
Once they are cut up place them in the bowl with the melted ice cream, and sprinkles, and fold them in using a spatula. The reason the cake is frozen and the ice cream is melted is exactly for this portion of the recipe. I didn’t want cake crumbs, I wanted cake chunks and the only way to achieve that is by this method. Now that everything is folded in, place the bowl in the freezer and let it sit for 90 minutes. You don’t want the ice cream completely frozen so that it is easy to get into the taco.

When the ice cream is soft, but frozen, remove it from the freezer and mold into each waffle taco shell. Now, place it back in the freezer to harden up a bit more. This time though, it should only take about 30 minutes.

There should be plenty of chocolate left over from brushing the inside of the waffle taco shells so pop it back in the microwave and re-melt it. You can either dip the ice cream stuffed tacos in the chocolate or brush the top of them with a pastry brush. Both ways are messy and will require a little finesse, but are guaranteed to make you eat chocolate off of your fingers 🙂

Top off with some sprinkles and place them back in the freezer for 1 more hour to completely freeze before serving.

I can tell you right now that these ice cream tacos are to die for. My wife, and her family, went to town on these things and could not get enough. They are rich, they are delicious, and are sure to spark some memories from your childhood. Enjoy!

Ice Cream Tacos

INGREDIENTS
- 2 eggs
- 2 egg whites
- Pinch of salt
- ½ cup of sugar
- 1 ½ cup of flour, sifted
- 4 tablespoons of melted butter
- 4 cups of semi-sweet chocolate chips
- 1 quart of good vanilla bean ice cream, melted
- 2 servings of yellow vanilla cake cut into 1/” pieces, frozen
- ½ cup of colored sprinkle
INSTRUCTIONS
- In a large bowl whisk together the eggs and salt until light and fluffy. Next, whisk in the sugar until combined followed up by adding in the flour until combined. Finish by whisking in the melted butter.
- Pour 1 ounce of the batter into the waffle cone iron and cook for 1 to 2 minutes or until lightly browned all over.
- Immediately remove once finished cooking and form them to the taco holder mold and let sit.
- In a large glass bowl add the chocolate chips and place in the microwave for 1 minute and then stir. Place it back in the microwave on :30 second bursts stirring in between each cooking period until the chocolate is melted.
- Brush the inside of the tacos with the chocolate until completely covered and place in the freezer to harden.
- In a separate large bowl fold together the melted ice cream, ¾ of the sprinkles, and frozen cake until combined and place in the freezer for 90 minutes to harden up.
- Next, mold the ice cream to the inside of the frozen waffle cone taco shells and place back in the freezer for 30 minutes.
- Re-melt the chocolate in :30 second bursts in the microwave until melted.
- Brush the tops of the ice cream tacos where the ice cream is until it is completely covered and immediately sprinkle with remaining sprinkles and freeze for 1 more hour before serving.