
Our good friends Jaimee and Aaron had us over to their place a
little while back. They wouldn’t tell us what we’d be having for dinner. “It’s
a surprise,” they insisted. When we showed up, there was a spread of all kinds
of meltable cheese and fancy sliced bread. It was so fun! We all got to choose
ingredients for a tailor-made grilled cheese. They have twin girls, and the
kids loved this interactive dinner just as much as the adults did. We immediately
started thinking about how we could make this grilled cheese tradition our own.
Follow along for the delicious result!
We love grilled cheese sandwiches, and we love to make waffles
for a leisurely weekend brunch. Morning waffle-making happens maybe about once
a month at most, though, so we found a way to make our waffle maker work harder
and be more useful more often.
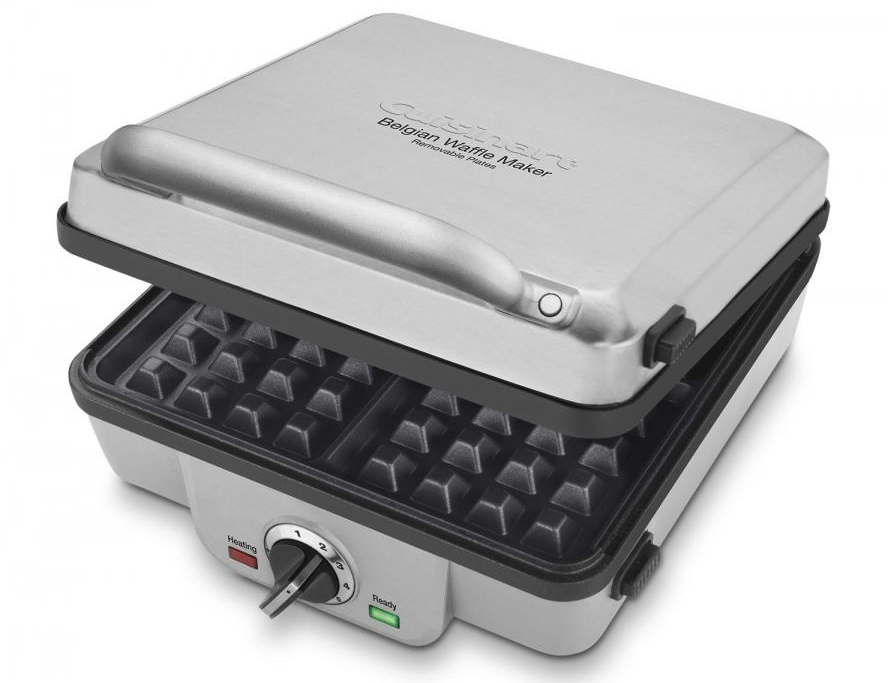
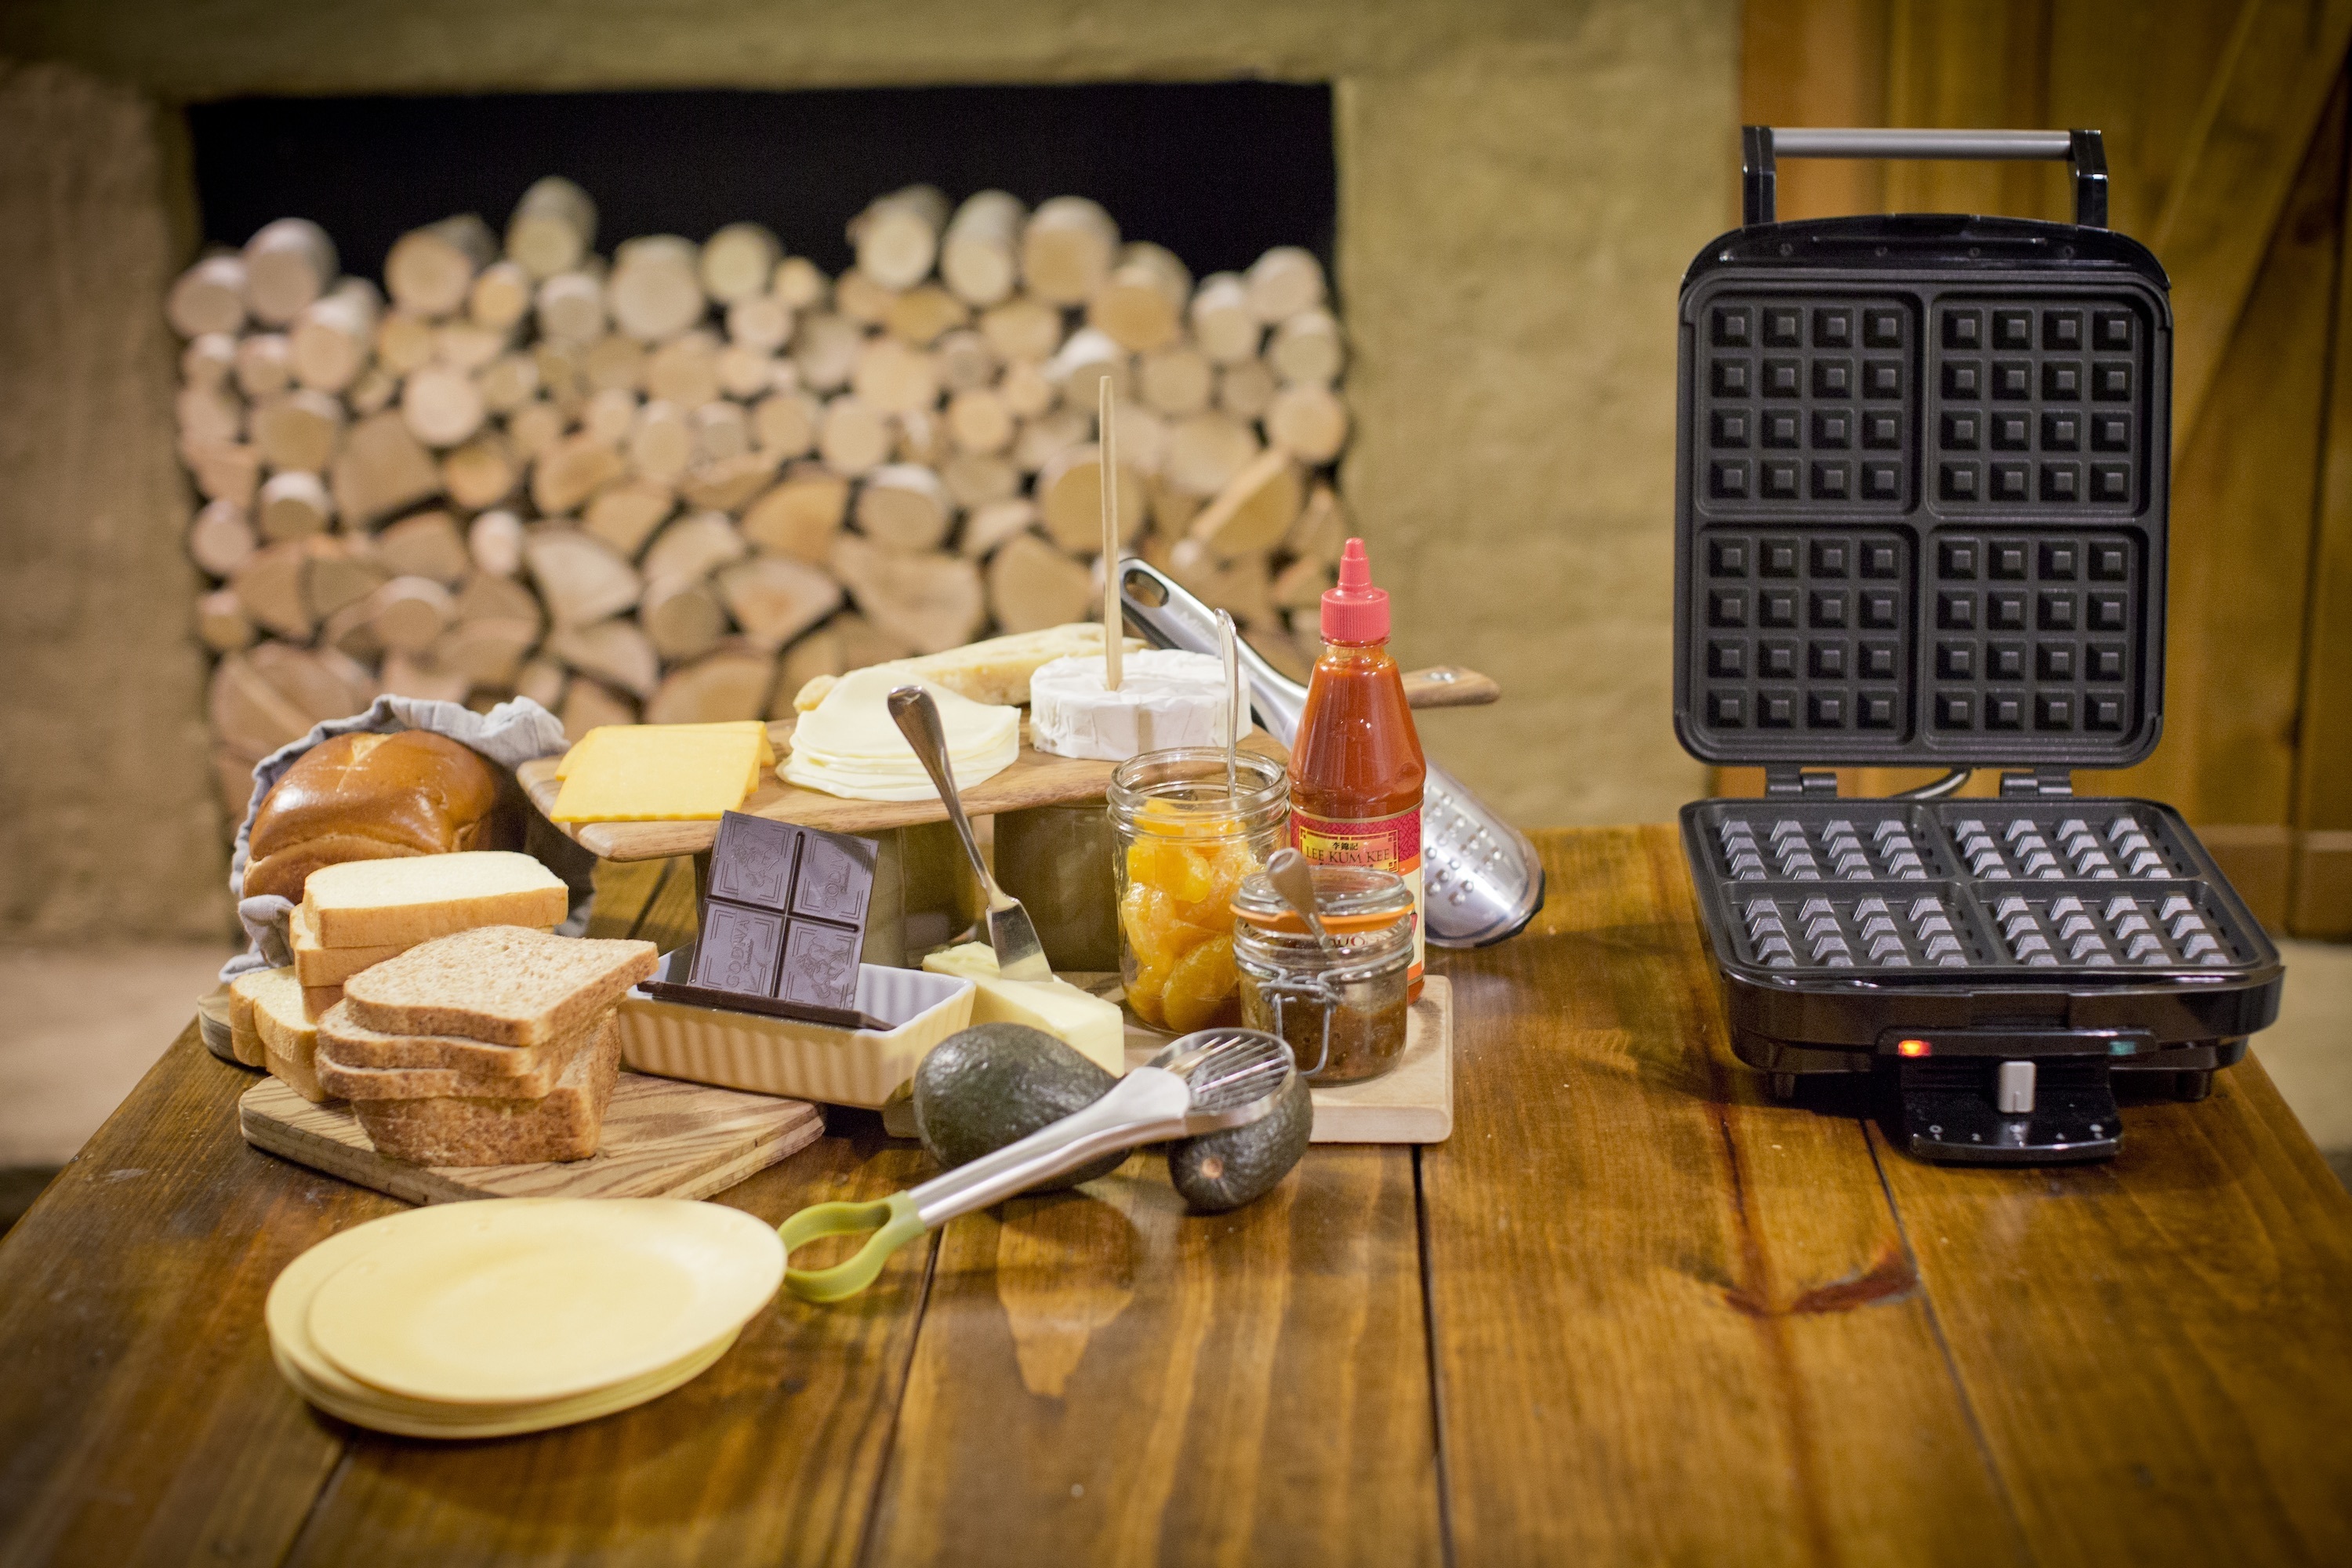
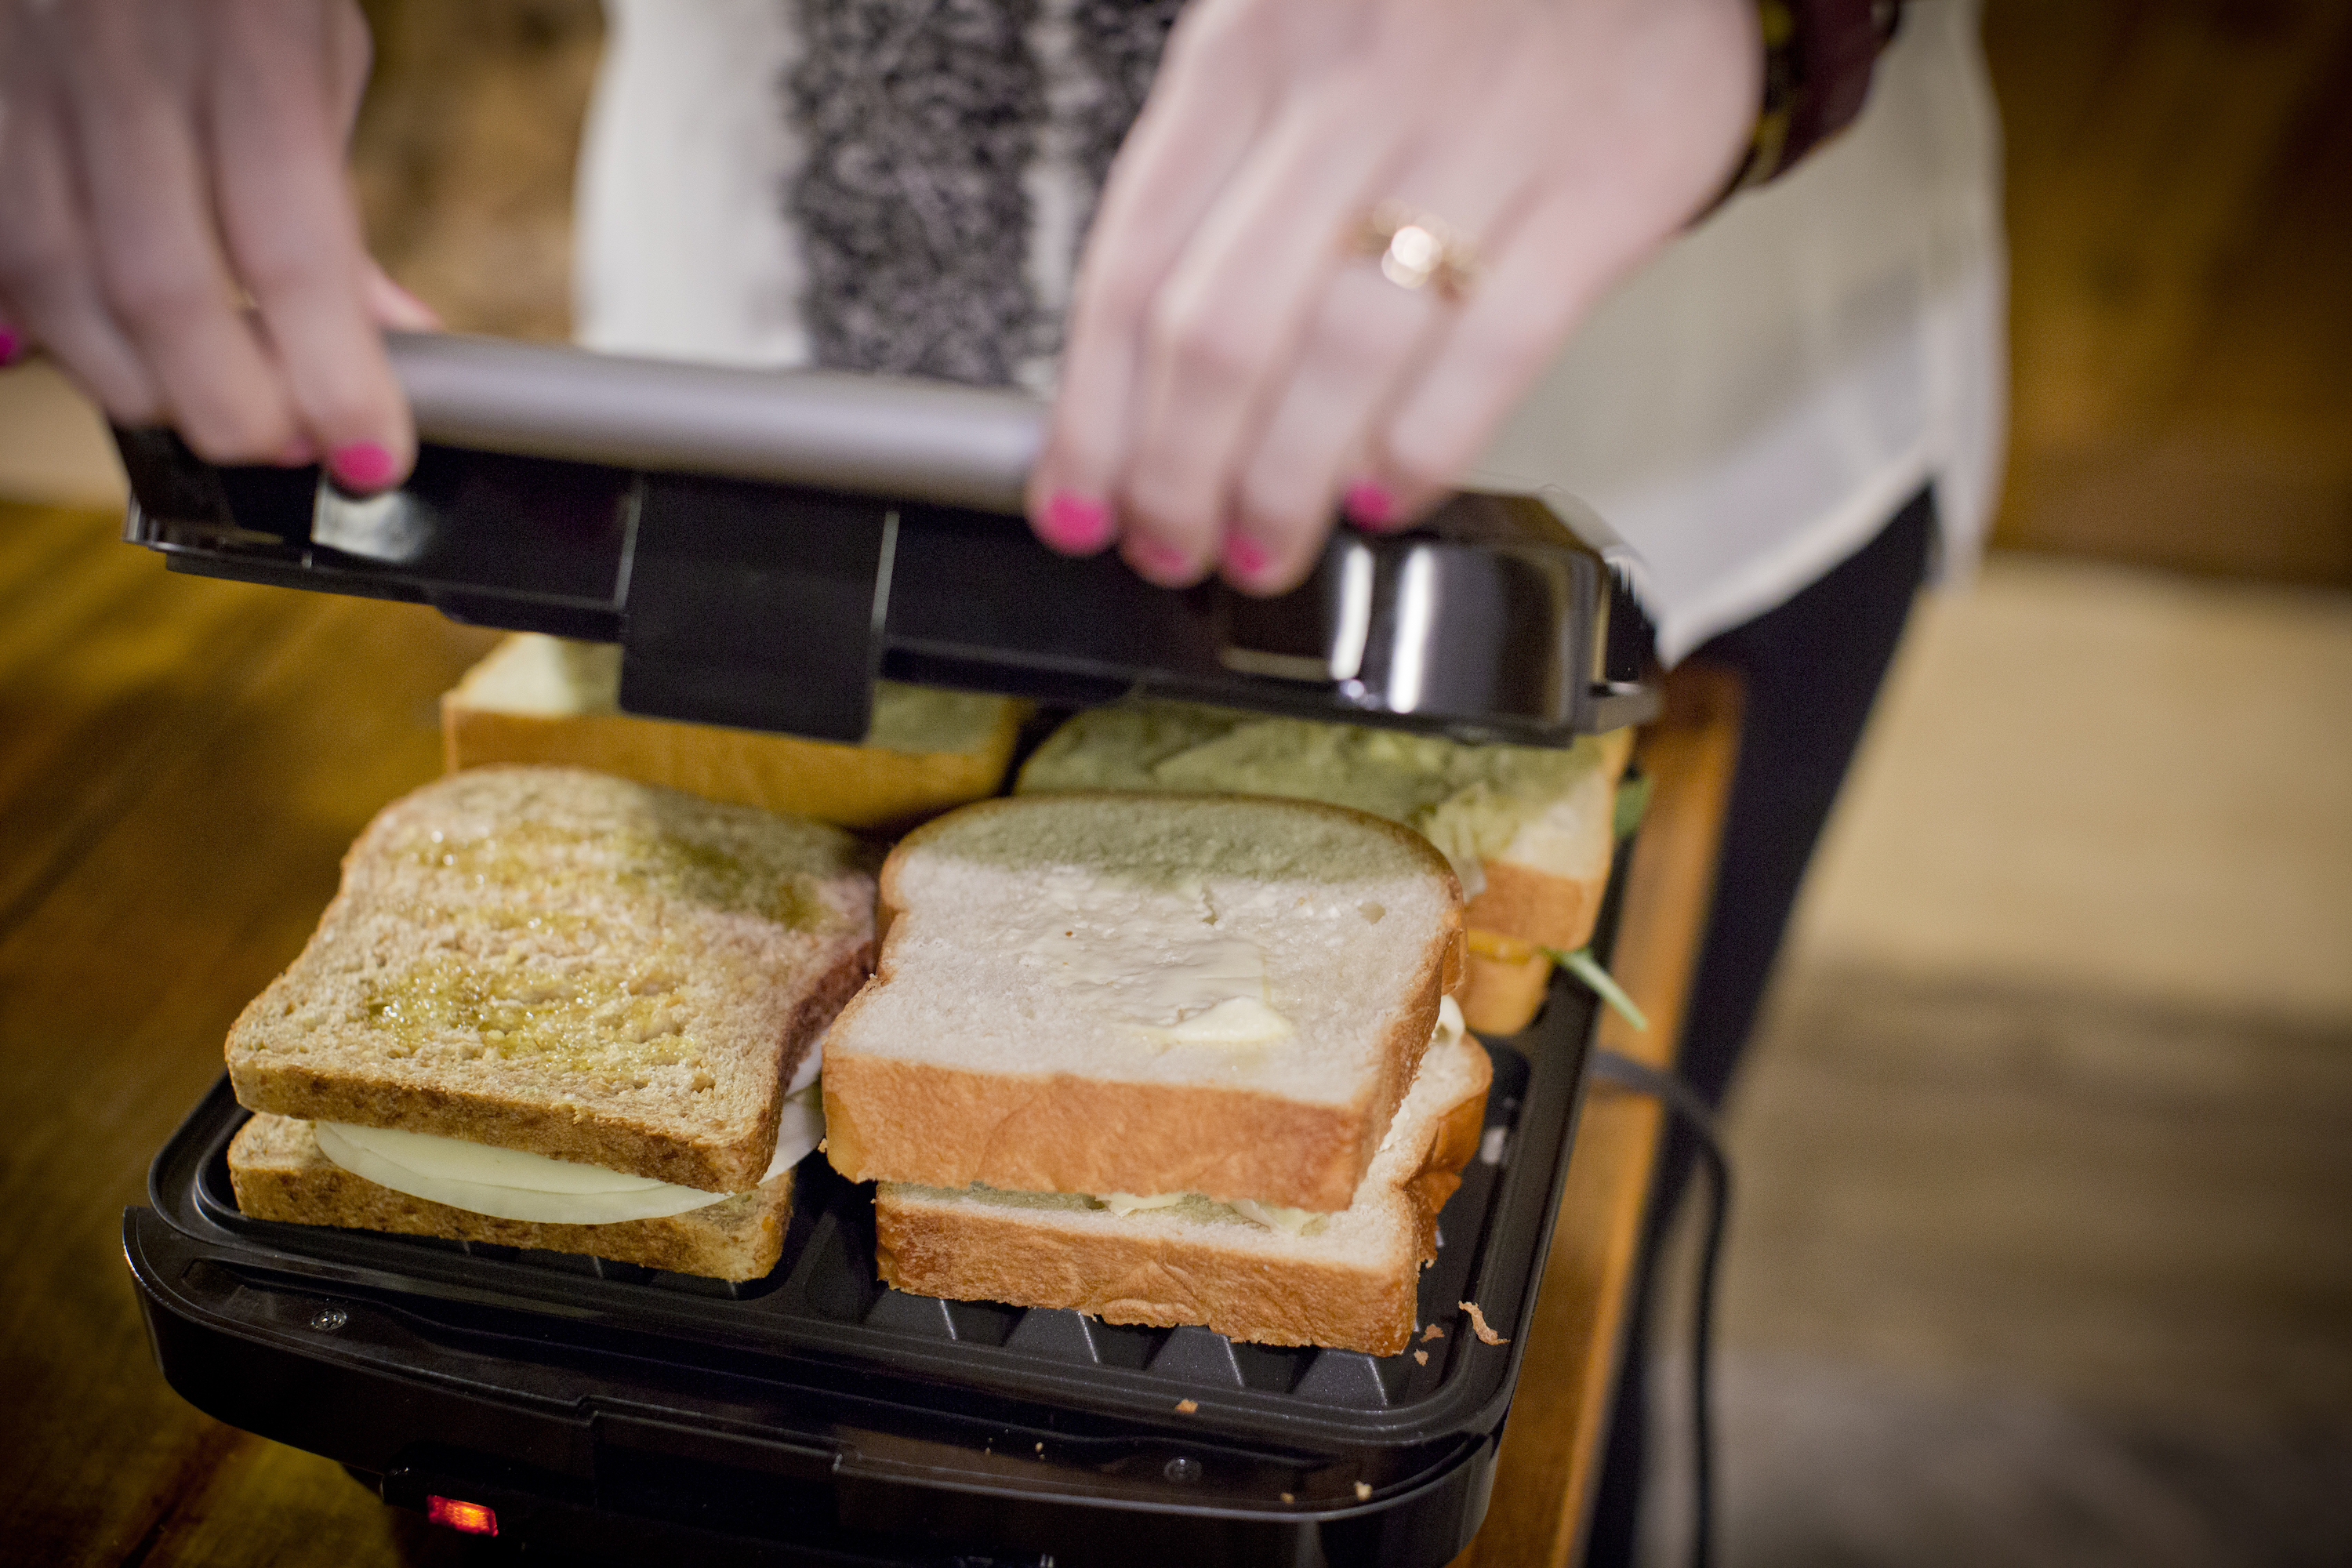
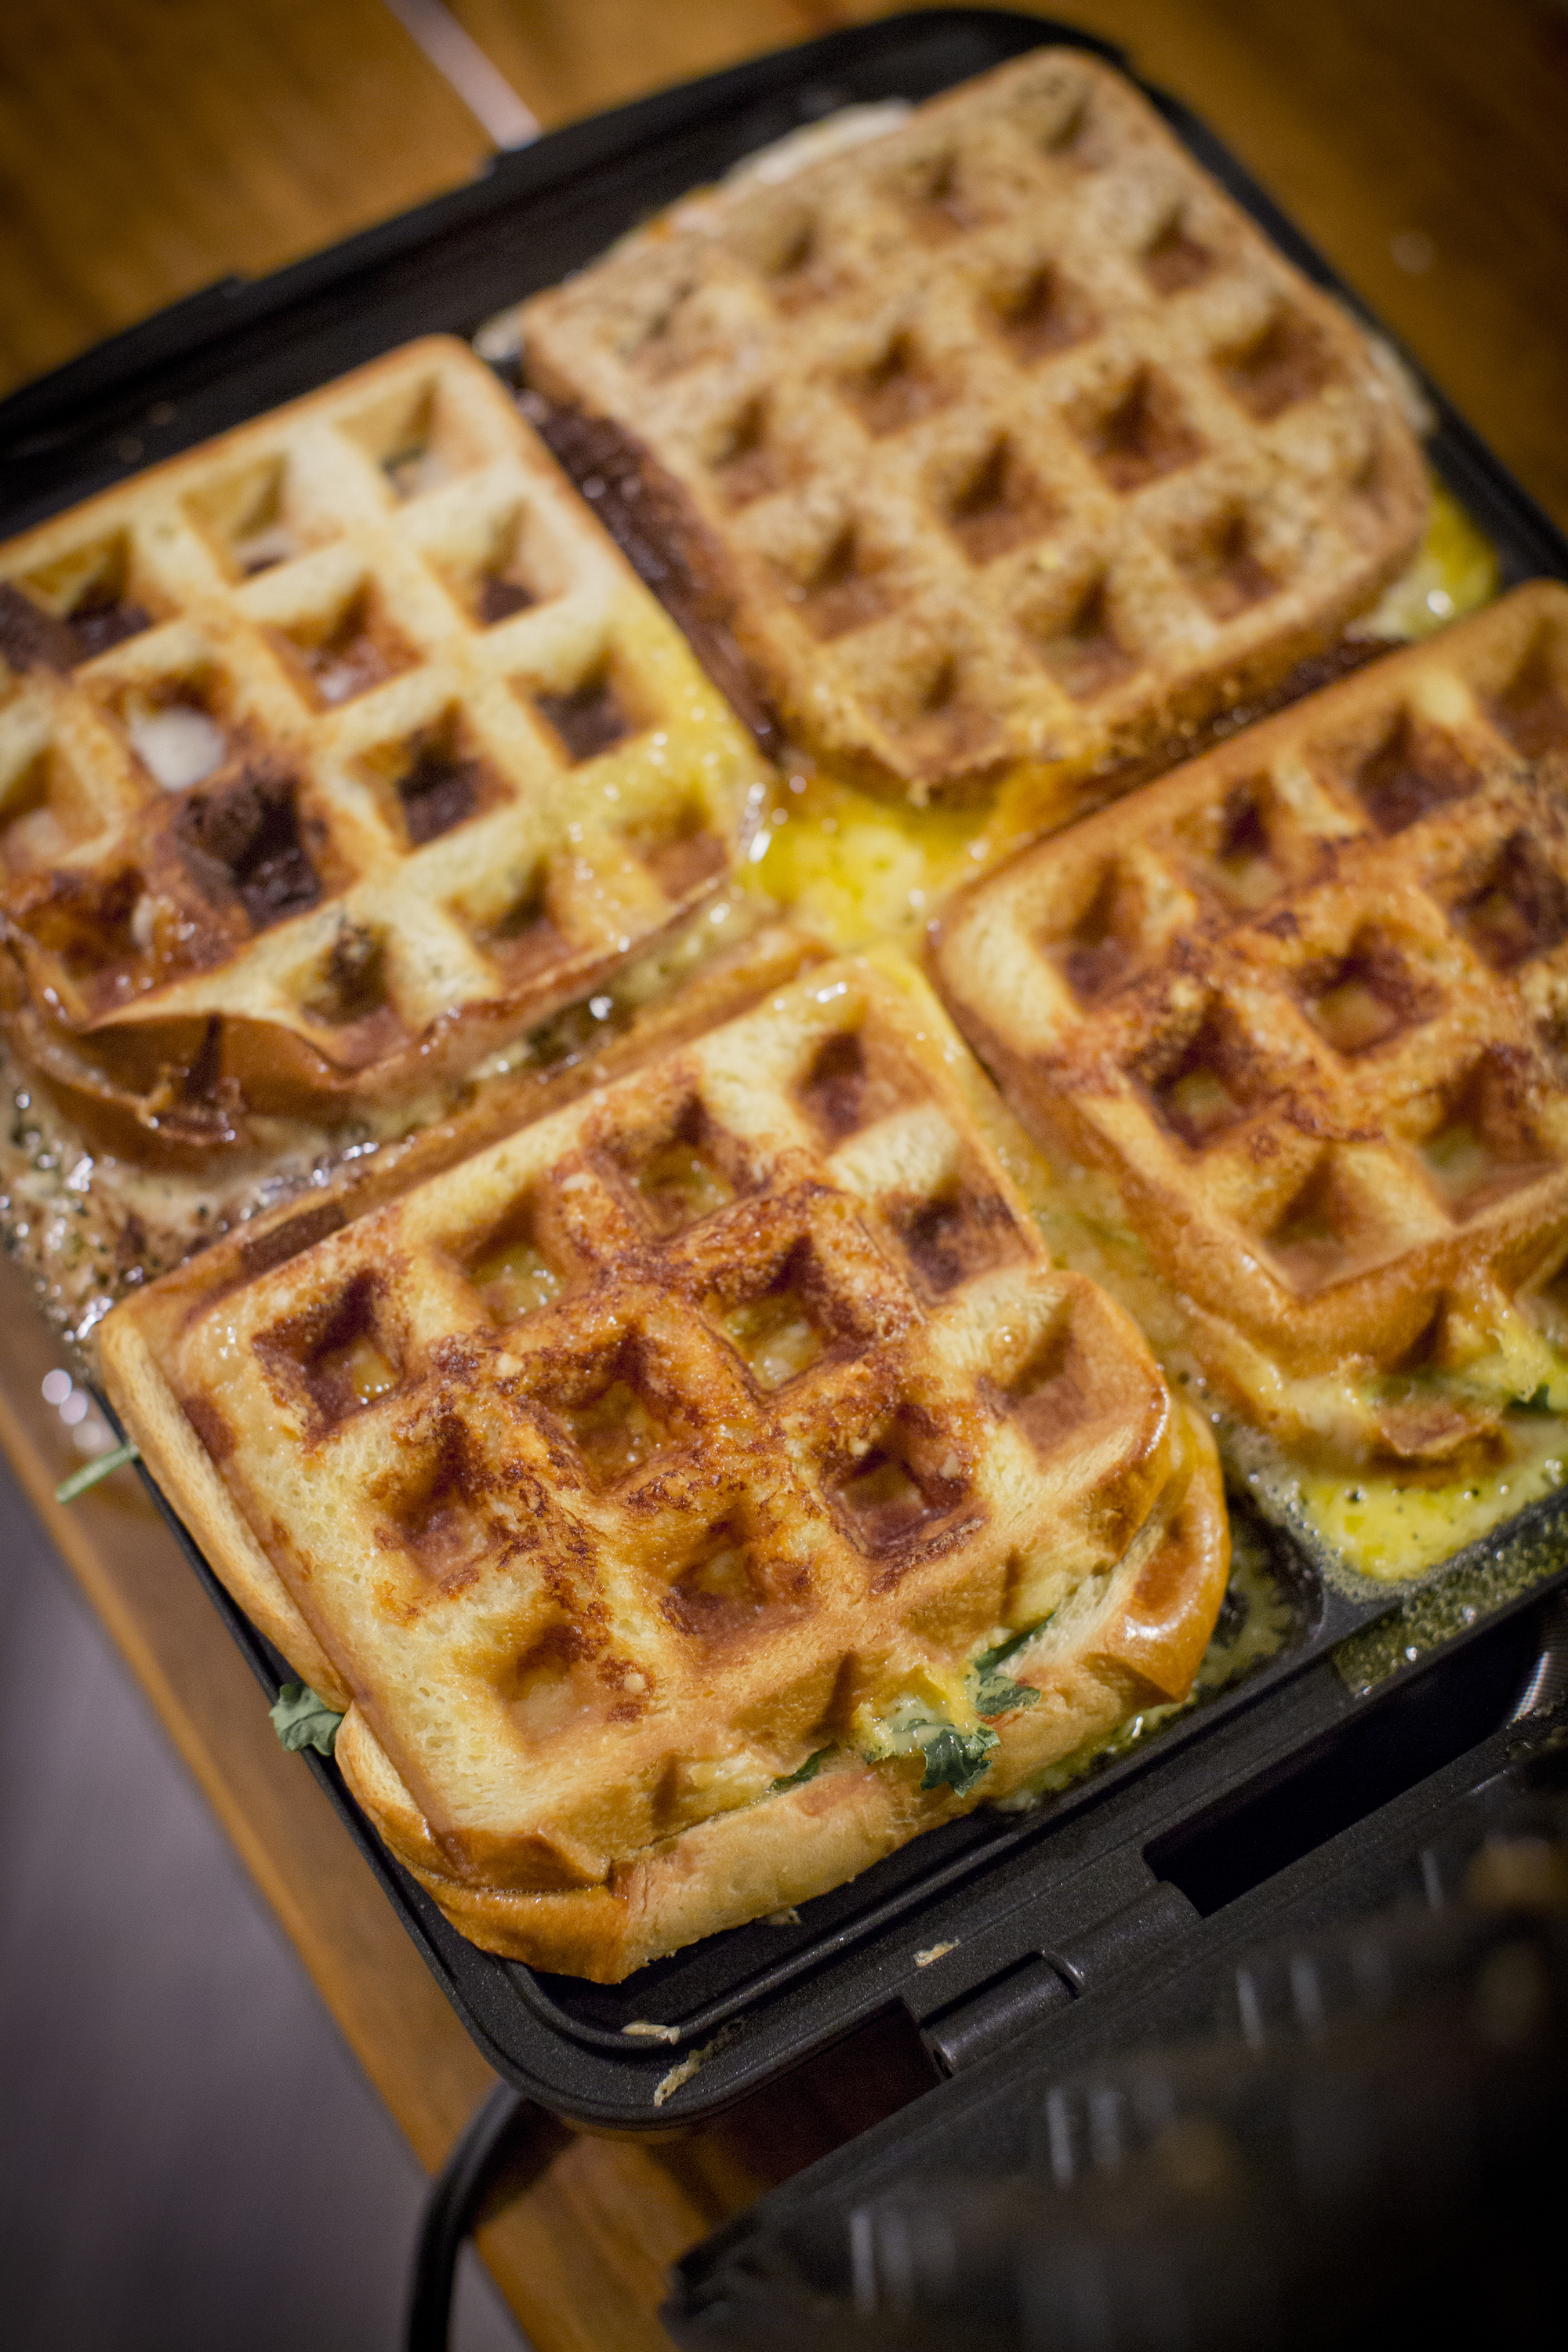
Wouldn’t our Cuisinart 4-Slice Belgian Waffle Maker be the perfect grilled cheese maker, too? The large, square, one-inch-deep sections are the same size as a standard slice of bread, perfect for making the most delicious grilled cheese sandwiches you’ve ever tried. The day we realized that we could make an awesome pressed sandwich in the waffle maker was quite an important discovery at our house.
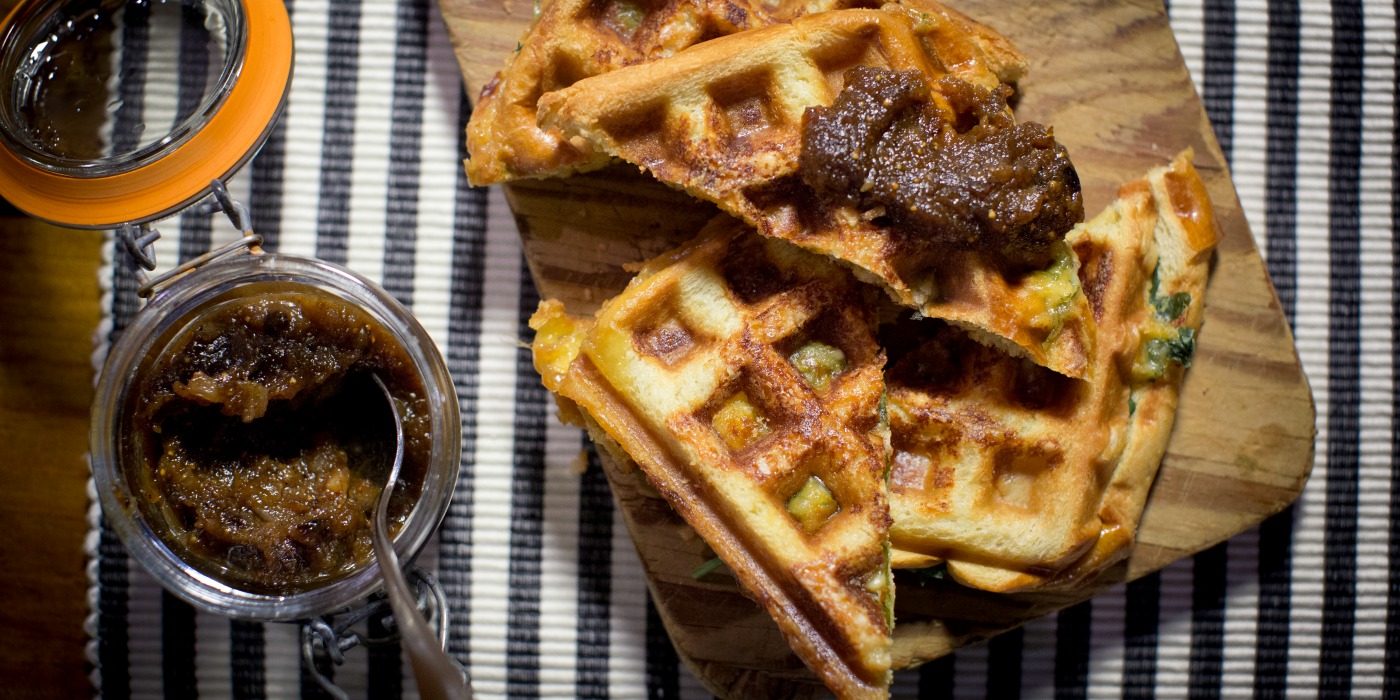
The heat from the top and bottom cooks the grilled cheese quickly and evenly while the indentations the waffle maker leaves in the sandwiches not only adds tooth and texture but also creates the perfect space for some creative grilled cheese toppings like our Fig & Shallot Jam.
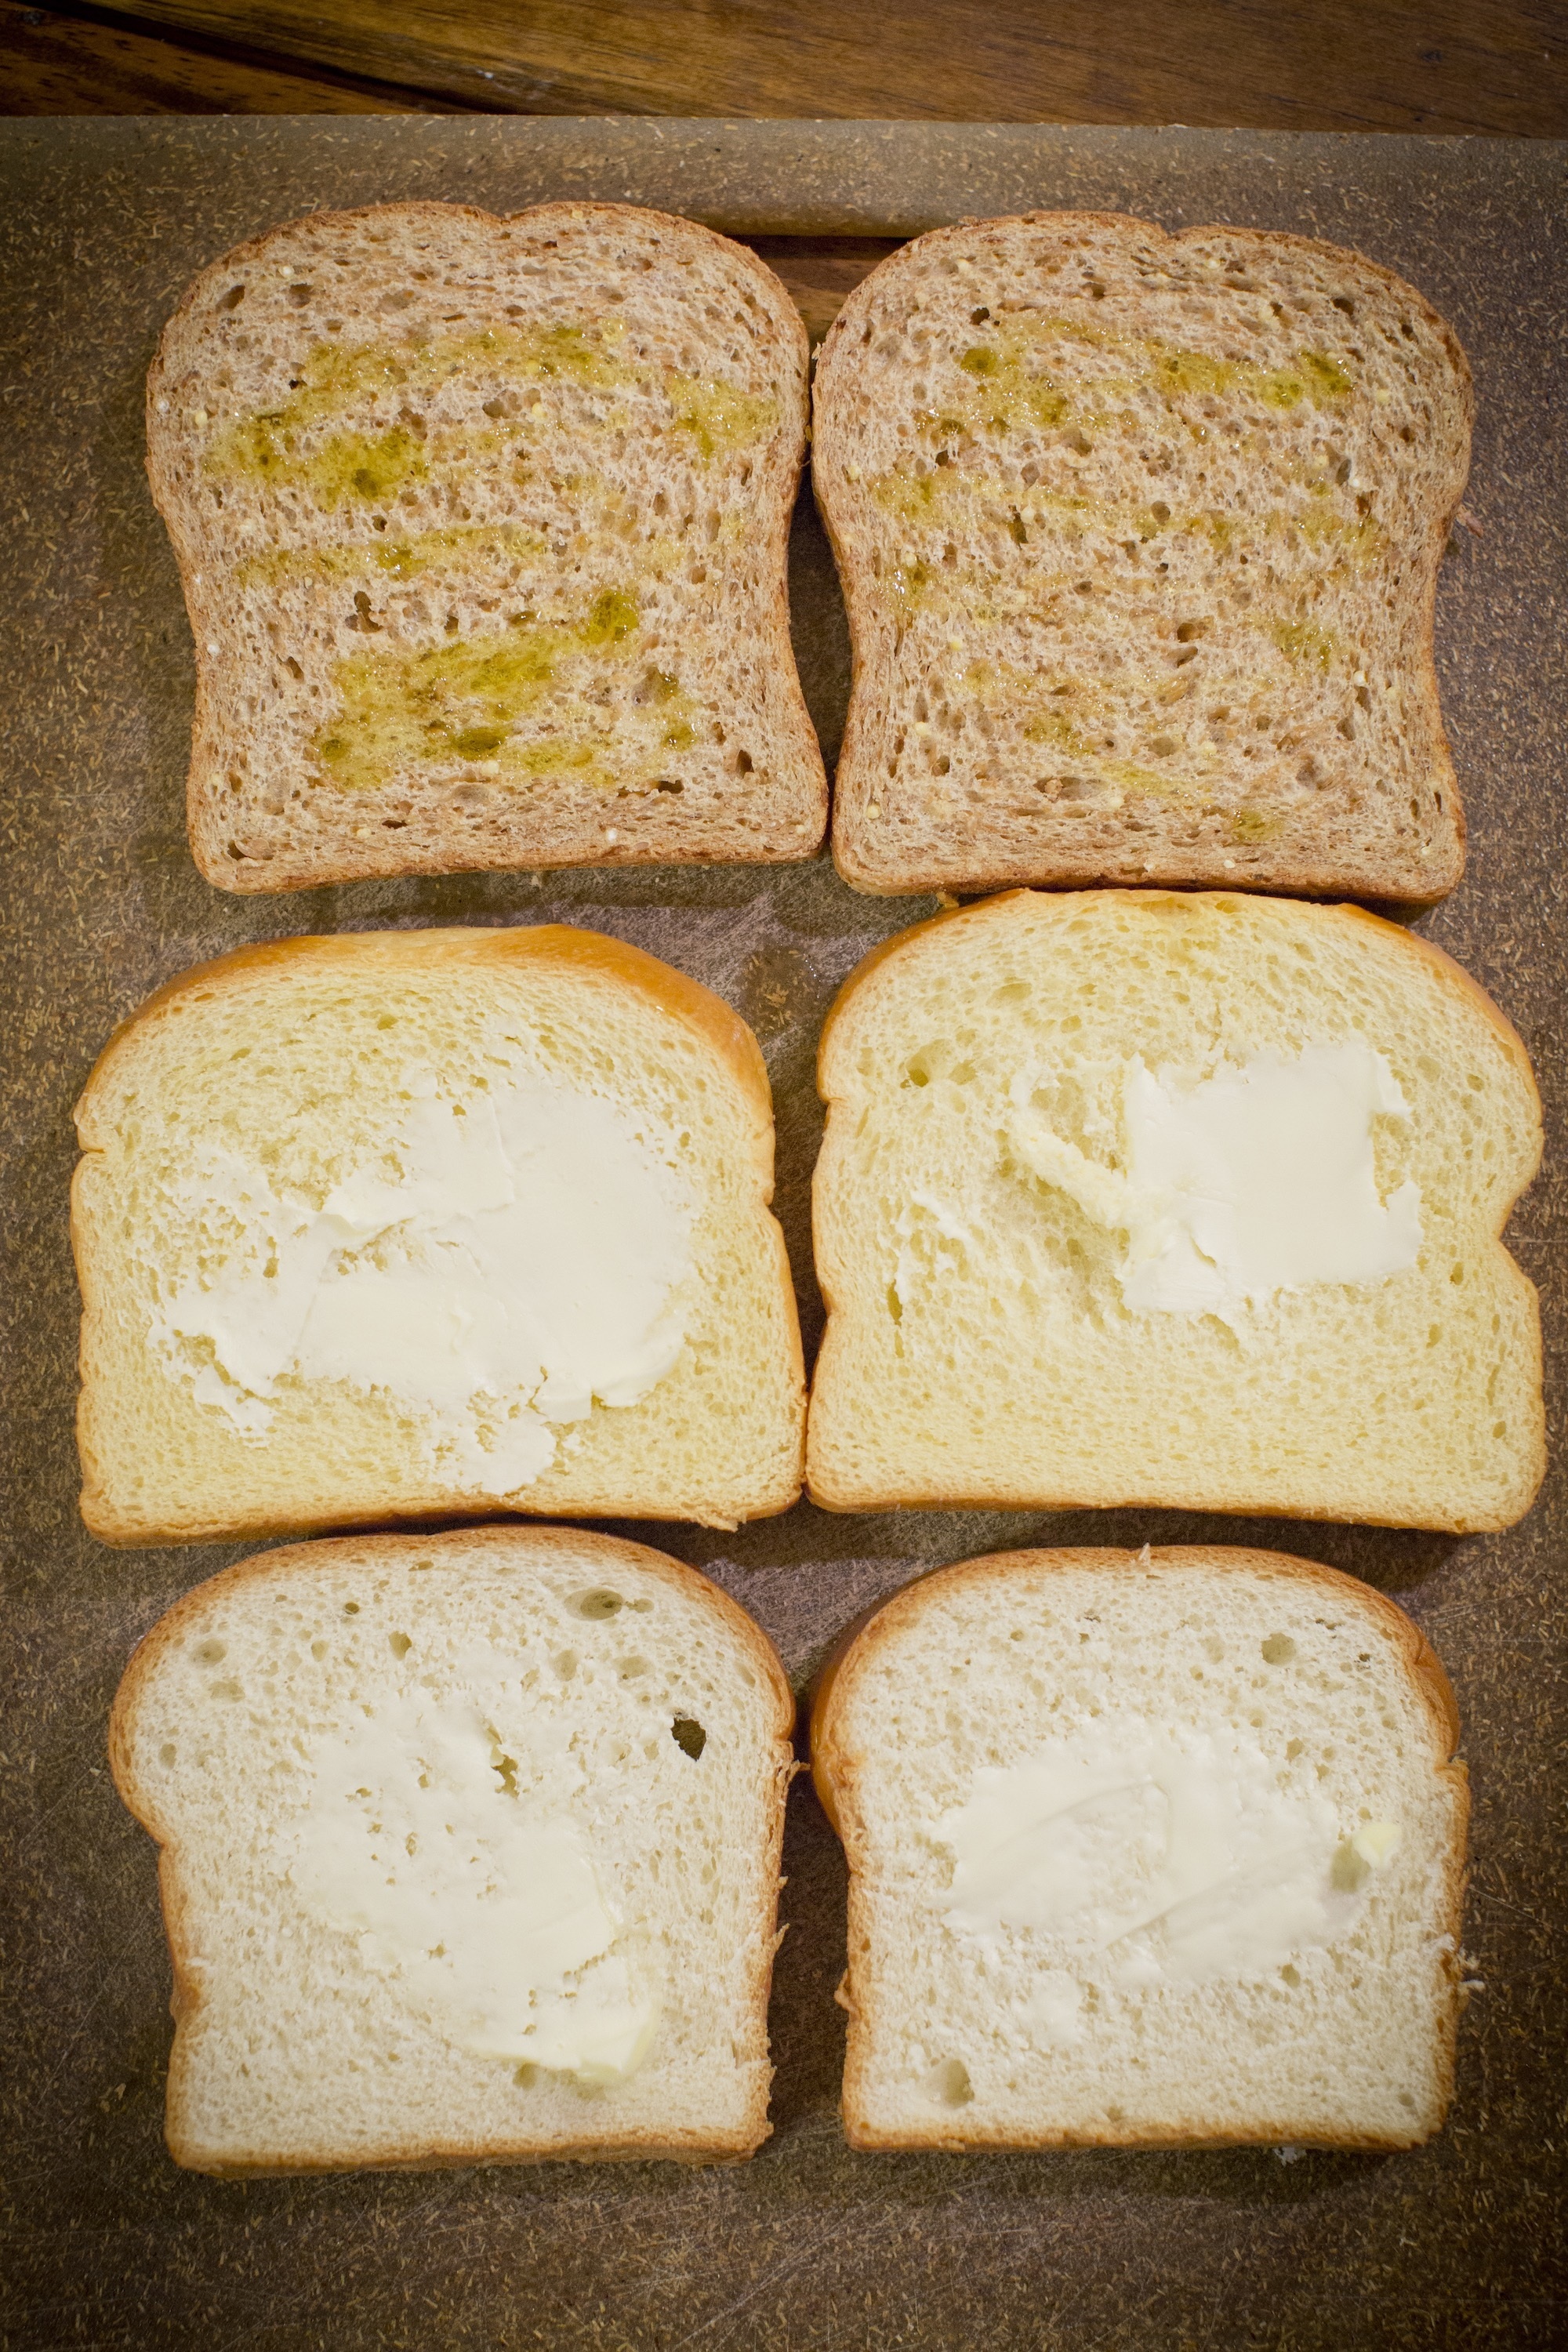
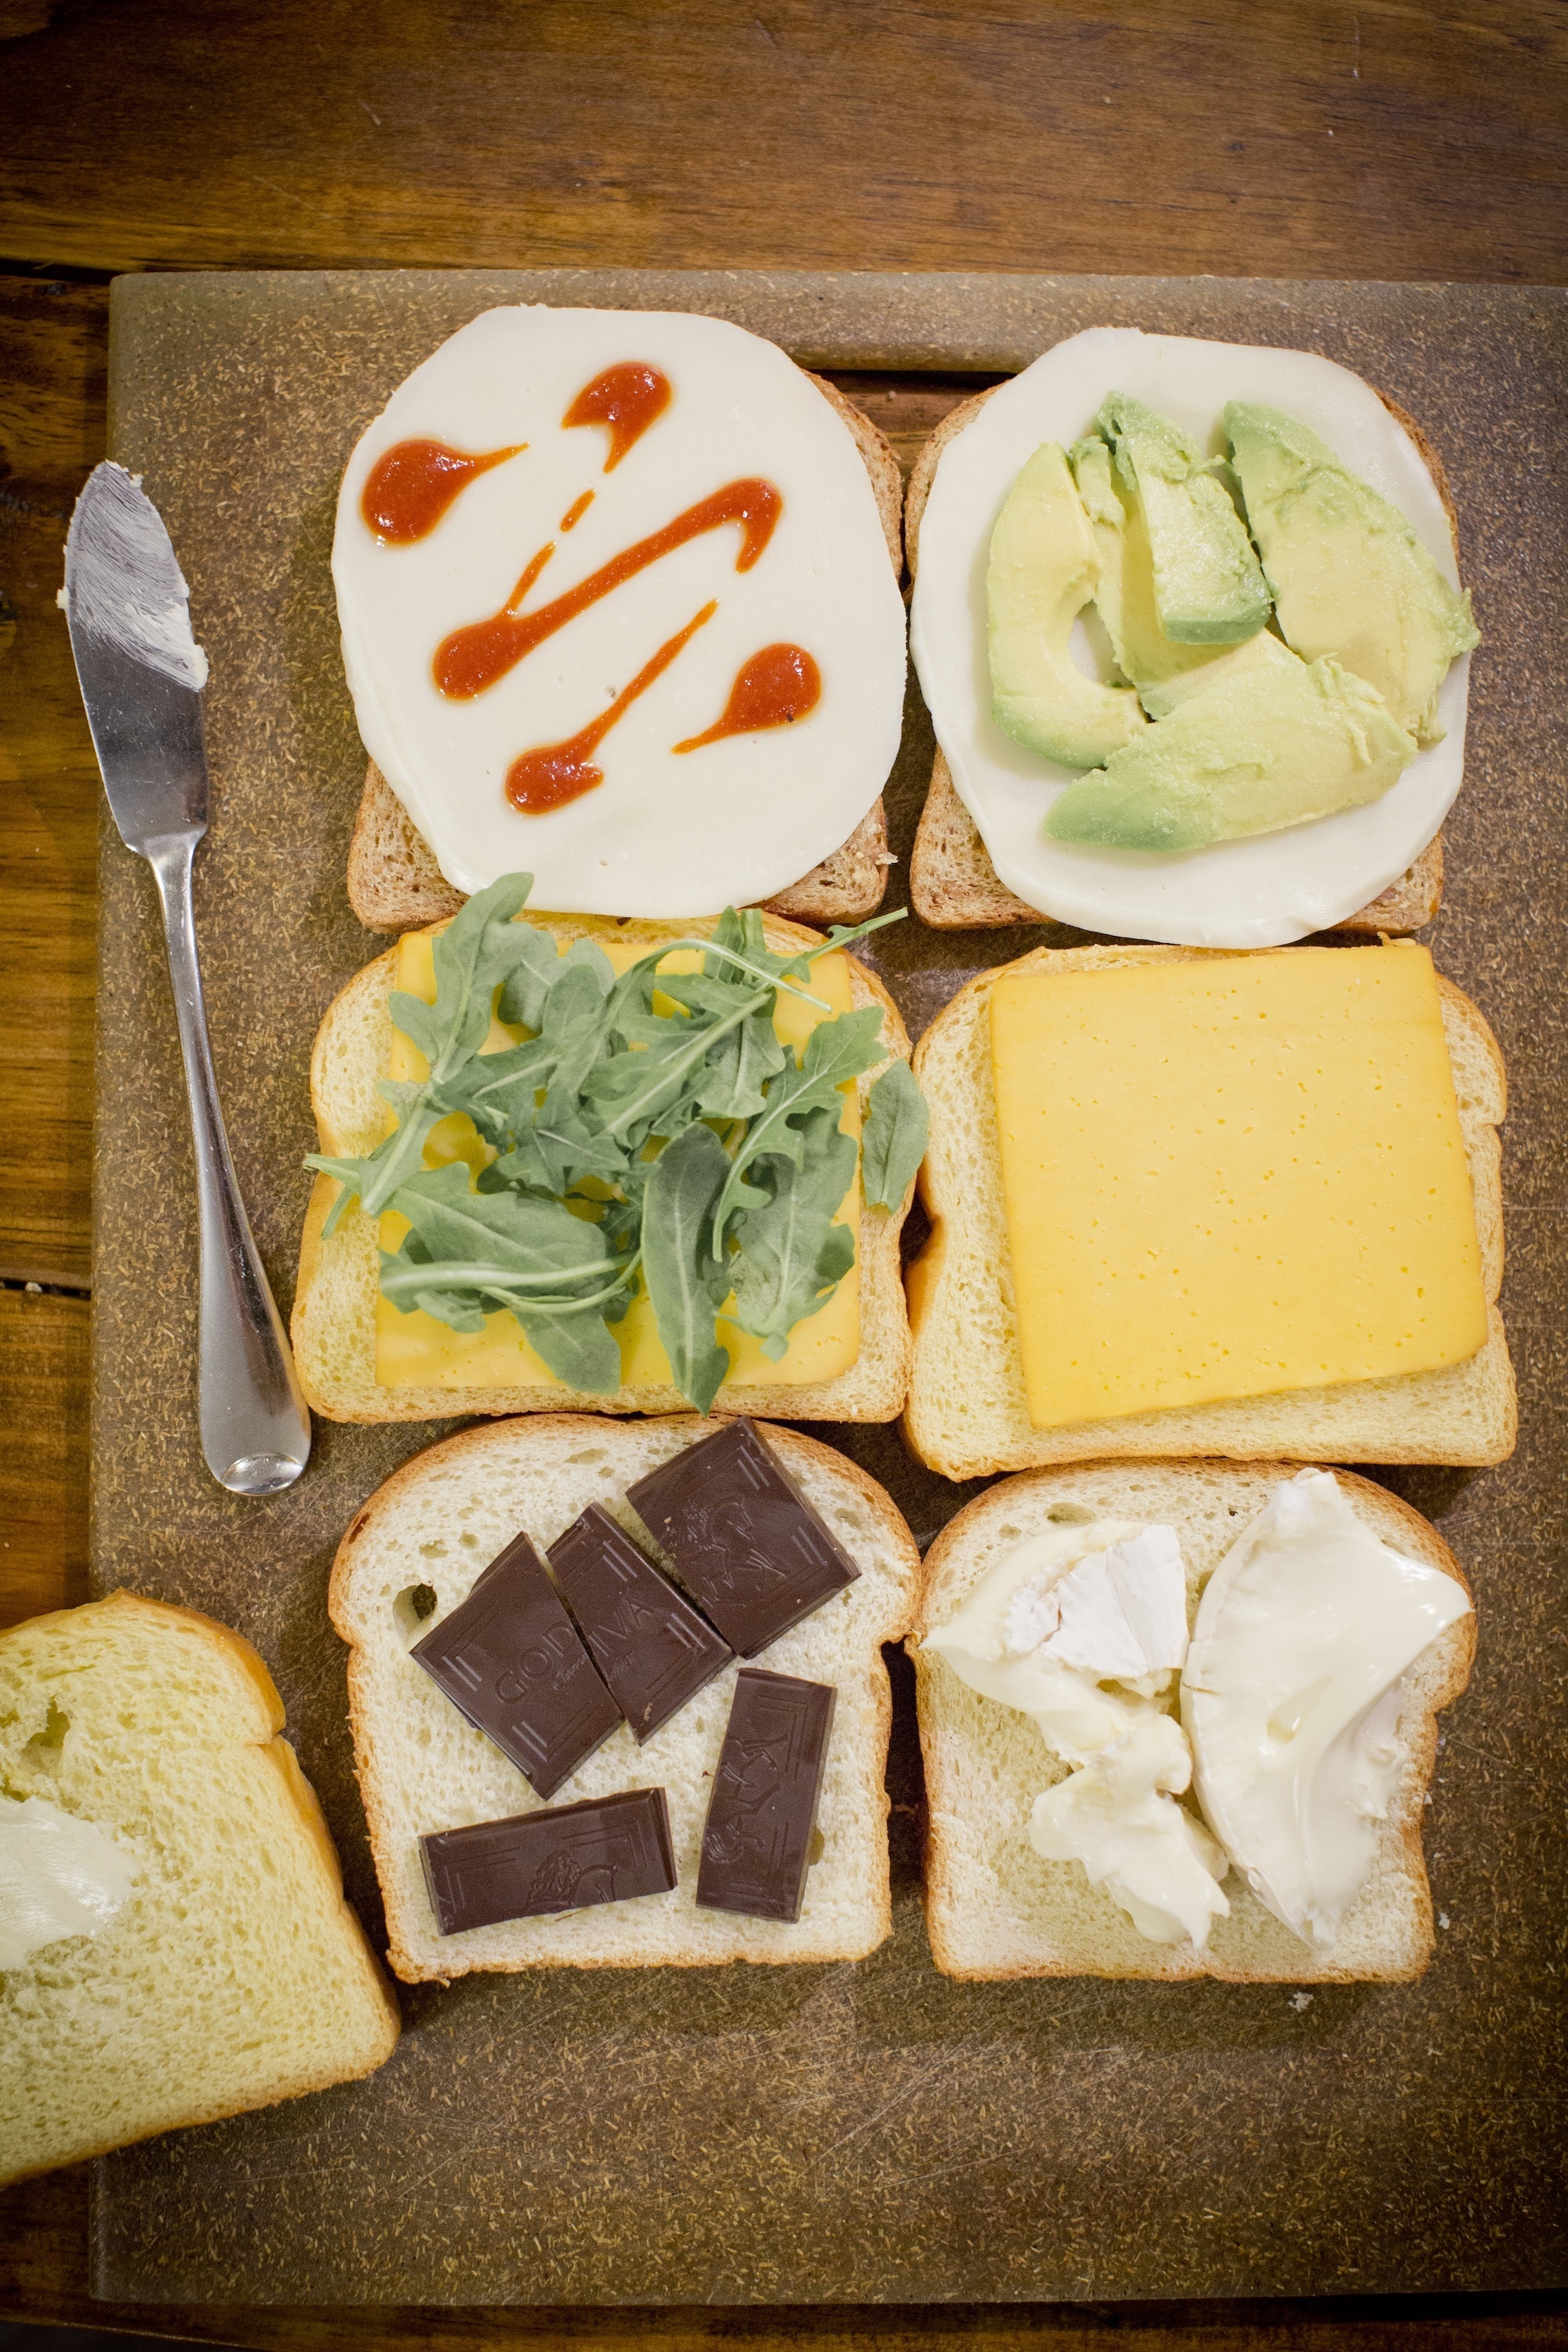
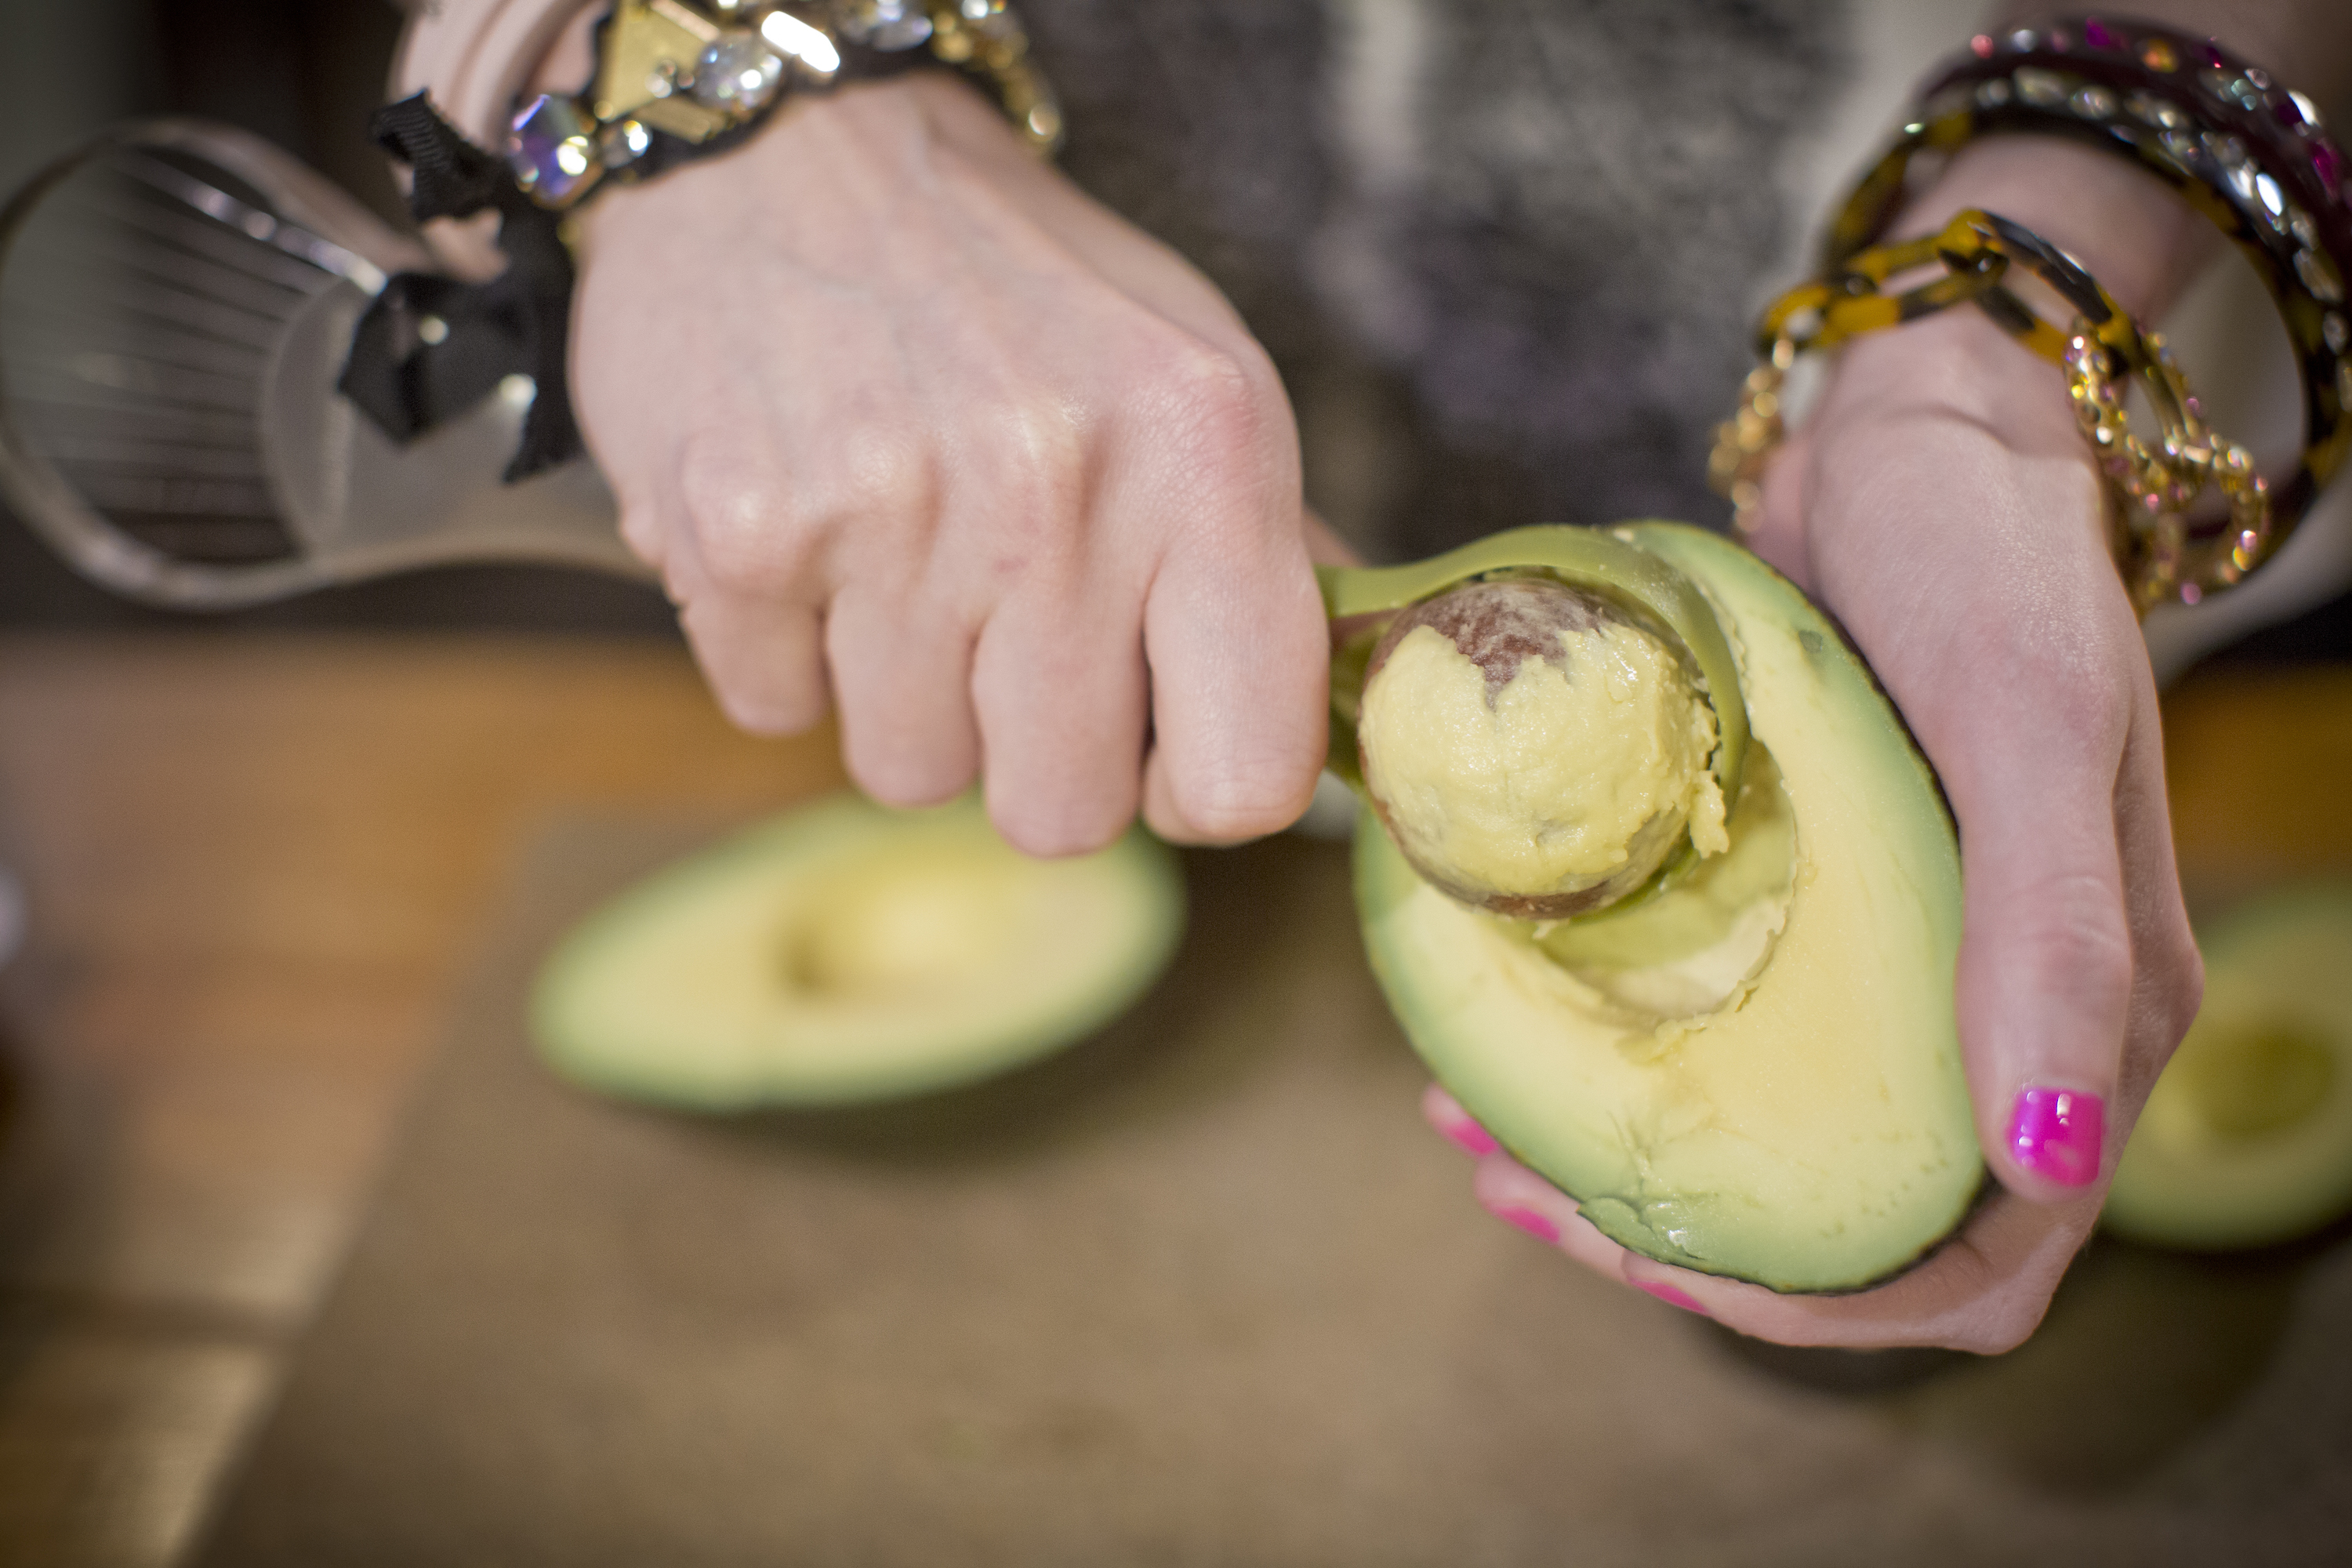
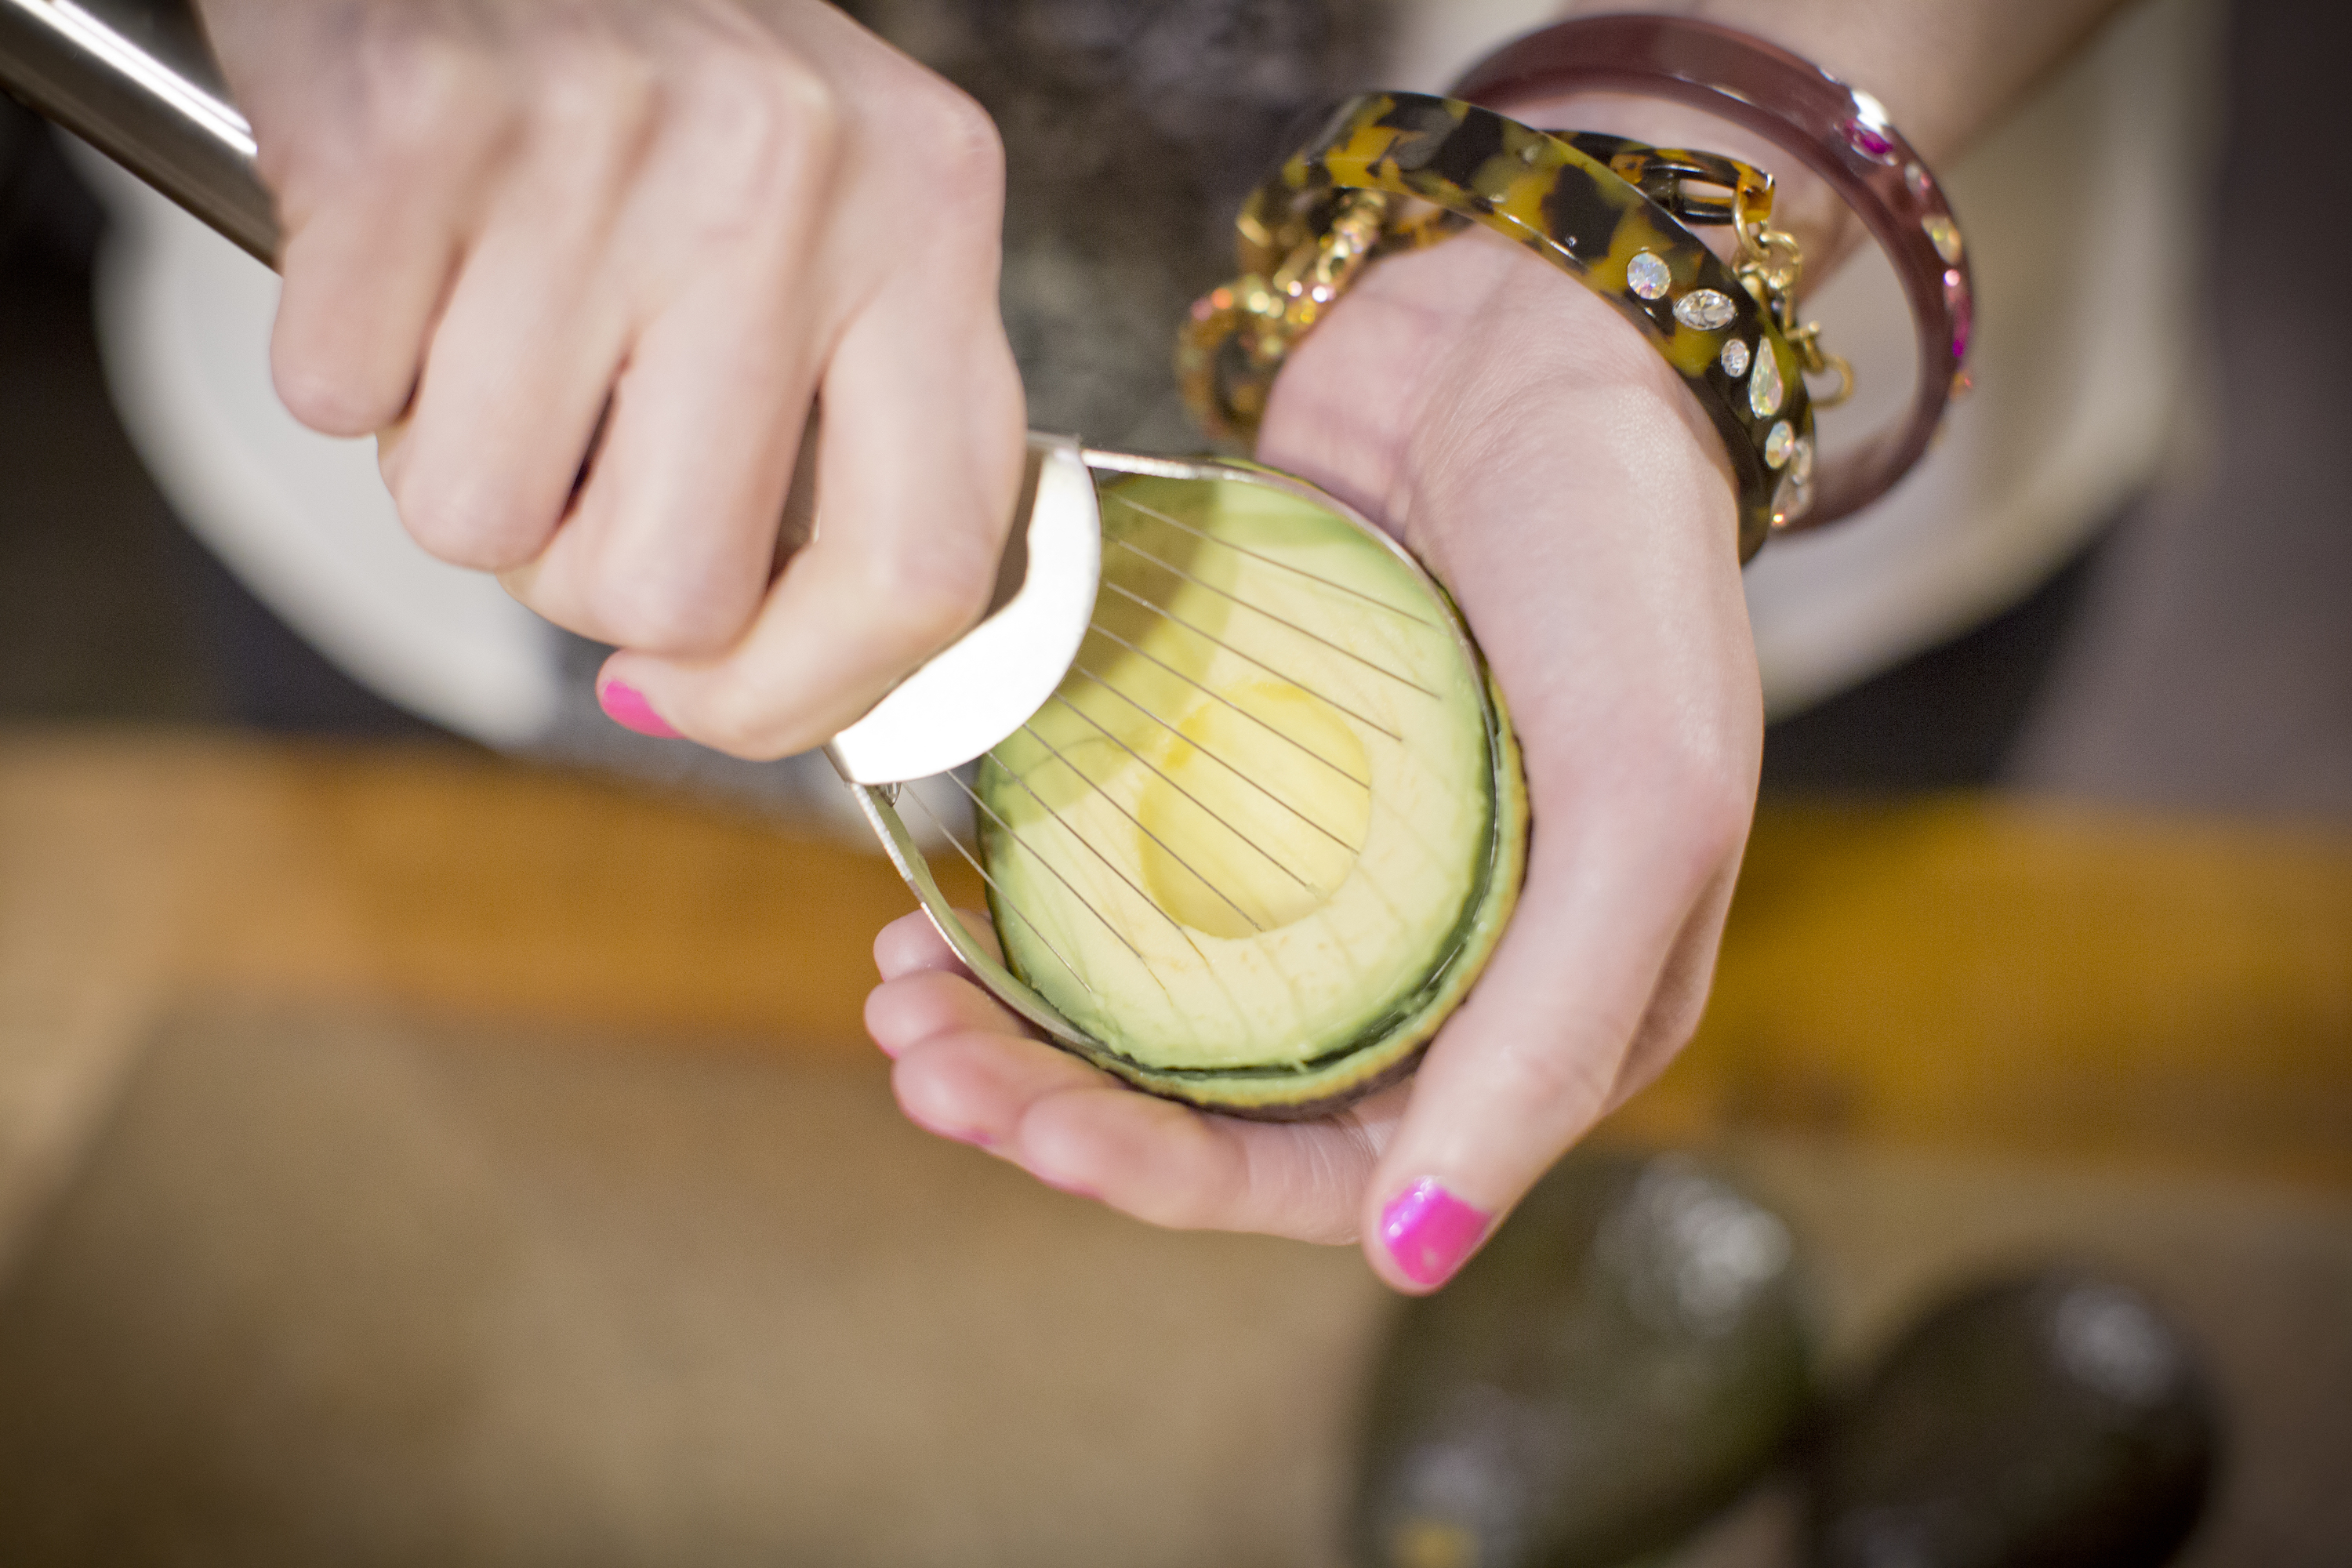
We decided that two ingredients in the sandwich and one on top works out nicely. All you do is choose a tasty cheese and a bread then select one other items to go inside. For solid, non-melty things, like avocados, you want thin slices.
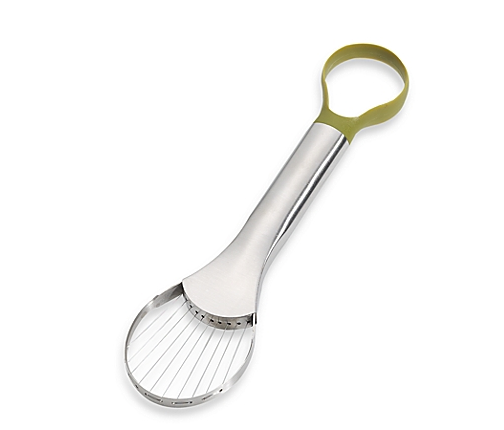
We love substituting avocado for some of the cheese on our grilled cheese, and the Amco Houseworks Avocado Slicer & Pitter helps to quickly make thin slices of avocado that fit into a grilled cheese or a taco.
Adding a small sprinkle of hard cheese like Parmesan or Asiago to the top of your grilled cheese is a game changer. We just grate 1/4 cup of Parmesan on our Microplane Extra Coarse Elite Series Grater, which came with a handy measuring cup that fits right under it to catch the cheese, and sprinkle a little light parm on top before we close the waffle maker lid.
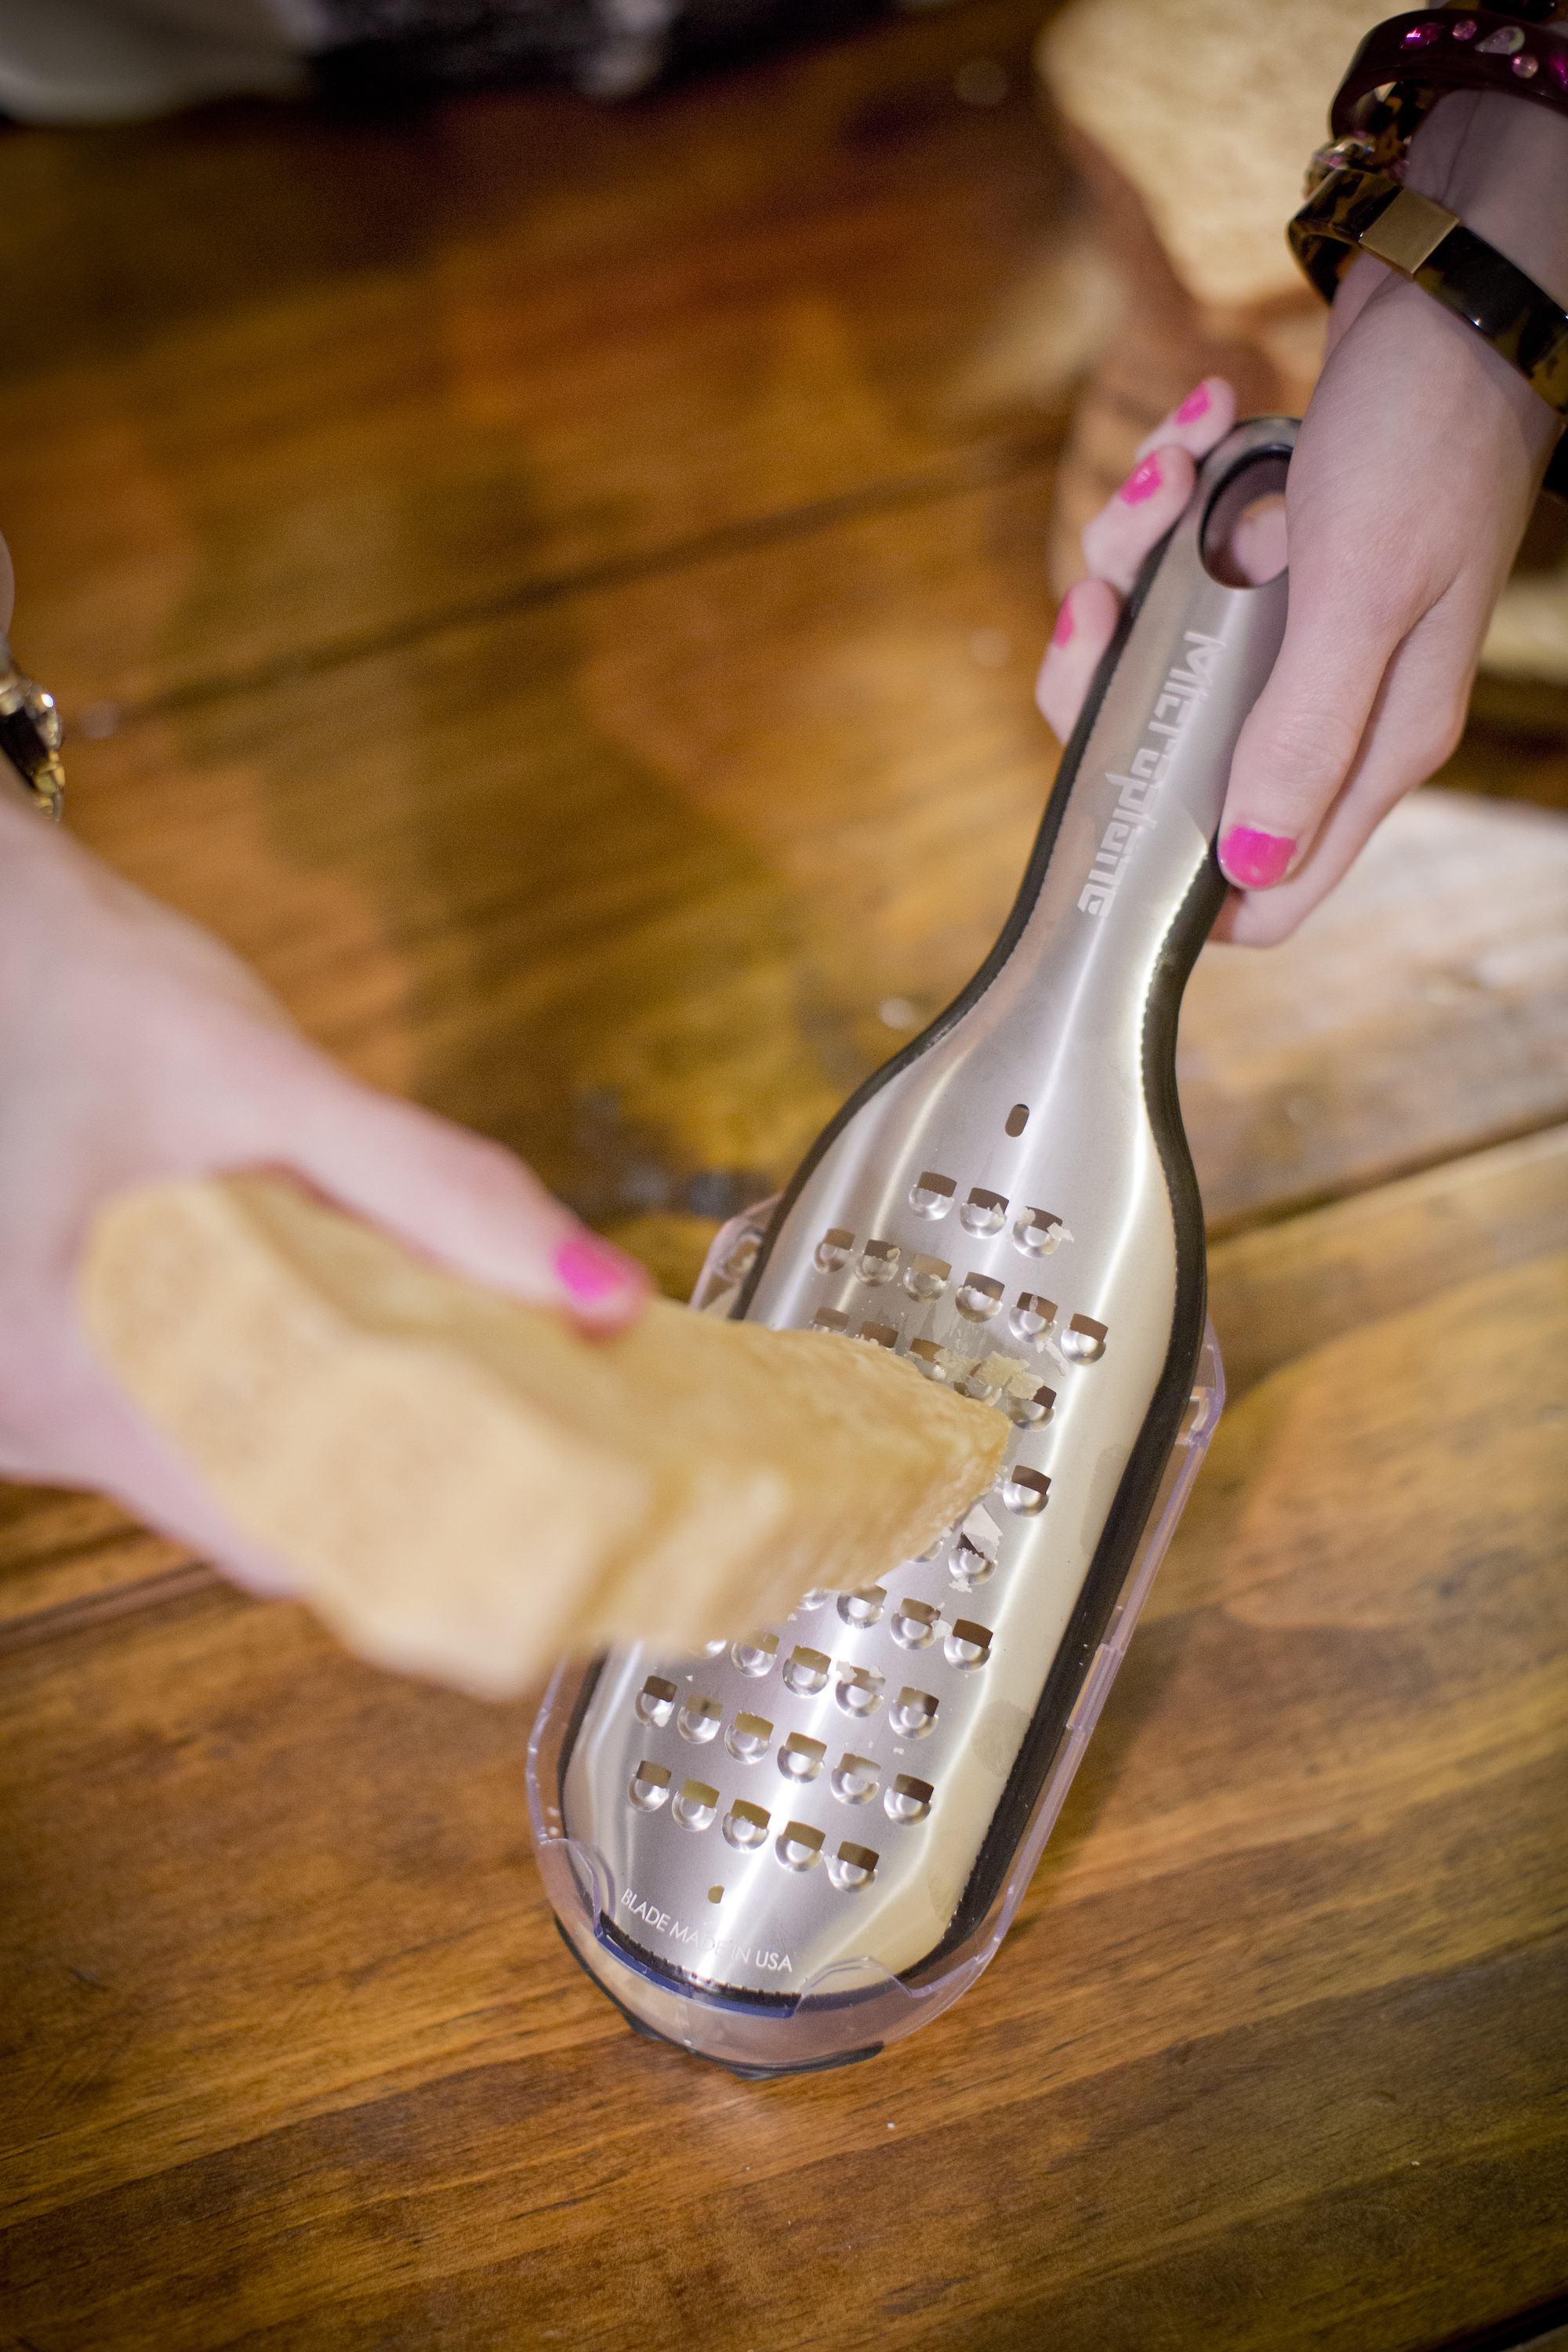
This gives you a savory and crispy crunch to the bread!
So go ahead and be as creative as you’d like, or use your
favorite standby grilled cheese on white bread with American cheese. The truth
is, making your next grilled cheese in your waffle maker makes it brand-new
again. Once you give it a shot, you may never make it any other way!
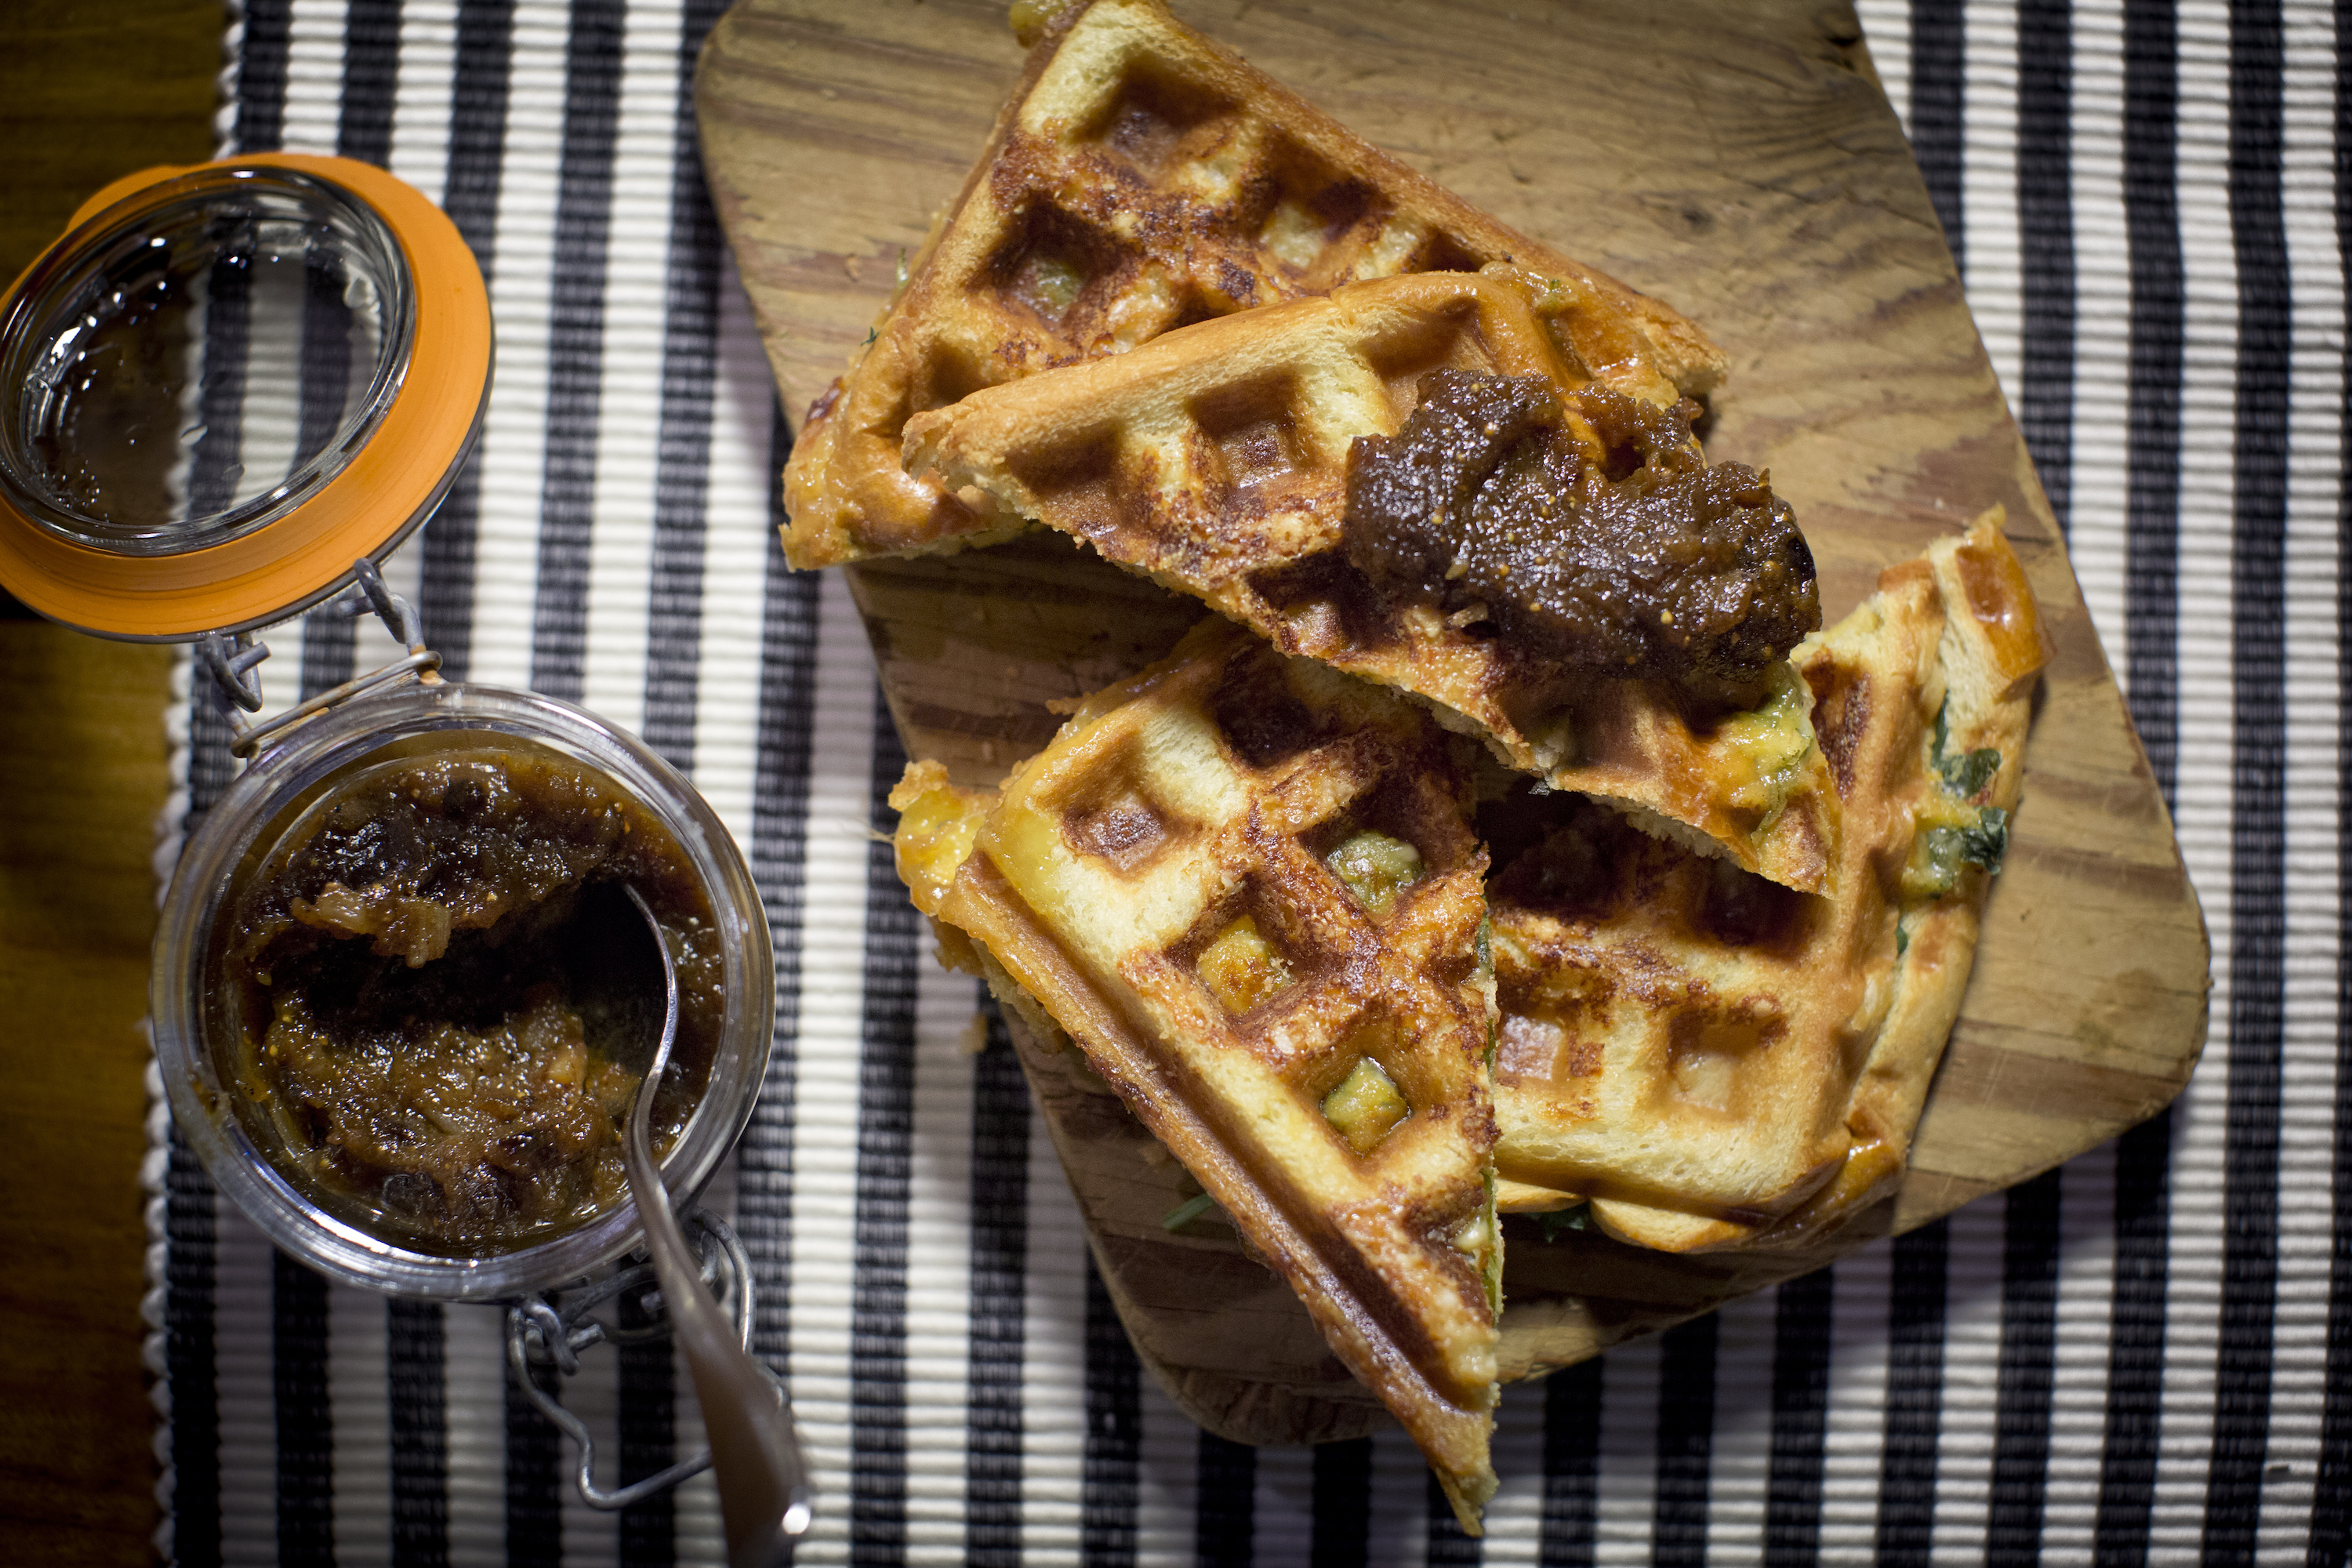
Smoked Gouda Grilled Cheese Topped with Arugula + Fig & Shallot Jam

INGREDIENTS
For the Fig & Shallot Jam:
- 1 tablespoon butter
- 1/2 cup diced shallot
- 1/2 cup fig jam or preserves
- 1 tablespoon champagne vinegar
- 1/2 teaspoon black pepper
- Kosher salt to taste
For the Grilled Cheese:
- 8 slices brioche bread
- 1½ tablespoons softened butter
- 8 oz. sliced smoked gouda
- 2 cups loosely packed arugula
- ¼ cup micro-planed parmesan cheese
- Fig & Shallot Jam
INSTRUCTIONS
For the Fig & Shallot Jam:
- In a small frying pan over medium heat, melt the butter and add the shallots. Allow shallots to cook until translucent and starting to brown, which will take 5 to 6 minutes.
- Remove pan from heat. To the pan, add the fig jam, vinegar, black pepper, and salt. Stir to incorporate all ingredients.
- Place the jam in a small jar to cool until ready to use. Fig & Shallot Jam will keep for up to a week in an airtight container in the fridge.
For the Grilled Cheese:
- Make the Fig & Shallot Jam according to the recipe and set aside.
- Spread a small amount of butter on one side of each slice of bread.
- Turn the bread butter-side-down on a cutting board and build your grilled cheese sandwich by placing one slice of smoked gouda on each slice of bread.
- Onto half of the stacks, place 1/2 cup of the arugula and then bring the two stacks together to form the sandwich. (The order starting at the top is butter, bread, cheese, arugula, cheese, bread, butter.)
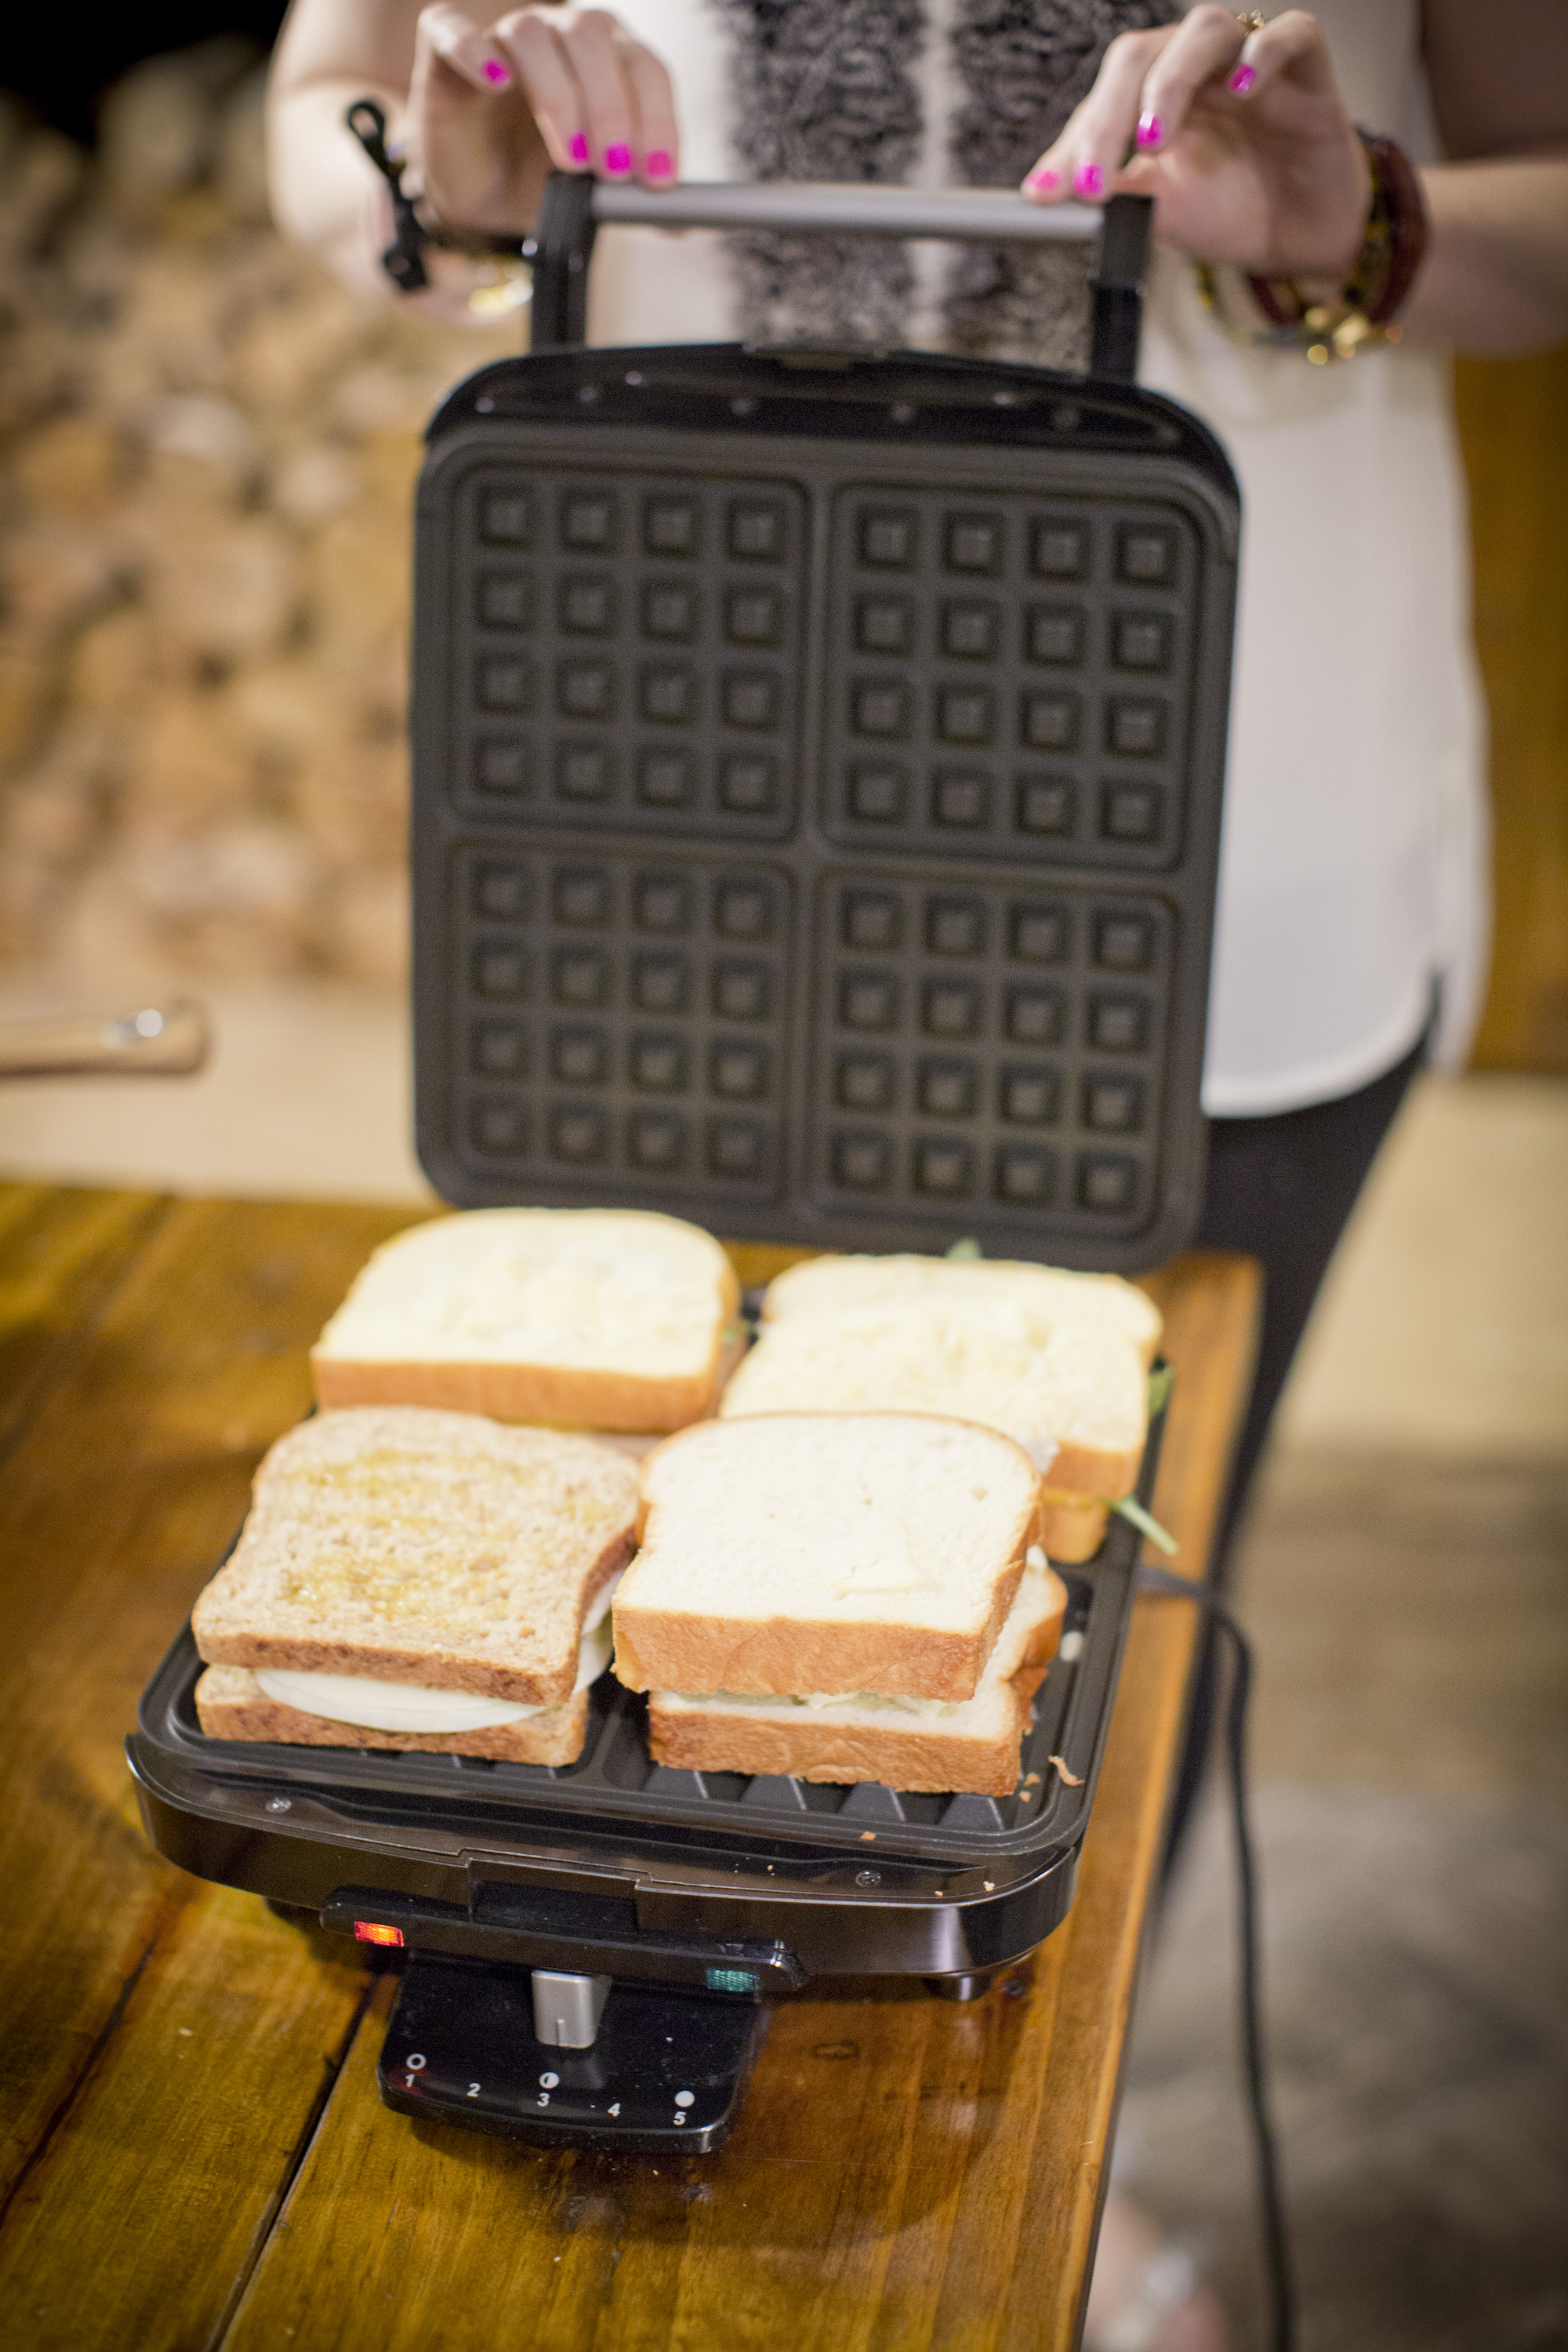
- Plug in your waffle maker and set the slider to medium. Allow the appliance to preheat; the green light will be illuminated when it’s ready.
- Place each sandwich onto 1/4 of the waffle grid. Sprinkle the tops of the sandwiches with 1 tablespoon each of the parmesan cheese and pull the lid down. Depending on the thickness of your bread, the lid probably won’t close all the way. That’s fine! Just give it a little gentle pressure and then let the sandwiches cook for 4 minutes.
- The green indicator light will let you know when they’re ready. Lift the lid and remove the grilled cheese sandwiches. Allow them to cool for 2 minutes.
- Cut them in half and spread the top of each with a generous amount of Fig & Shallot Jam.

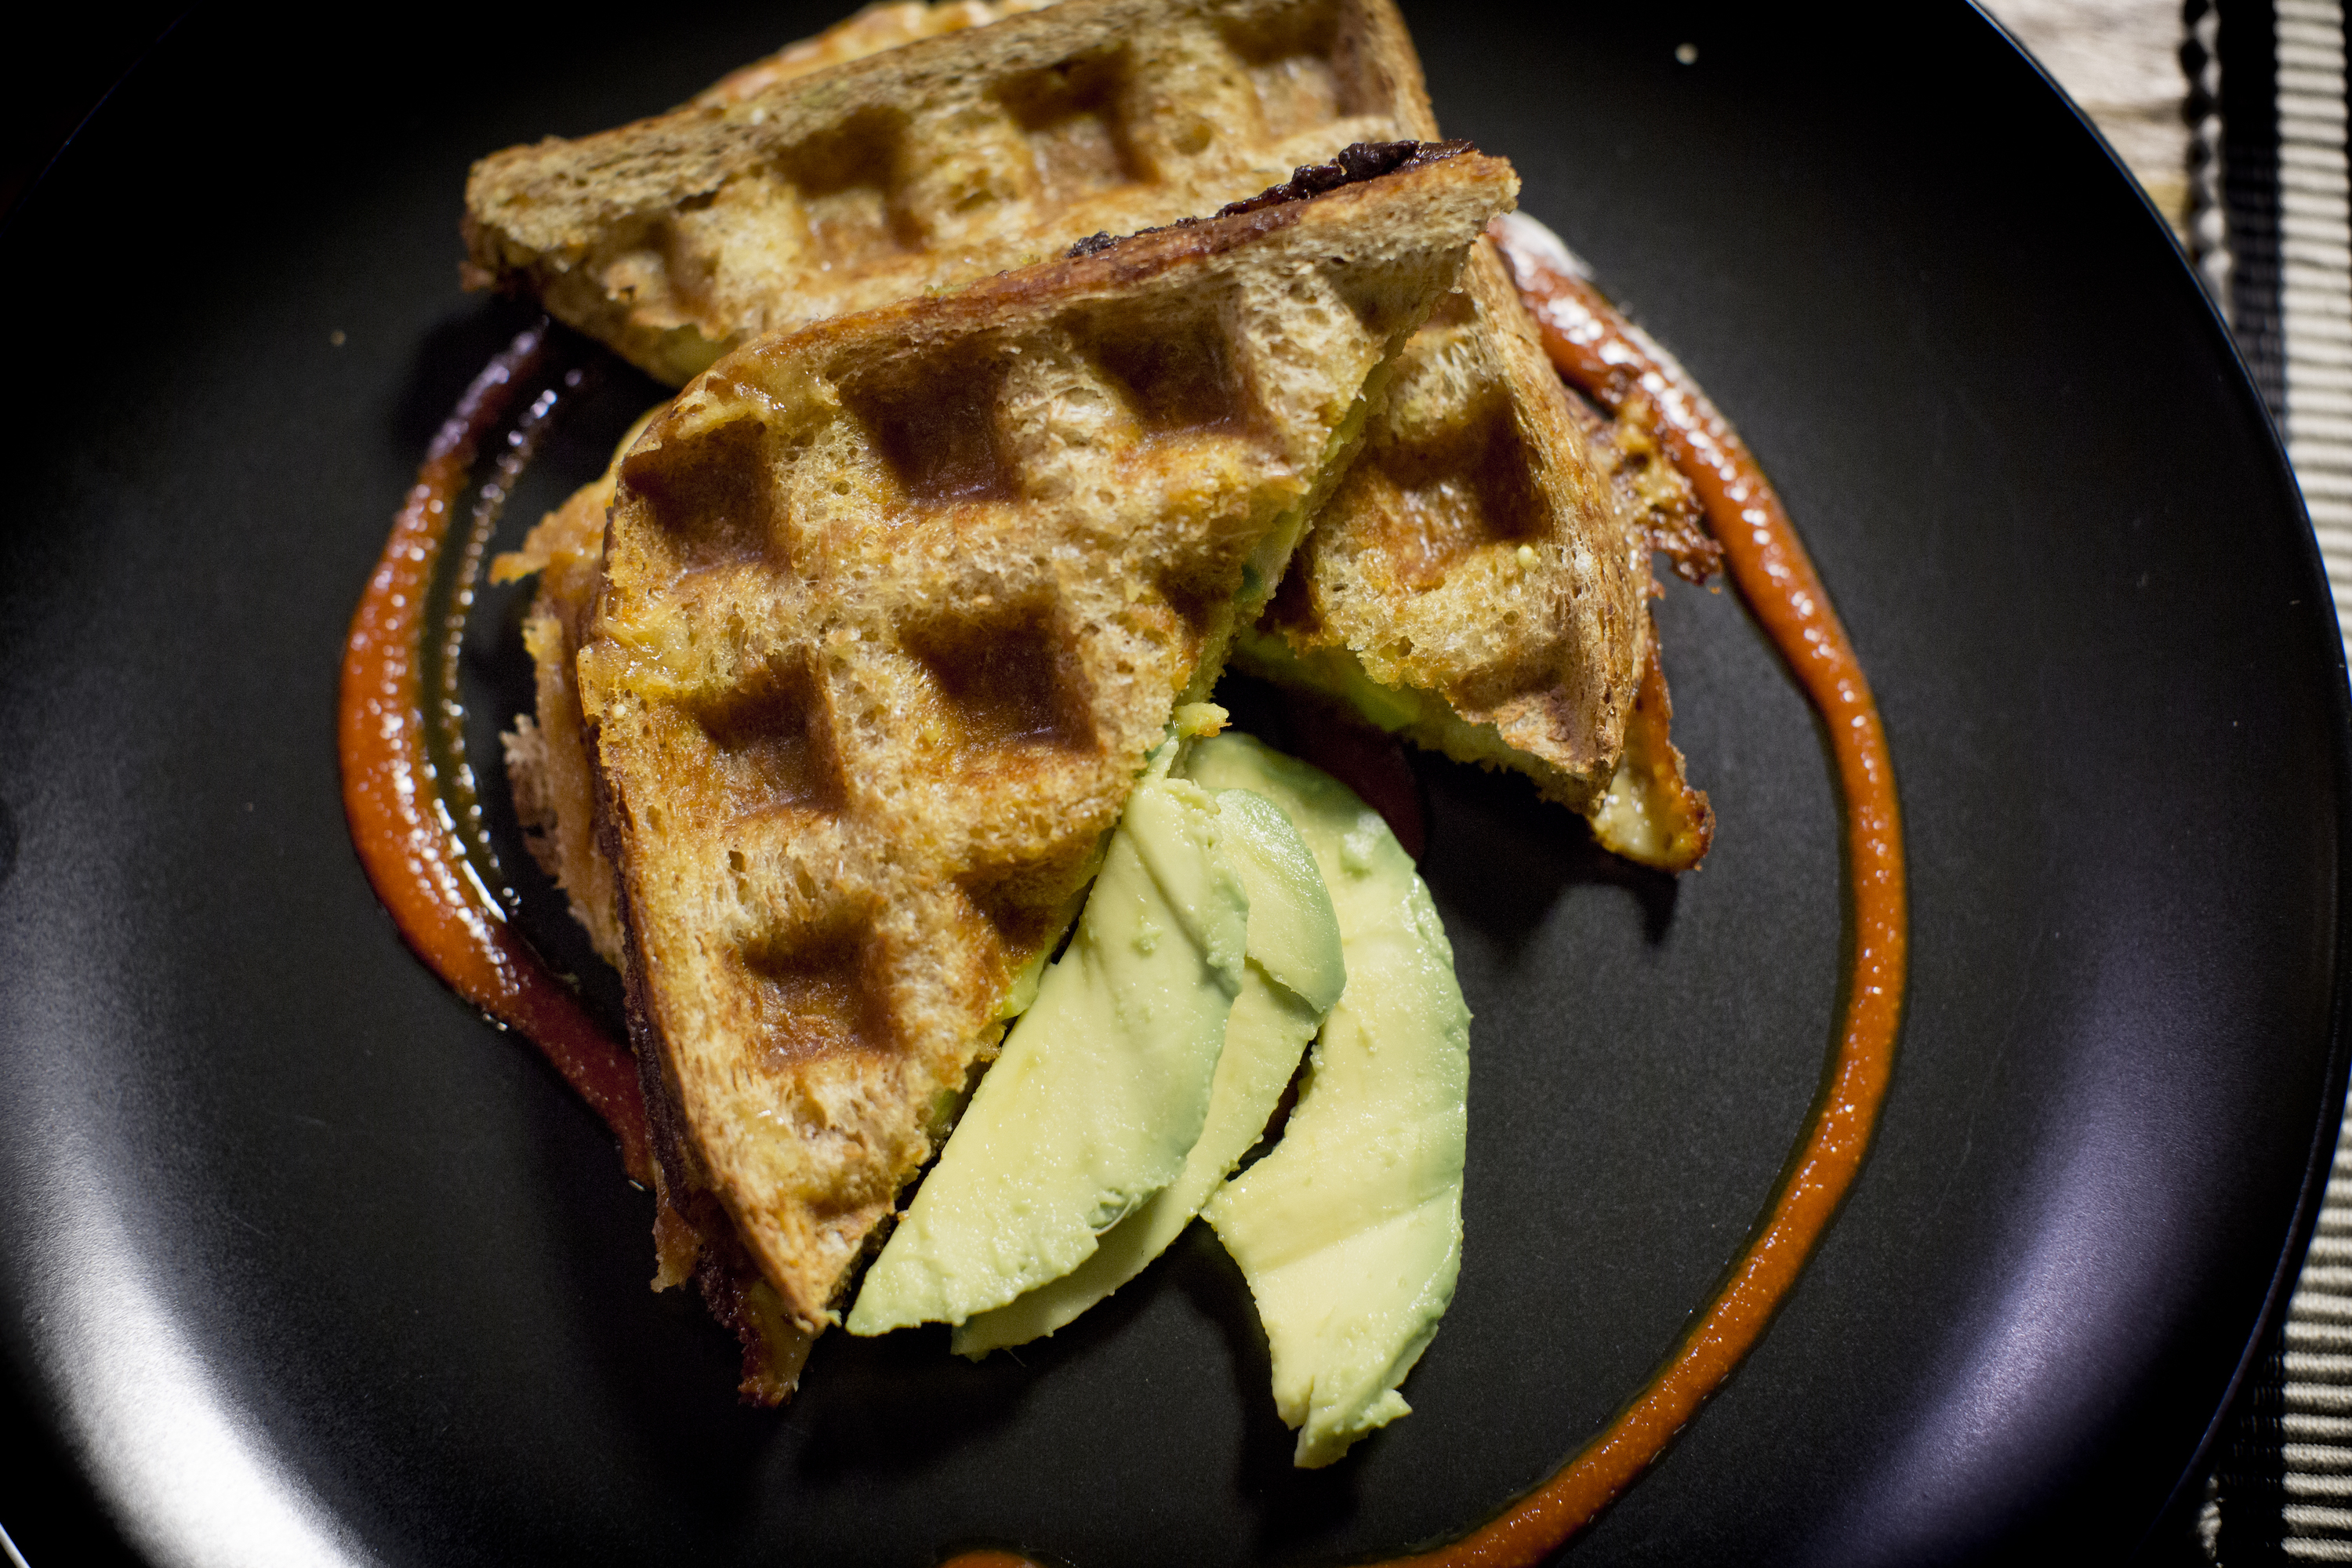
Sriracha + Avocado Grilled Cheese on Sprouted Whole Wheat
INGREDIENTS
- 1 ½ tablespoons olive oil
- 8 sprouted whole wheat bread
- 8 oz. sliced provolone
- 2 medium sliced avocados
- Sriracha (to taste)
INSTRUCTIONS
- Drizzle a small amount of olive oil on one side of each slice of bread. Turn the bread oil-side-down on a cutting board and build your grilled cheese sandwich by placing one slice of provolone on each slice of bread.
- Onto half of the stacks, place 4 or 5 slices of avocado, and on the other half, squeeze some sriracha. Bring the two stacks together to form the sandwich. (The order starting at the top is olive oil, bread, cheese, avocado, sriracha, cheese, bread, olive oil.)
- Plug in your waffle maker and set the slider to medium. Allow the appliance to preheat; the green light will illuminate when it’s ready.
- Place each sandwich onto 1/4 of the waffle grid. Pull the lid down. Depending on the thickness of your bread, the lid probably won’t close all the way. That’s fine! Just give it a little gentle pressure and then let the sandwiches cook for 4 minutes.
- The green indicator light will let you know when they’re ready. Lift the lid and remove the grilled cheese sandwiches. Allow them to cool for 2 minutes.
- Cut them in half and serve with a few extra slices of avocado and some extra Sriracha.
Brie + Chocolate Dessert Grilled Cheese with Vanilla & Honey Oranges
INGREDIENTS
For the Vanilla & Honey Oranges:
- 2 medium minneola oranges (peeled and pulled into segments)
- ¼ cup local honey
- 1 teaspoon vanilla
- ¼ teaspoon kosher salt
For the Grilled Cheese:
- 8 slices butter-crust bread
- 1½ tablespoons softened butter
- 8 oz. double cream brie
- 3.5 oz. (one bar) 72% dark chocolate
- Vanilla & Honey Oranges
INSTRUCTIONS
For the Vanilla & Honey Oranges:
- Into a medium jar, place the orange segments, honey, vanilla, and salt. Place the lid on the jar and shake to incorporate.
- Set aside in the fridge until ready to use. The oranges will give up some of their liquid that will mix with the honey and vanilla to create a syrup.
For the Grilled Cheese:
- Spread a small amount of butter on one side of each slice of bread. Turn the bread butter-side-down on a cutting board and build your grilled cheese sandwich by placing two ounces each of double cream brie on half of the slices of bread.
- Onto each of the other half of the slices, place 1/4 of the bar of chocolate. Bring the two sides together to form the sandwich. (The order starting at the top is butter, bread, cheese, chocolate, bread, butter.)
- Plug in your waffle maker and set the slider to medium. Allow the appliance to preheat; the green light will illuminate when it’s ready. Place each sandwich onto 1/4 of the waffle grid. Pull the lid down. Depending on the thickness of your bread, the lid probably won’t close all the way. That’s fine! Just give it a little gentle pressure and then let the sandwiches cook for 4 minutes.
- The green indicator light will let you know when they’re ready. Lift the lid and remove the grilled cheeses using a spatula. Allow them to cool for 2 minutes.
- Cut them in half and top of each with a few Vanilla & Honey Orange segments and a drizzle of the syrup that’s collected at the bottom of the jar.