At some point, my kids need to evolve from spoonfed toddlers to being able to follow a recipe, master kitchen techniques, and make themselves dinner. There’s no better time than summer to help them take risks and learn new skills in the kitchen, simply because there’s less stress and more free time. So each summer, I set out to try a few new kitchen projects with them, and lately I’ve been letting them drive the choices.
Sushi was high on everyone’s list to learn how to make. I have rolled my own a few times but took the opportunity to upgrade the equipment and brush up on technique. I love sushi because it involves minimal cooking (perfect for summer) and lots of chopping (which I find meditative), plus it’s just plain fun to make. It doesn’t have to contain raw fish, if your family’s not into that. Mine was full of veggies and some cooked crab— our version of a California roll—but you could throw almost anything in that seaweed/rice blanket and call it dinner.
True story: When I first moved to LA I had never tried sushi and I spent about 6 months ordering the “Chicken Teriyaki Roll” at our neighborhood joint before I finally braved my first spicy tuna roll. But I digress…
Here’s a walkthrough of how I got my roll on.
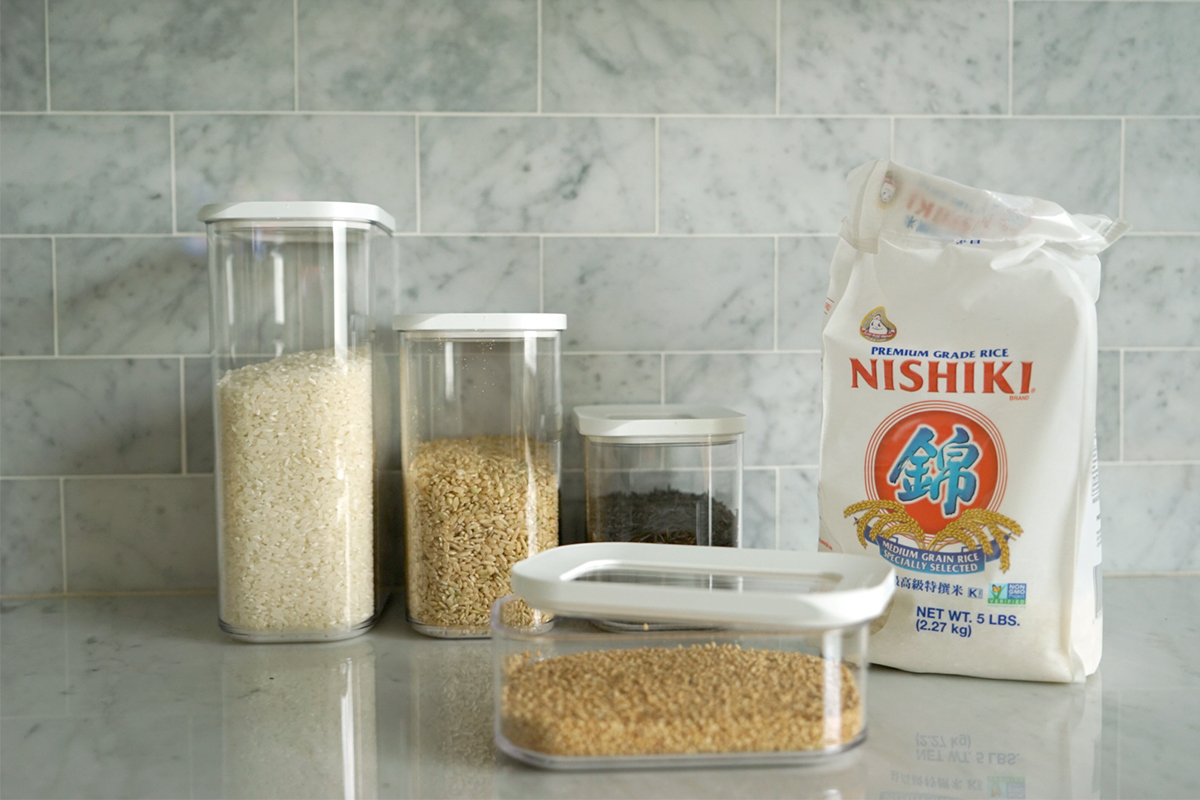
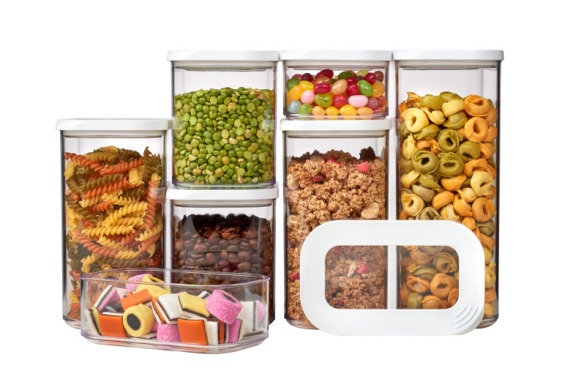
Storage is key when it comes to keeping rice fresh (and pest-free) in your pantry. These containers from Rosti Mepal stack neat and tidy. The lids are all the same size — meaning that they’re effortlessly stackable no matter the capacity.
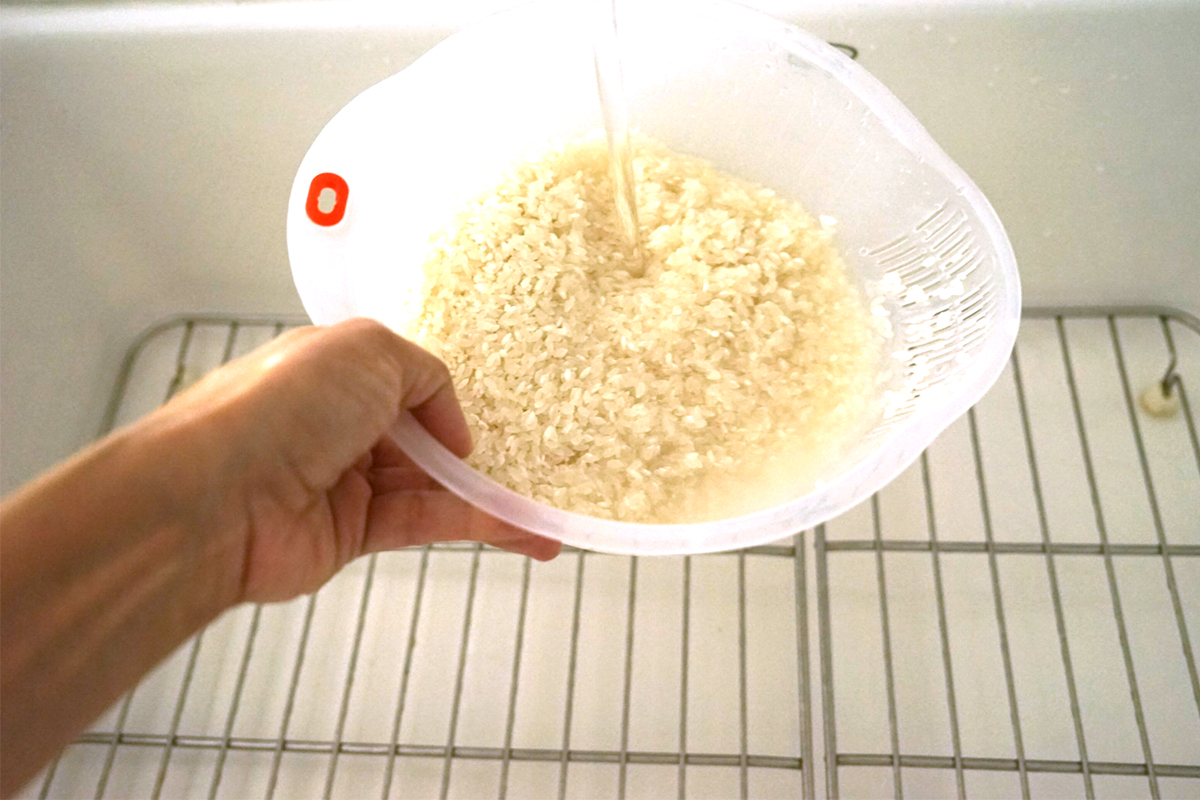
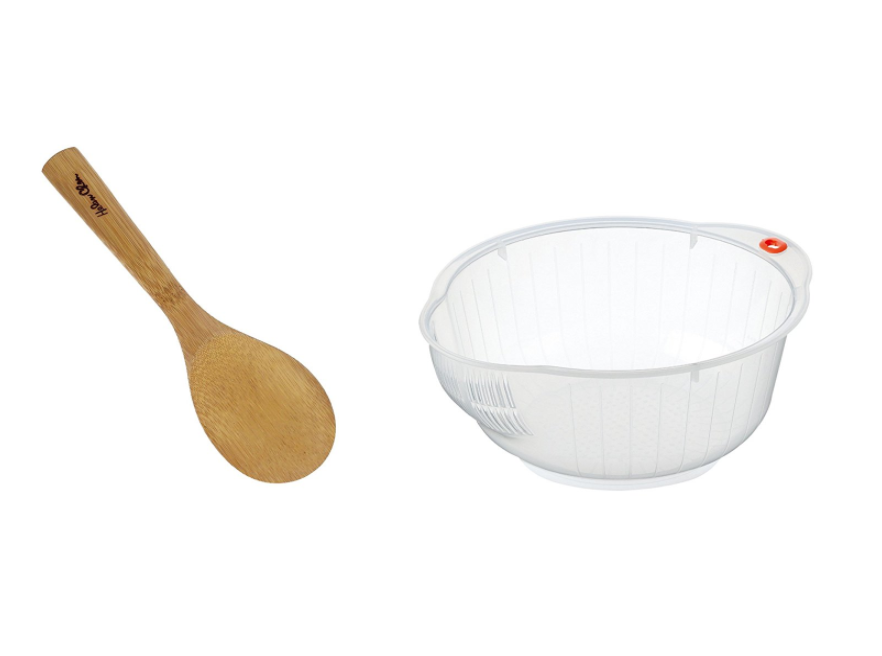
Rinsing the rice is key to getting that perfect sticky consistency. It’s a step I always used to skip, but never again— it makes a huge difference. This strainer from Harold Imports is especially designed to swirl your rice around and drain it easily.
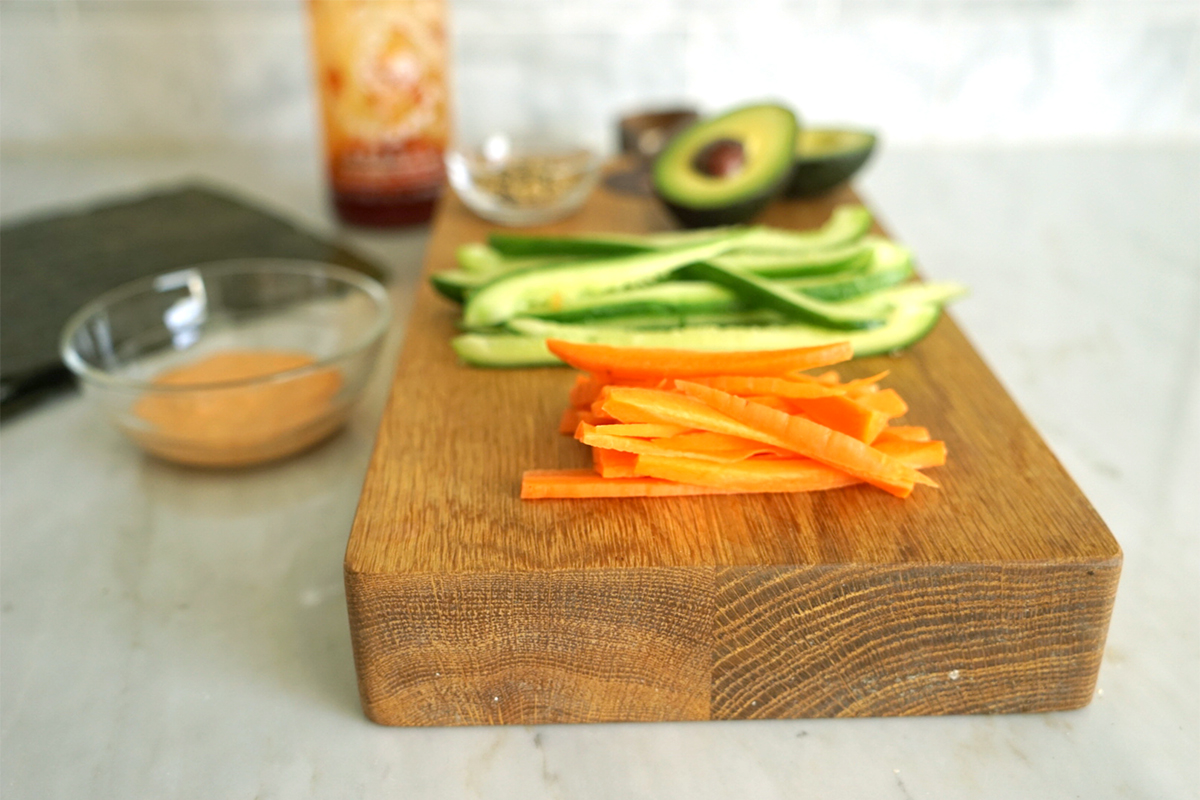
It’s great to get all your fillings ready in advance, so you can assemble those rolls quickly (because sushi making can make you hungry!). I’ve sliced some avocado, and julienned some cucumber and carrots. I also mixed some mayo and sriracha to make a spicy sauce. Not seen, the cooked crab claws I shelled. Yum.
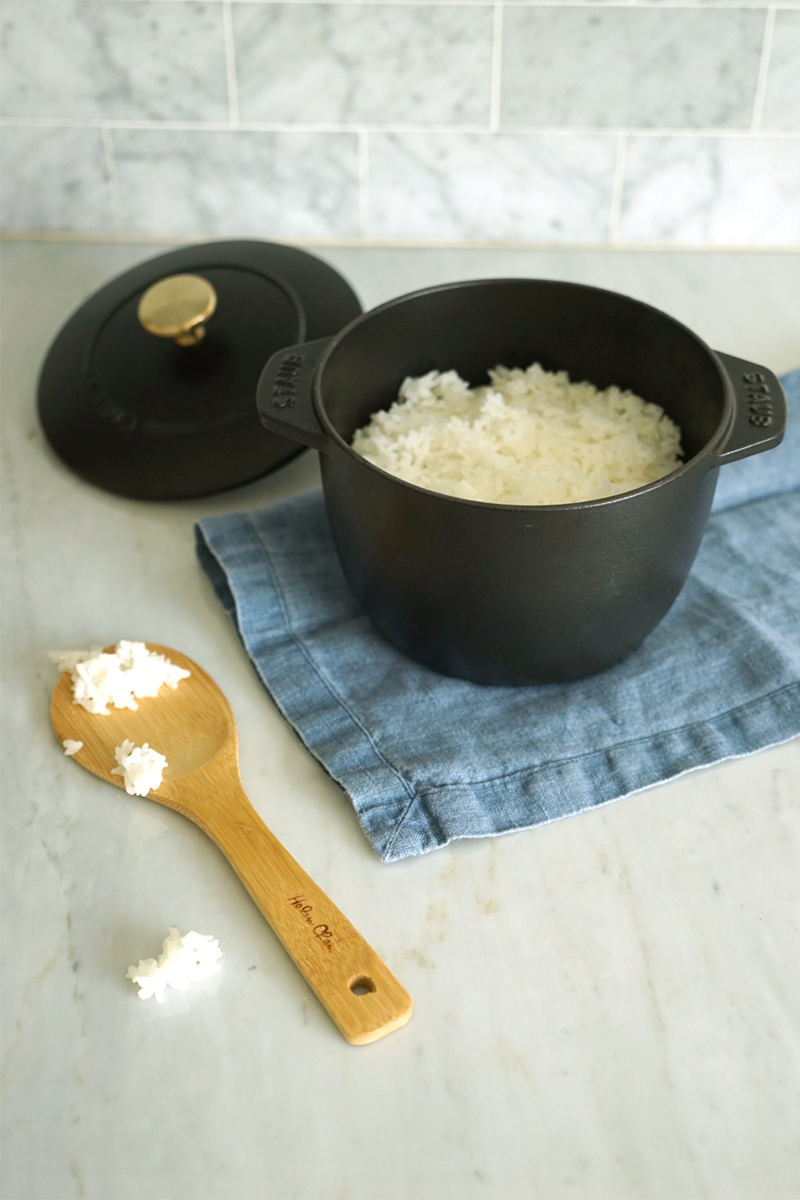
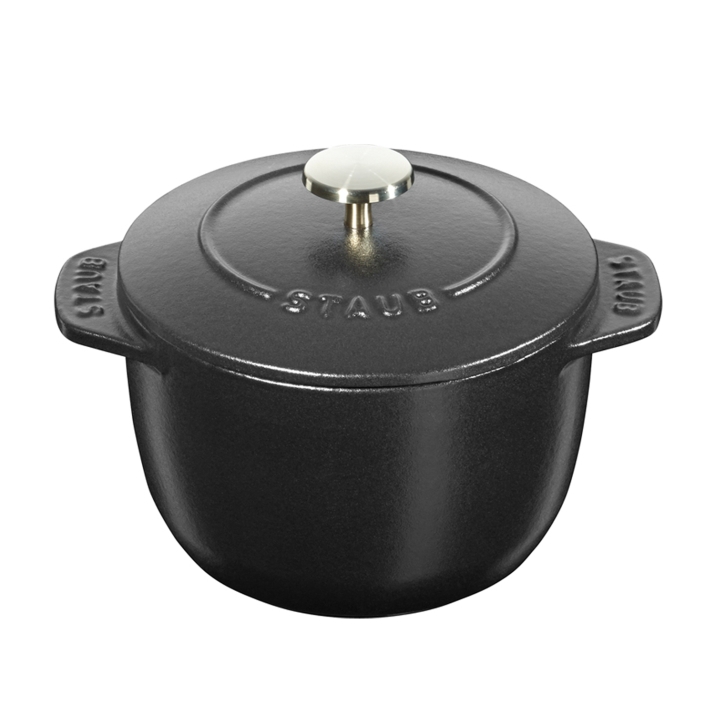
Sticky rice is a must for any sushi-making project — after all, the word “sushi” itself refers to the vinegar-ed, or sour-tasting, rice that’s paired with fish or one of the other ingredients mentioned above. This Staub Petite Round Oven is perfect for making amazing rice lo-tech style, thanks to the raised surface on the inside of the lid (call a “chistera” pattern), which is designed to return moisture to dishes as they cook.
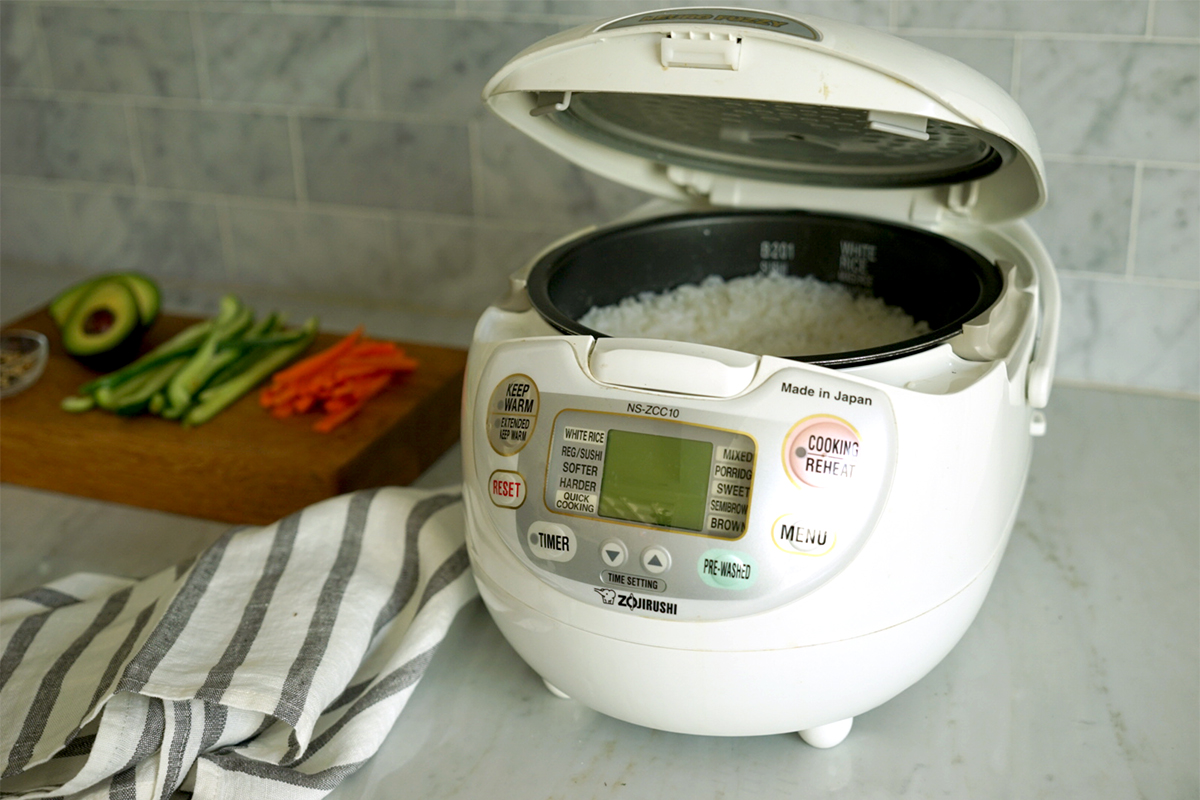
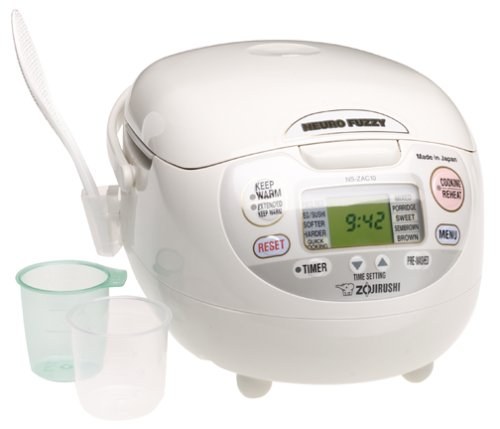
I’ve had versions of this rice cooker for decades, and I swear it’s smarter than I am. If you’re looking for something more precise and gadget-y to cook your rice, I recommend the Zojirushi Neuro Fuzzy Rice Cooker. It’s advanced smart technology automatically makes fine adjustments to temperature and heating time, guaranteeing you’ll cook perfect rice every time. It’s great for oatmeal, other kinds of rice, and quinoa too.
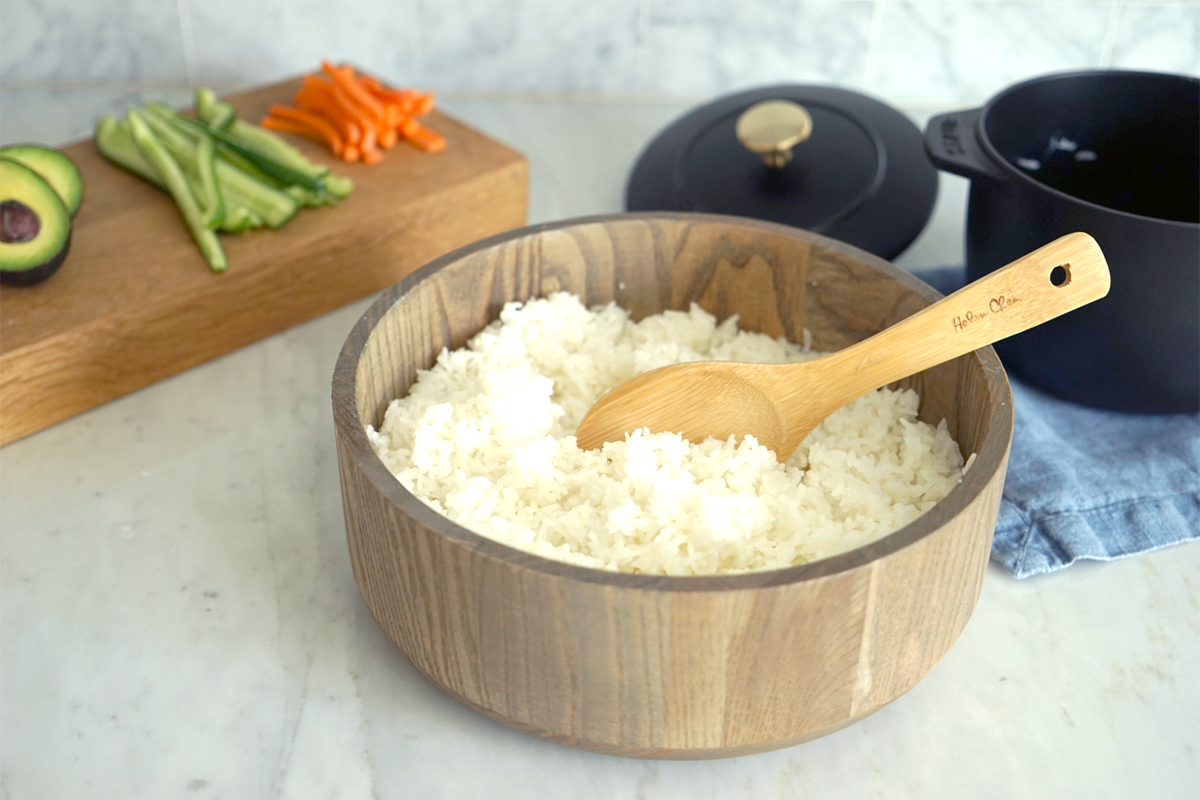
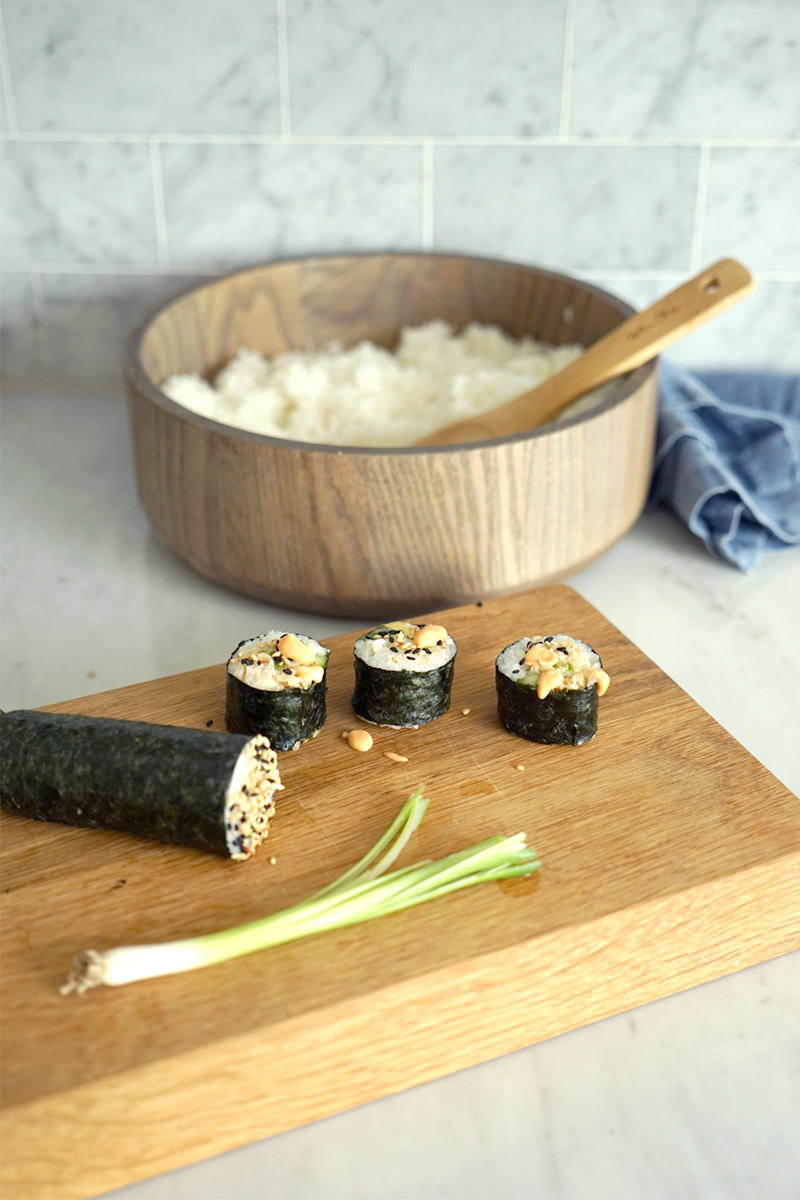
Once your rice is made, it’s time to season it. Rice vinegar is a must, but a little salt and sugar give that sweet/salty restaurant-style taste. This lightweight non-stick bamboo paddle is perfect for handing the rice once it’s cooked (it’s sticky!)
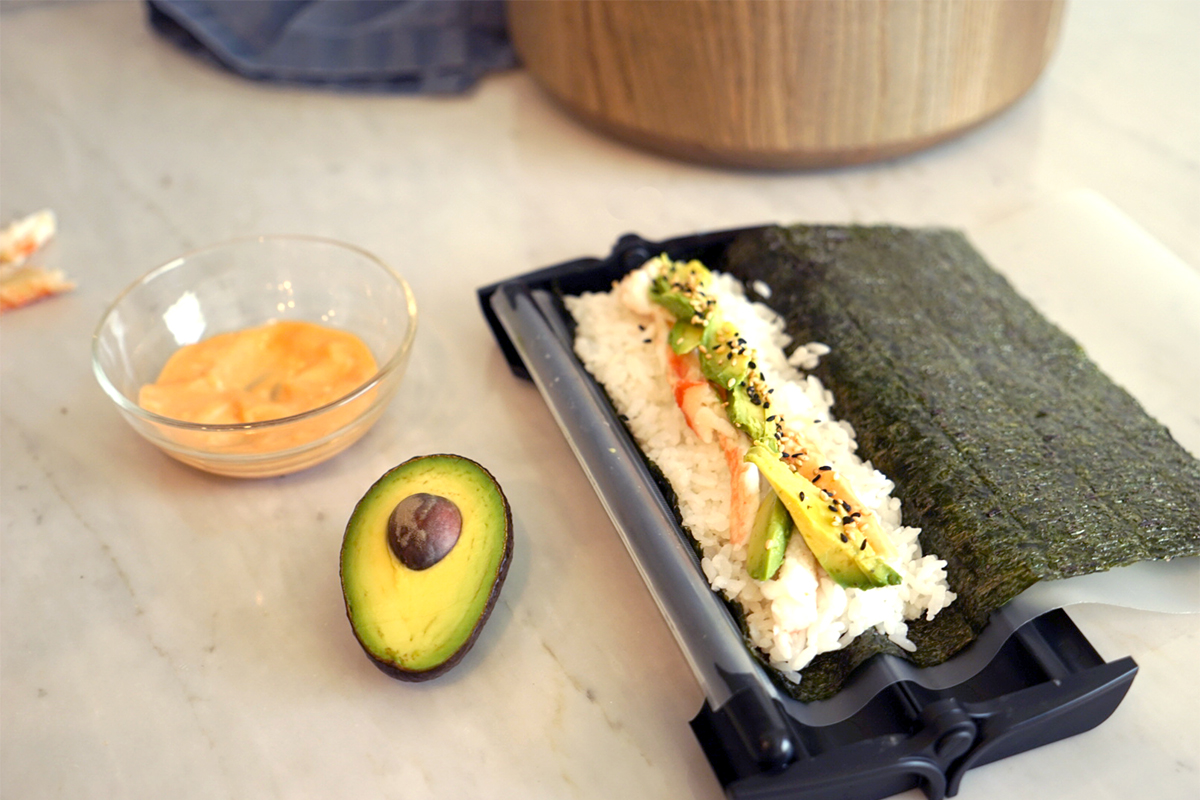
OK we’re at the fun part! This Cuisivin Easy Sushi contraption makes it a cinch to get tight, beautiful rolls— I will not make sushi without it from here on out! Lay a nori sheet on top of the plastic map, then use your paddle to scoop some rice on top, which you’ll press into each chamber of the Cuisivin. Then load your fillings into the middle.
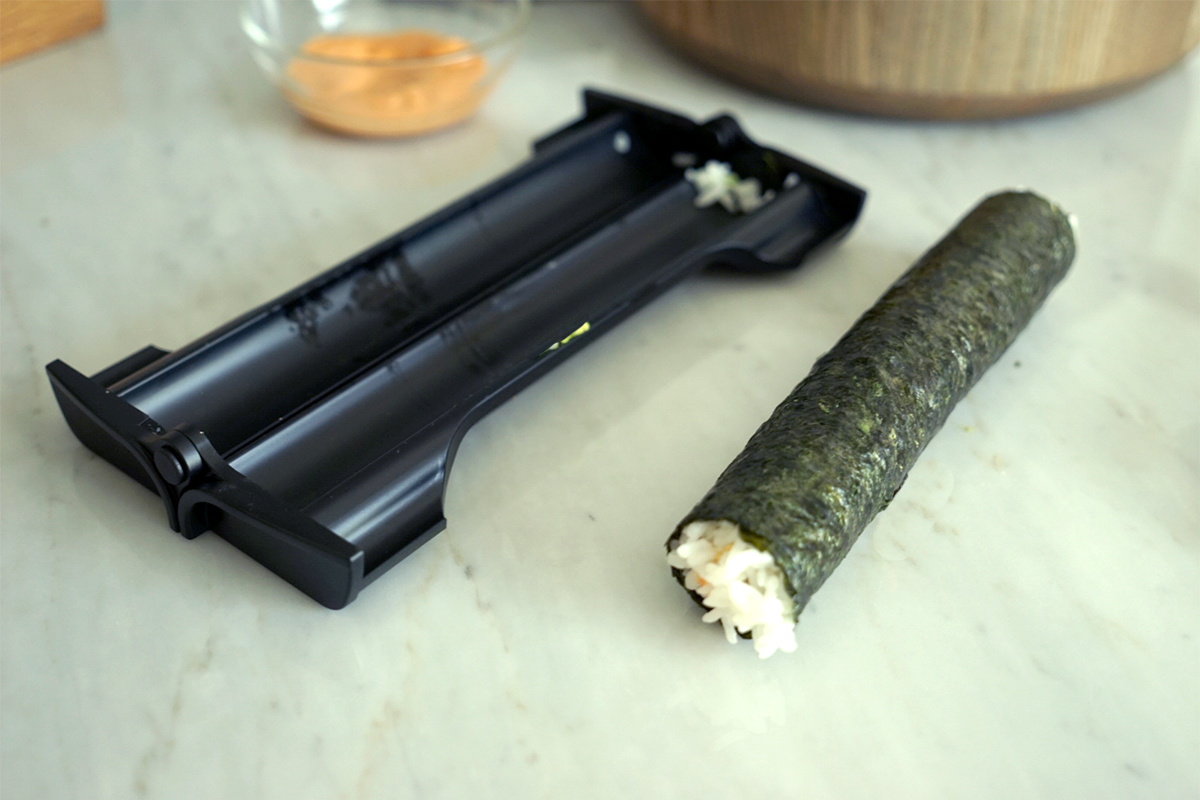
Then close the cover, pull the mat out slowly, and watch as you get tight, restaurant-quality maki rolls without even trying!