
Who doesn’t want a neat & stylish closet?
So, how are we doing on our New Year’s resolution to get organized? I’m no organizing genius, but I do know a thing or two about organization and living your best life. And, since it’s we’re off to fresh starts, let’s talk about paring down and what really belongs in your closet this time of the year.
Here are 6 really simple steps to organizing your sweaters, winter gear and finding your way to less stuff and a neat, stylish closet:
Step One: Prep
Before you begin, design your style and this project could very well be your next (or first) organizing masterpiece. Currently, I have wire storage shelves in my closet. Since they’re not going away anytime soon, there was no alternative. It was time for me to get creative. Using Hester & Cook black + white striped paper table runner, I lined the shelves to cover the wire and to add color + style. I used double-sided foam mounting tape to keep the “overhang” of the front edges in place and in 30 minutes or less, the wire disappeared.
Whether you’re organizing a category of your wardrobe or your entire closet, gather those items together and remove everything from that space, drawer or closet. I. mean. everything. I work best on the floor, so I spread out a big white blanket or sheet. It’s a personal thing, but I use white because items seem less complicated to me and the floor gives me space to edit, sort, pare down and stack by item type and color. Working in a dedicated space rather than in a closet, drawer or armoire also makes it easier to take inventory, remove items that don’t belong in that space and help to determine the type and number of storage containers or hangers you’ll need. Ultimately, it helps to reduce your stuff.
Step Two: Edit
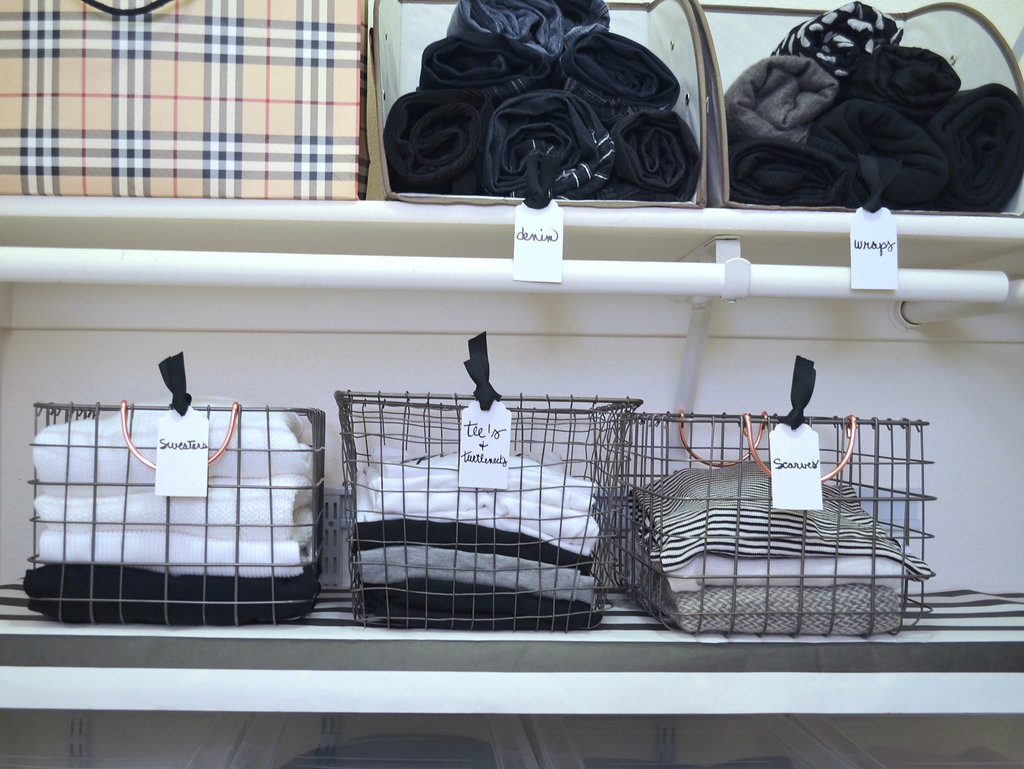
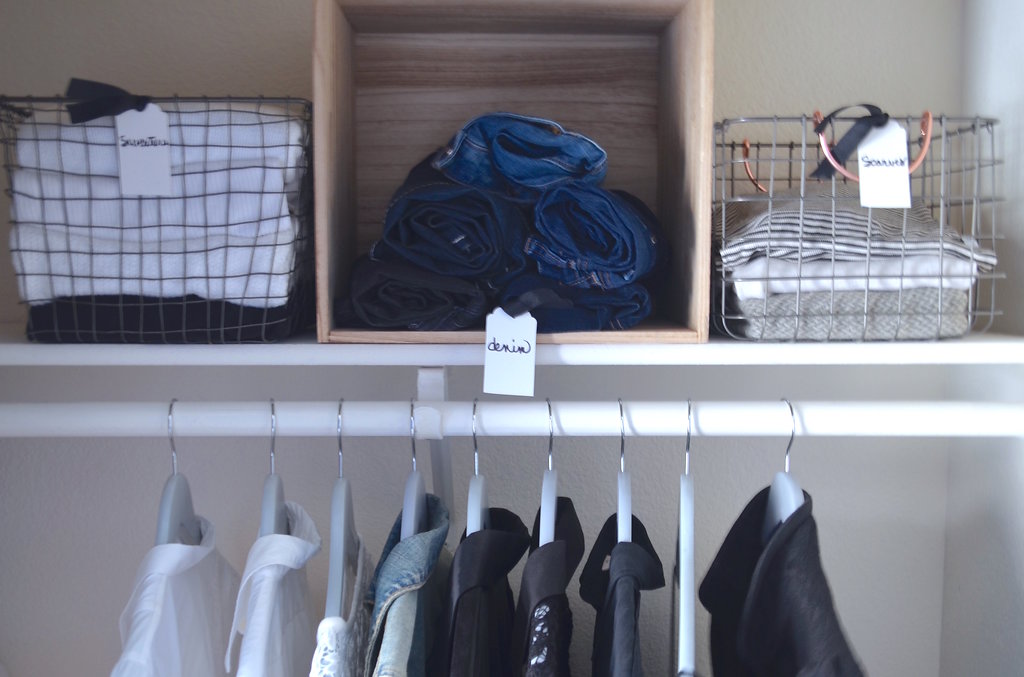
You can never be well organized if you have too much stuff or don’t have the “proper” storage systems in place. Where to begin? Let’s start with what we’re wearing now; sweaters, scarves, tees + turtlenecks, denim, flats, heels, booties and boots. Now is the time to be honest with yourself. Review what’s in front of you, separate and keep what you actually wear, need, what fits right NOW and only the things you love. If you’re on the fence about an item, ask yourself when you wore the item last. If it’s a special occasion piece, keep it. If it’s been a year, it probably doesn’t deserve the space in your drawers or closet. By now, you should be ready to keep the best and donate the rest!
Step Three: Separate, Fold & Stack
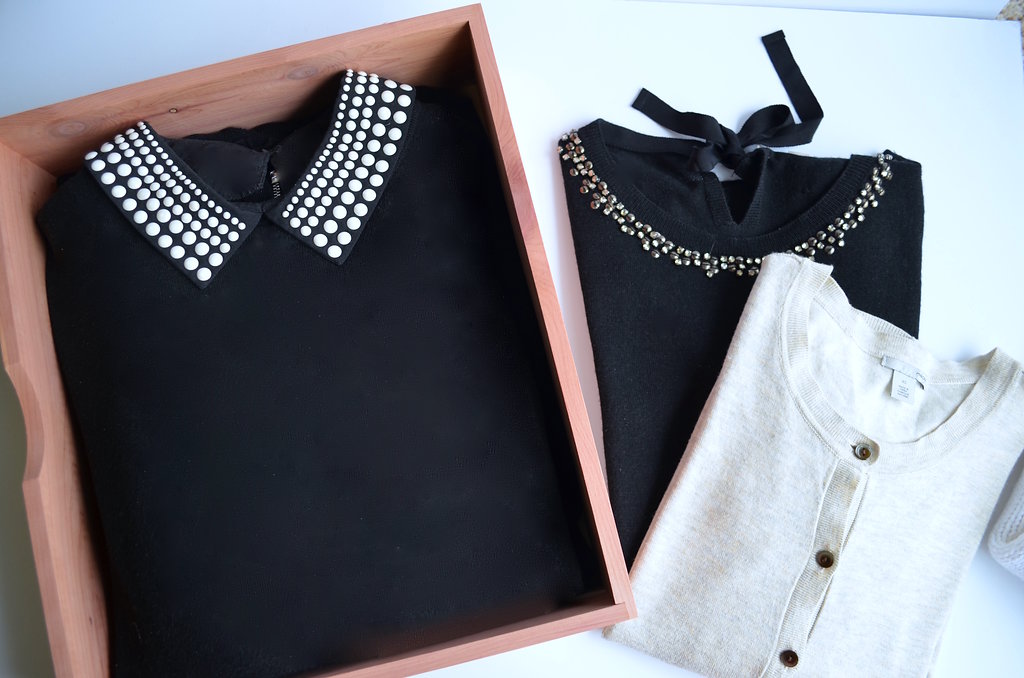
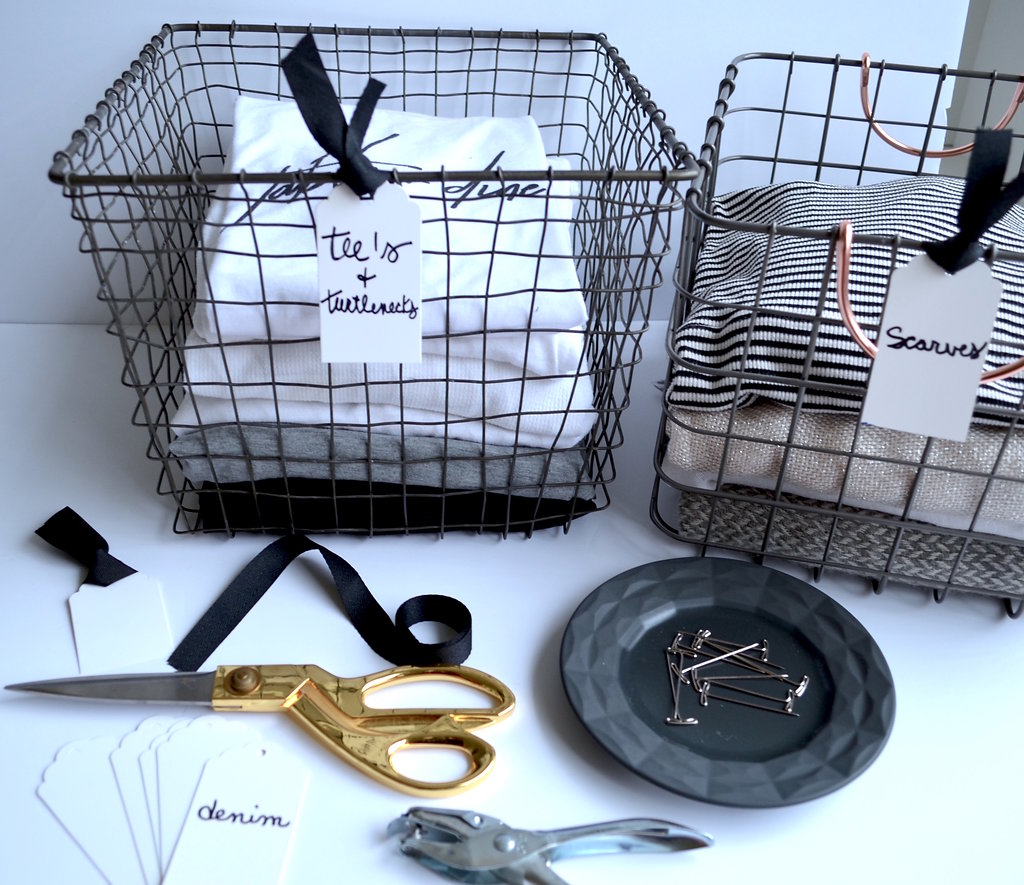
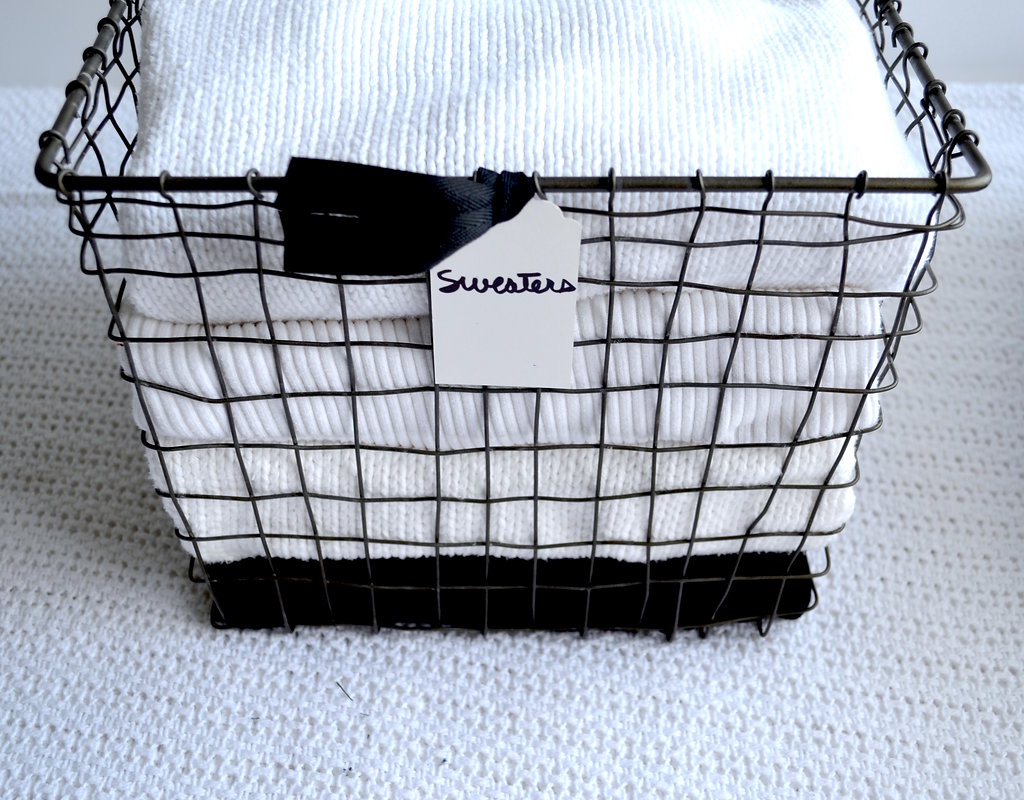
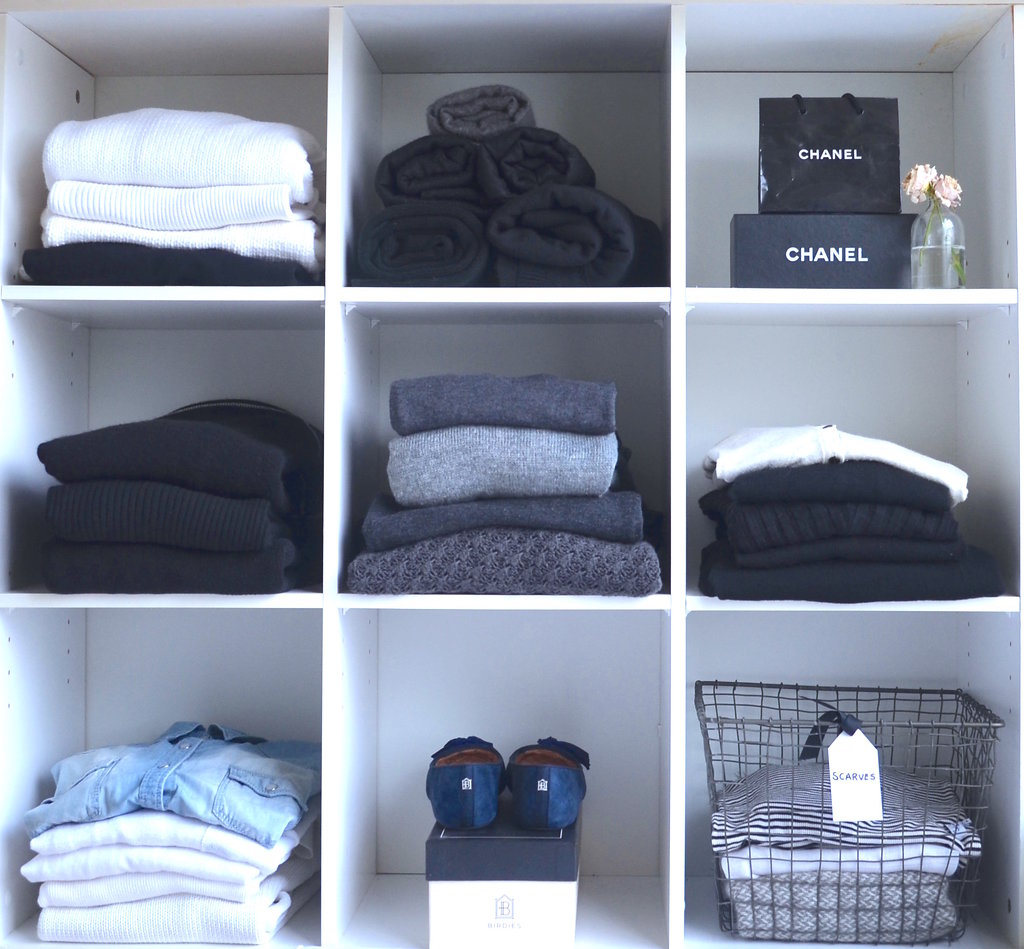
* Fold and stack sweaters, tees + turtlenecks and scarves by color, from dark to light.
* Roll denim.
* Sort flats, heels, booties and boots.
Step Four: Go Shopping
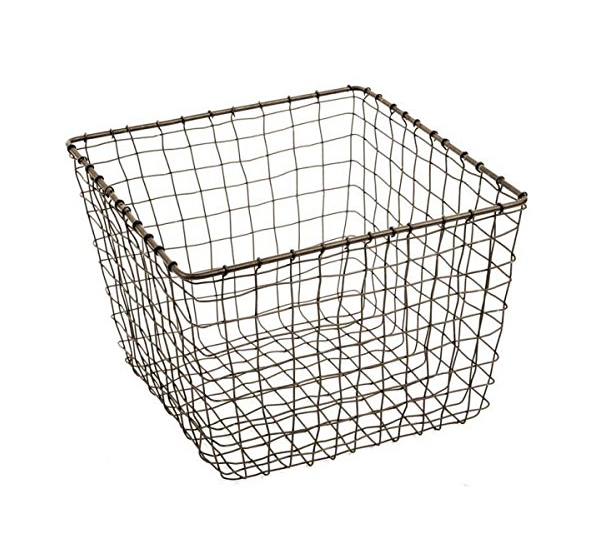
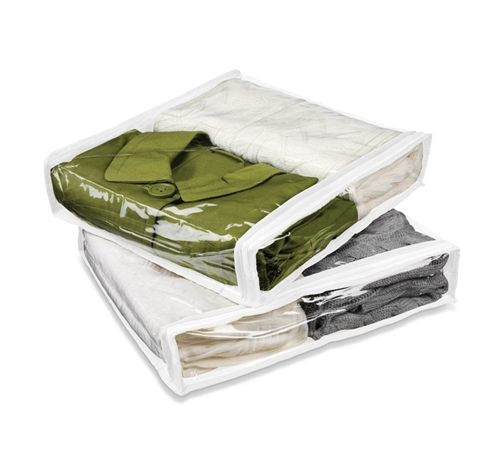
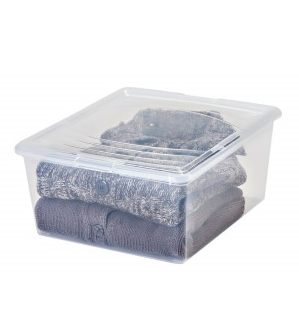
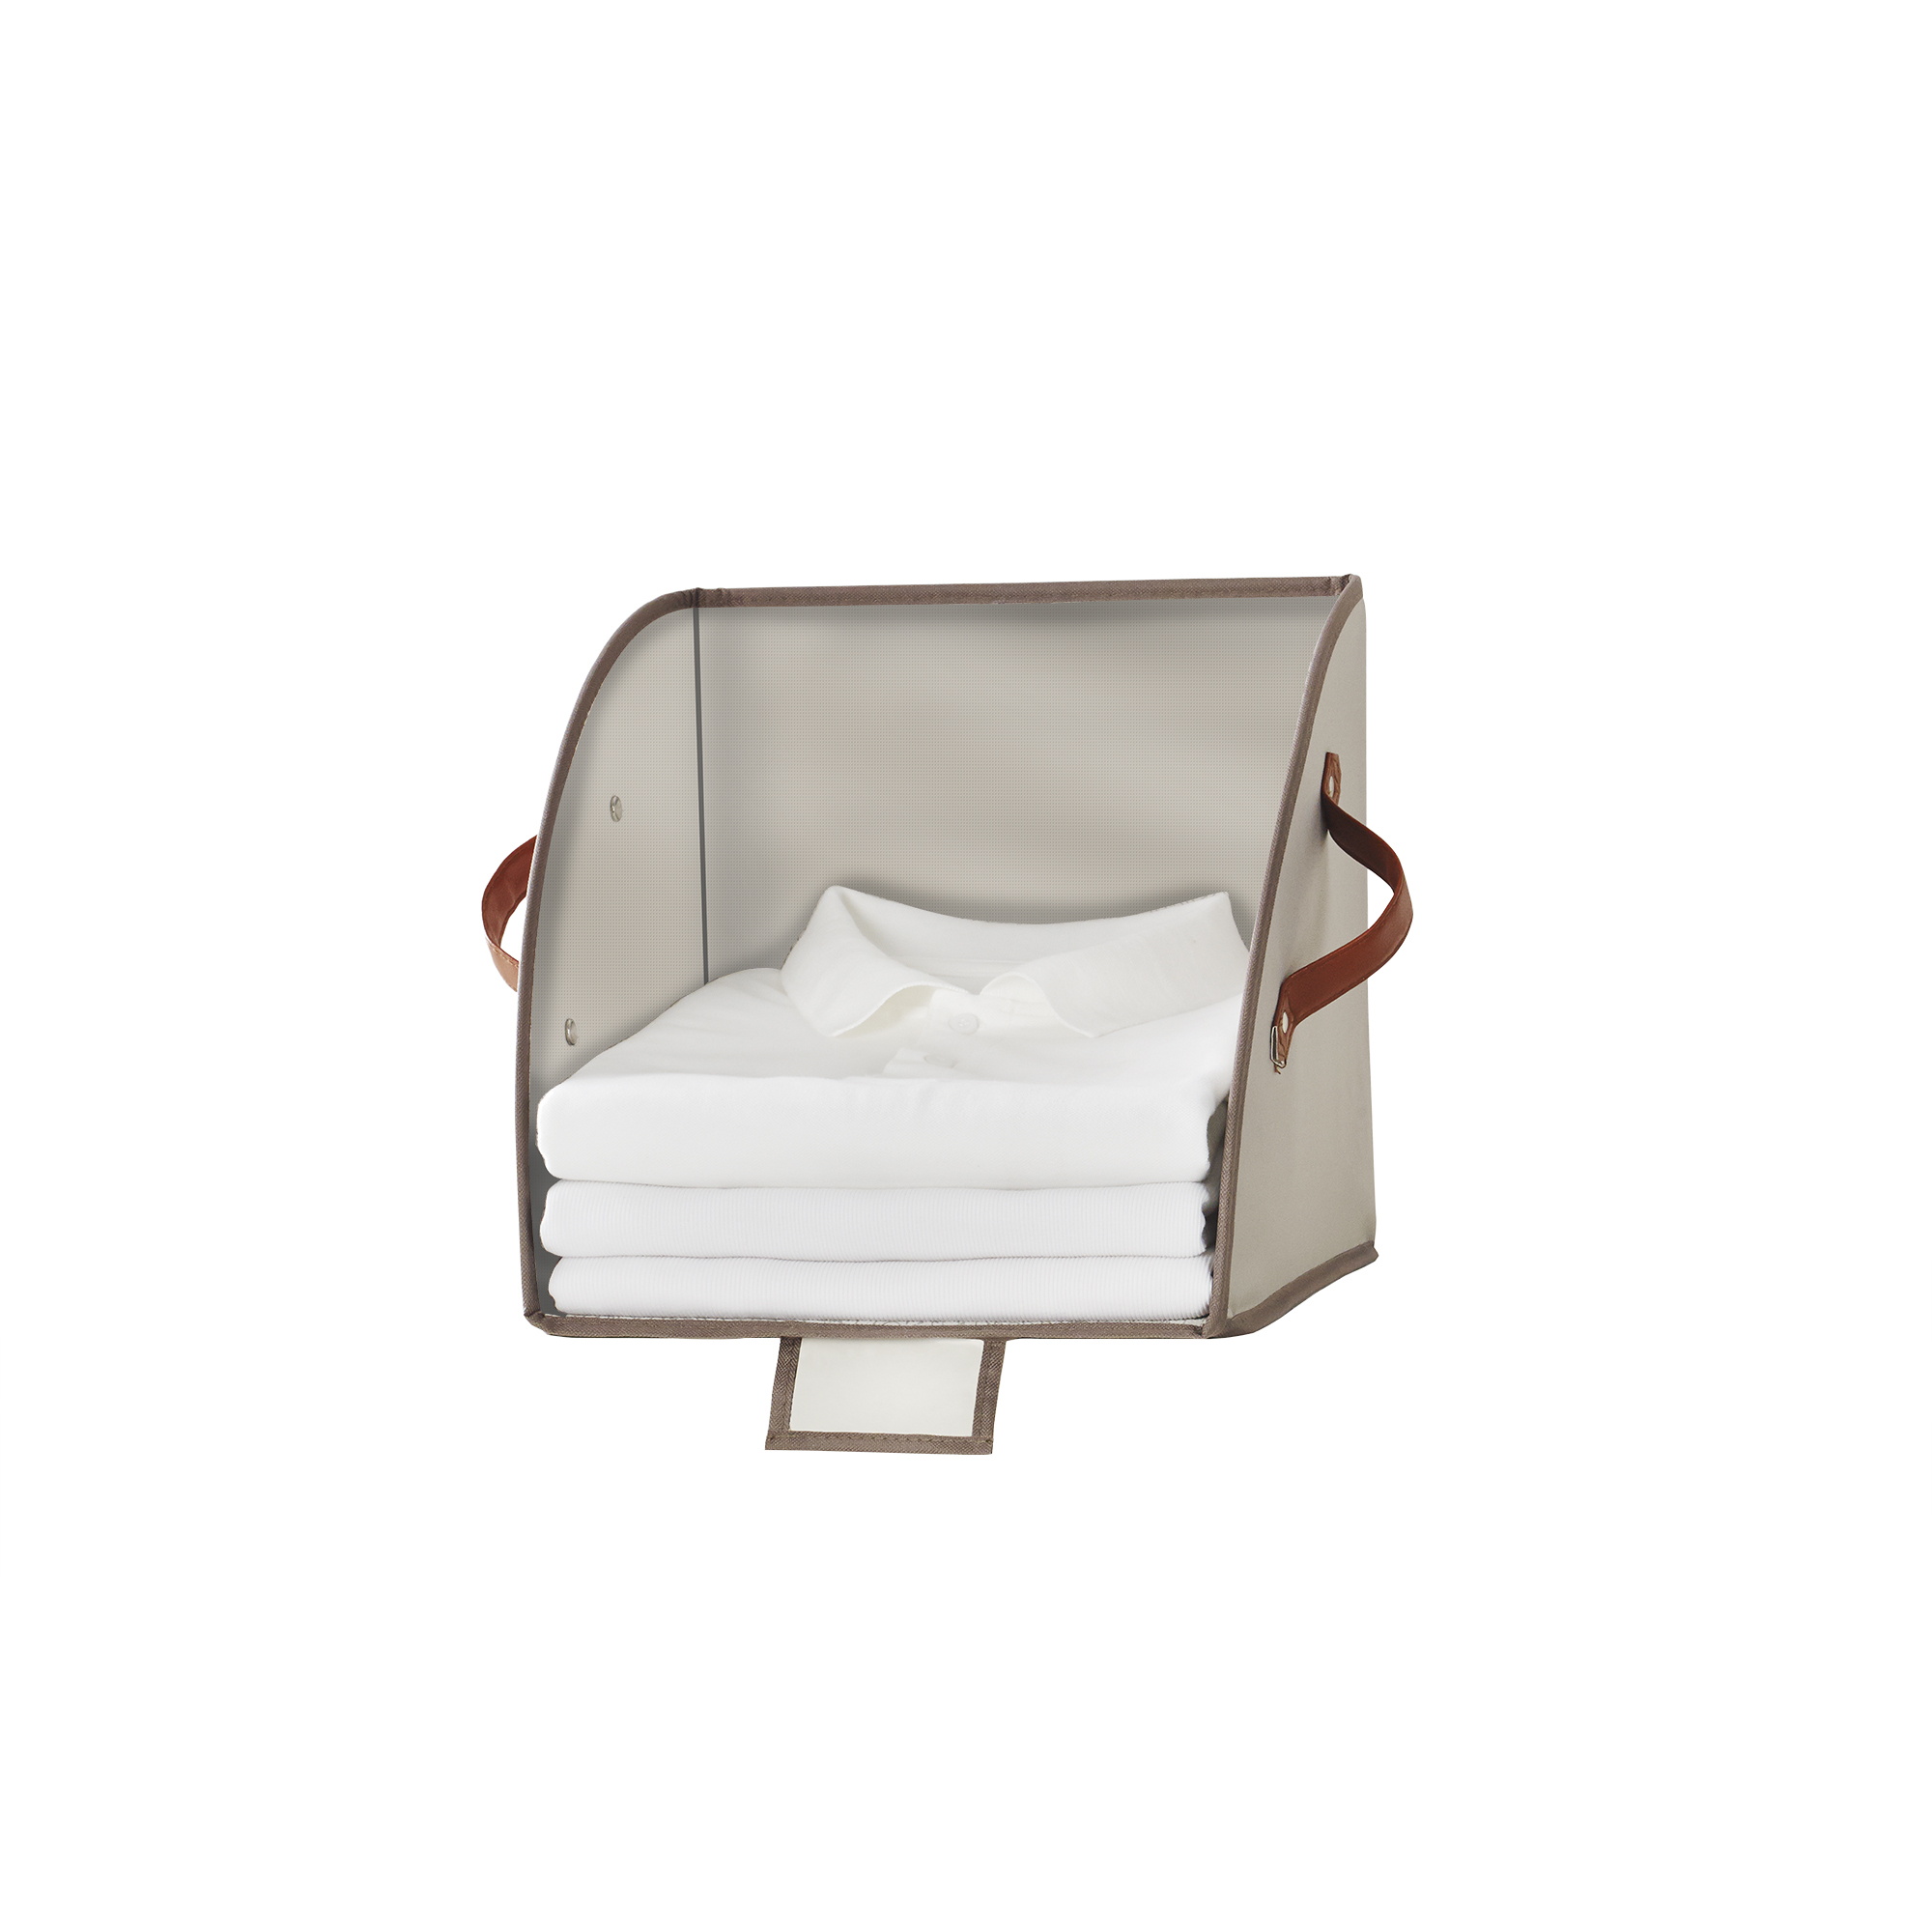
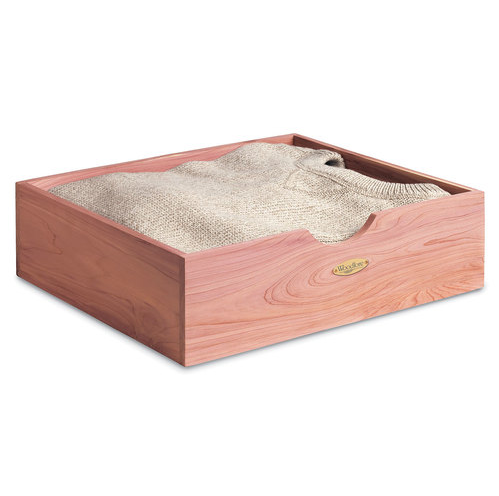
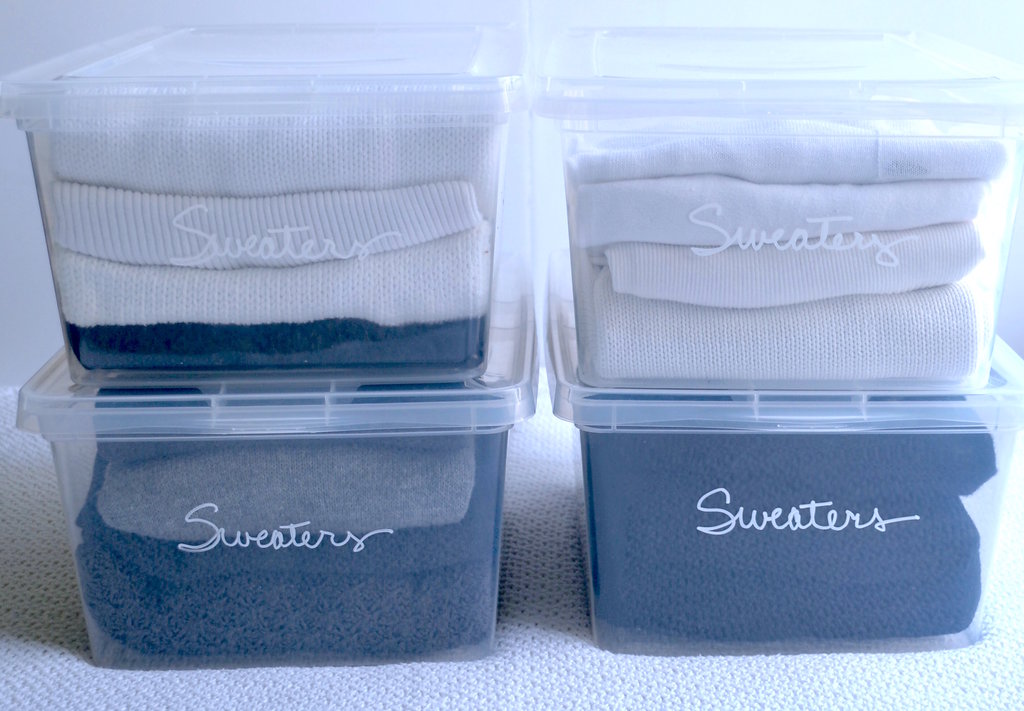
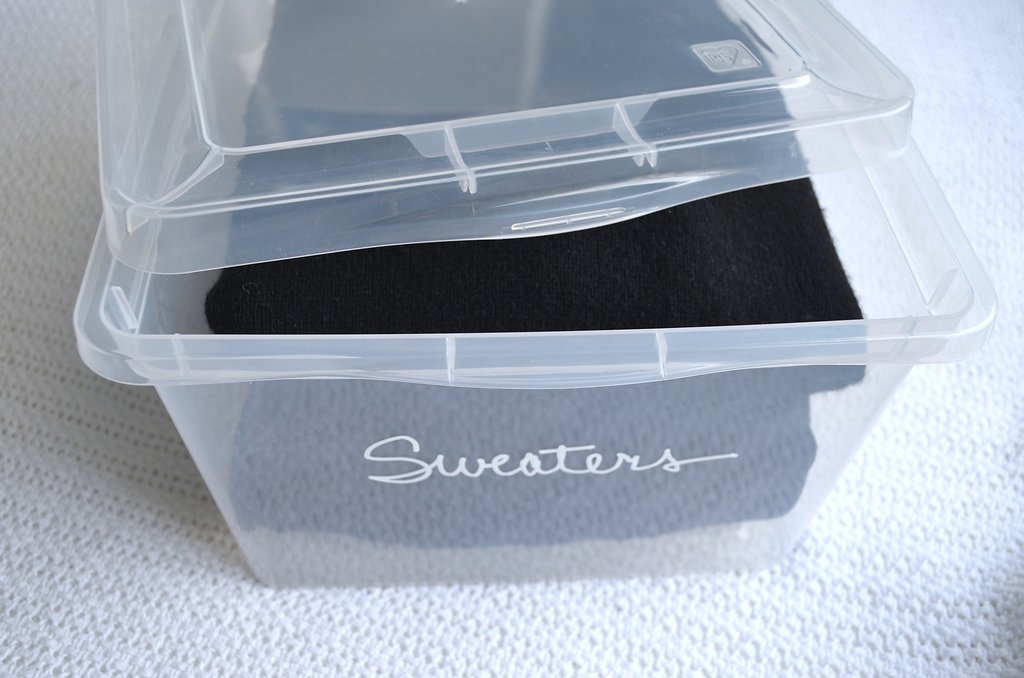
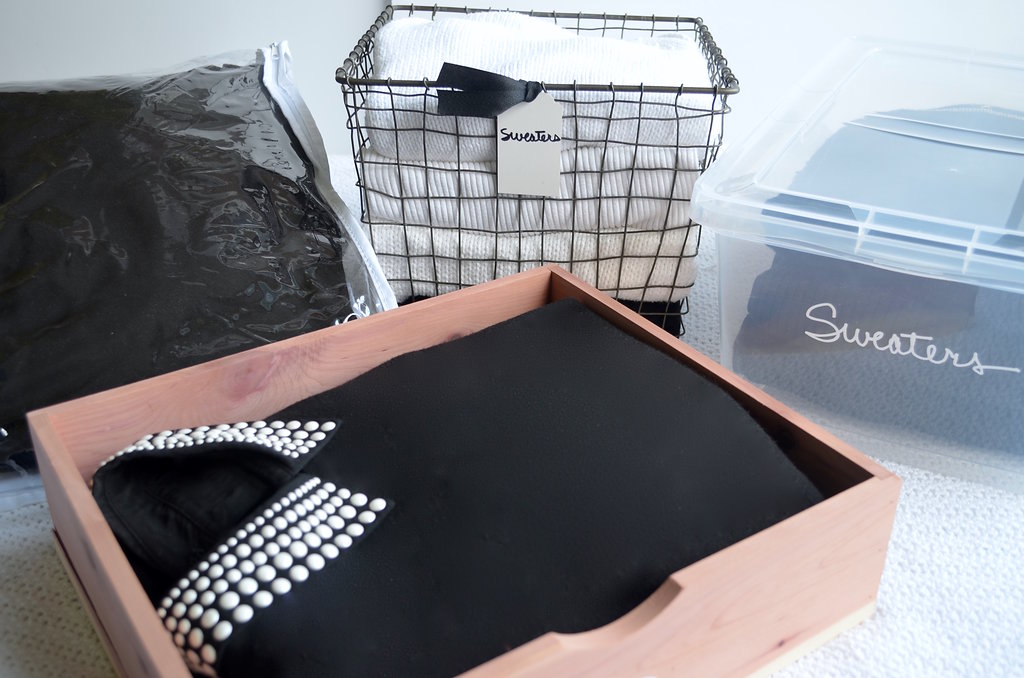
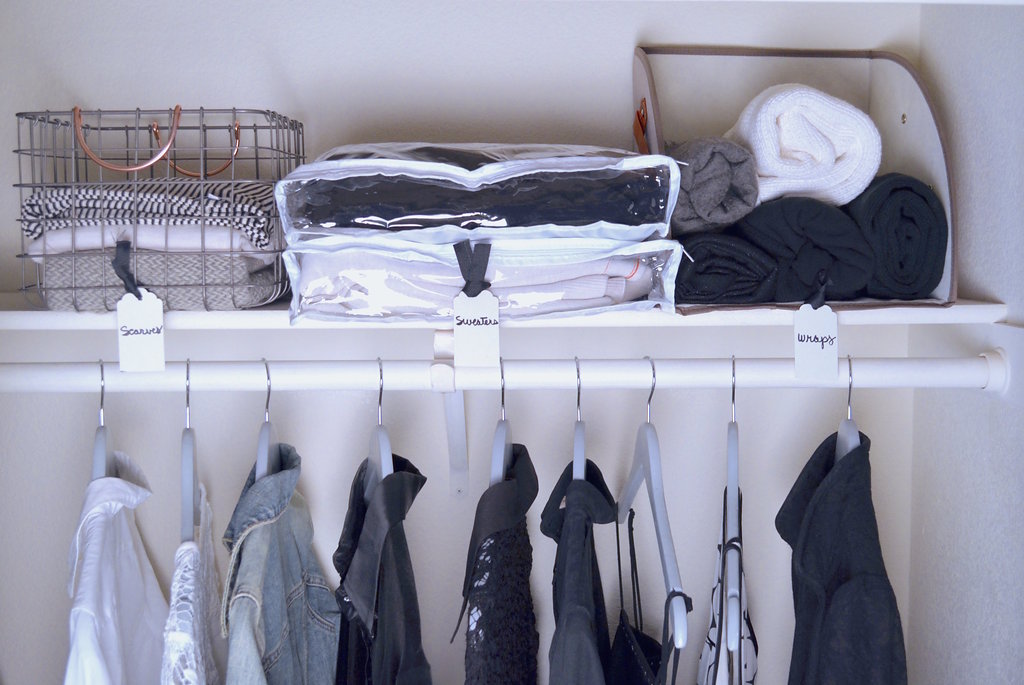
Sweaters can be stored in sweater boxes, clear zippered bags, bins, covered boxes, baskets, at the top of your closet using shelf dividers or using hanging sweater storage.
Use all the same color and style of hangers for a uniform look. It’s the golden rule of organization.
Bins + Baskets for sweaters, tees + turtlenecks, scarves and denim.
Shelf dividers; Can also be used combined with or in place of bins + baskets.
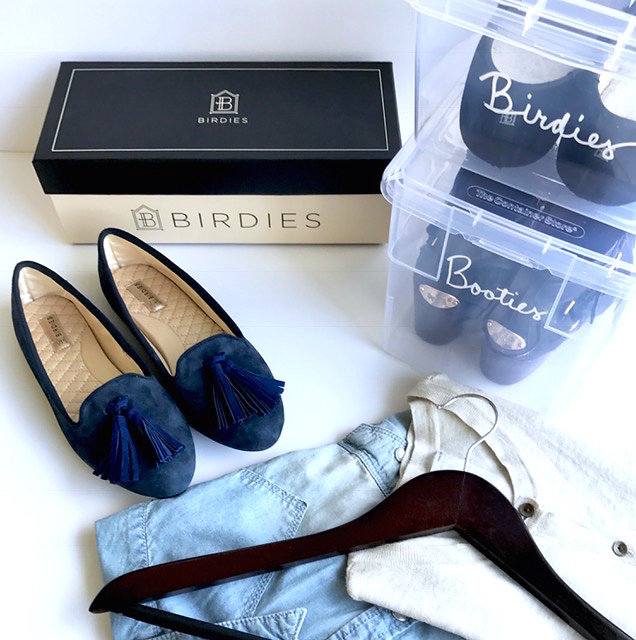
Covered shoe boxes and boot boxes for flats, heels, booties and boots.
Clear Covered Sweater boxes.
Sweater bags; Zippered storage bags.
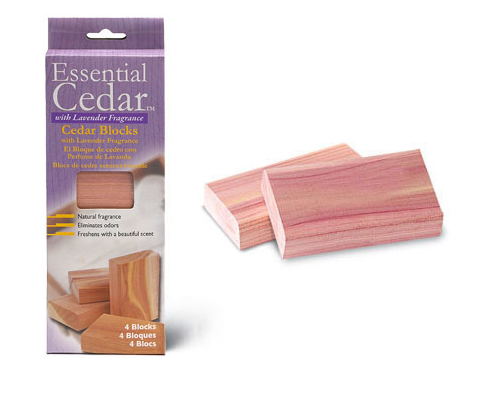
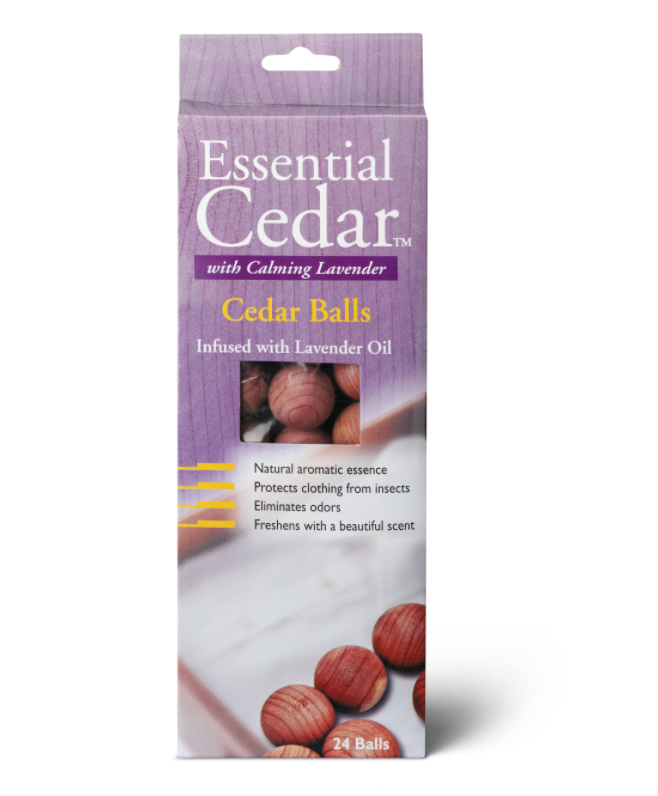
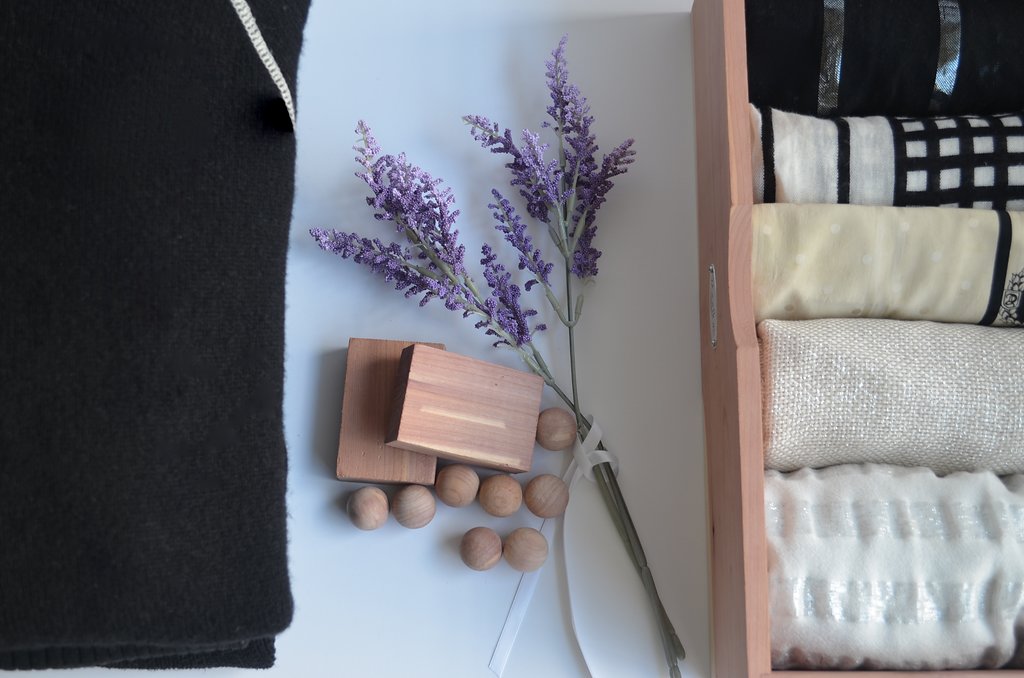
Lavender Cedar Blocks and Cedar Balls for clothing protection.
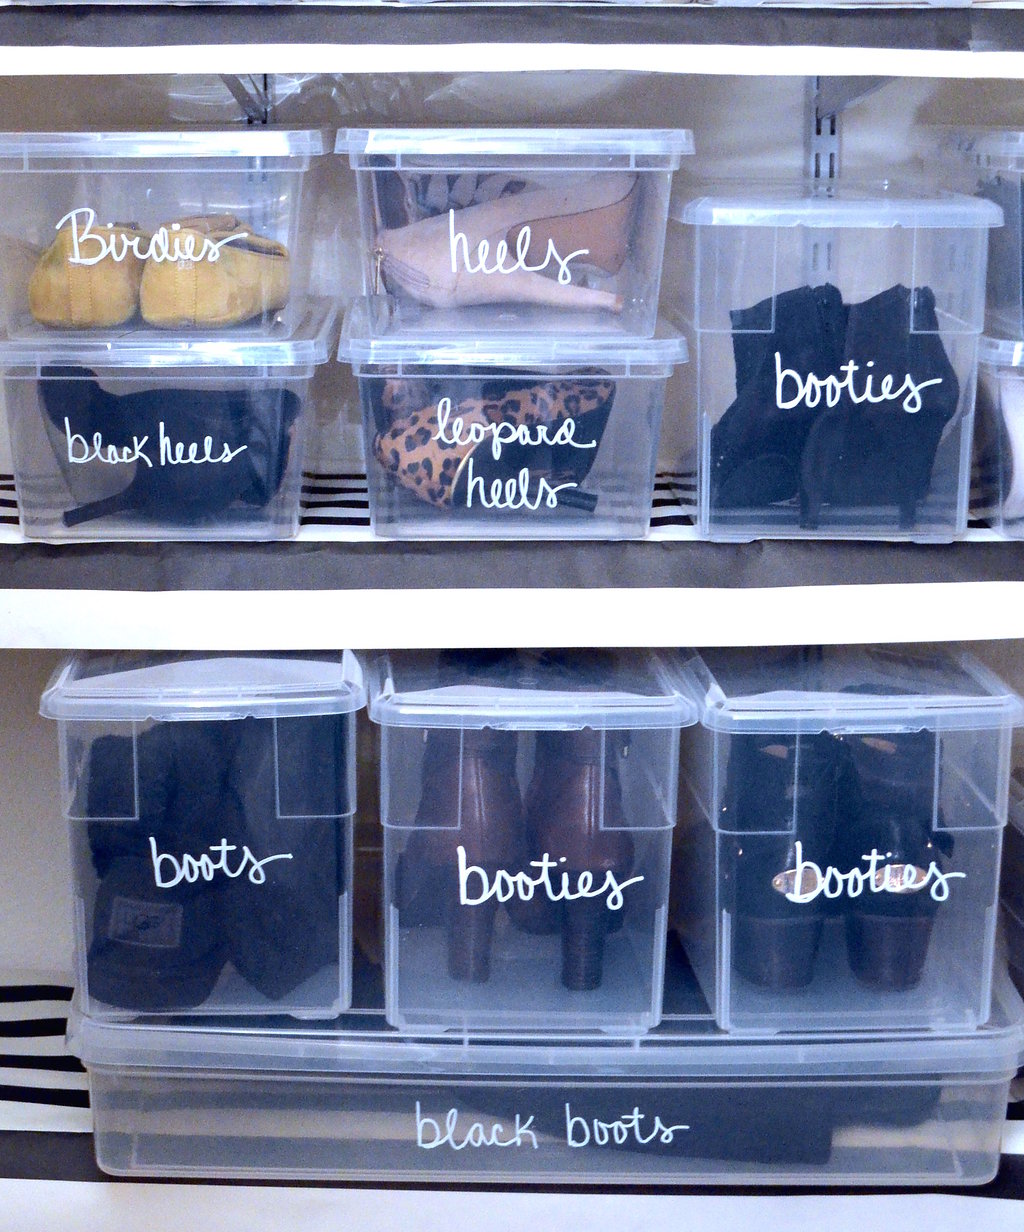
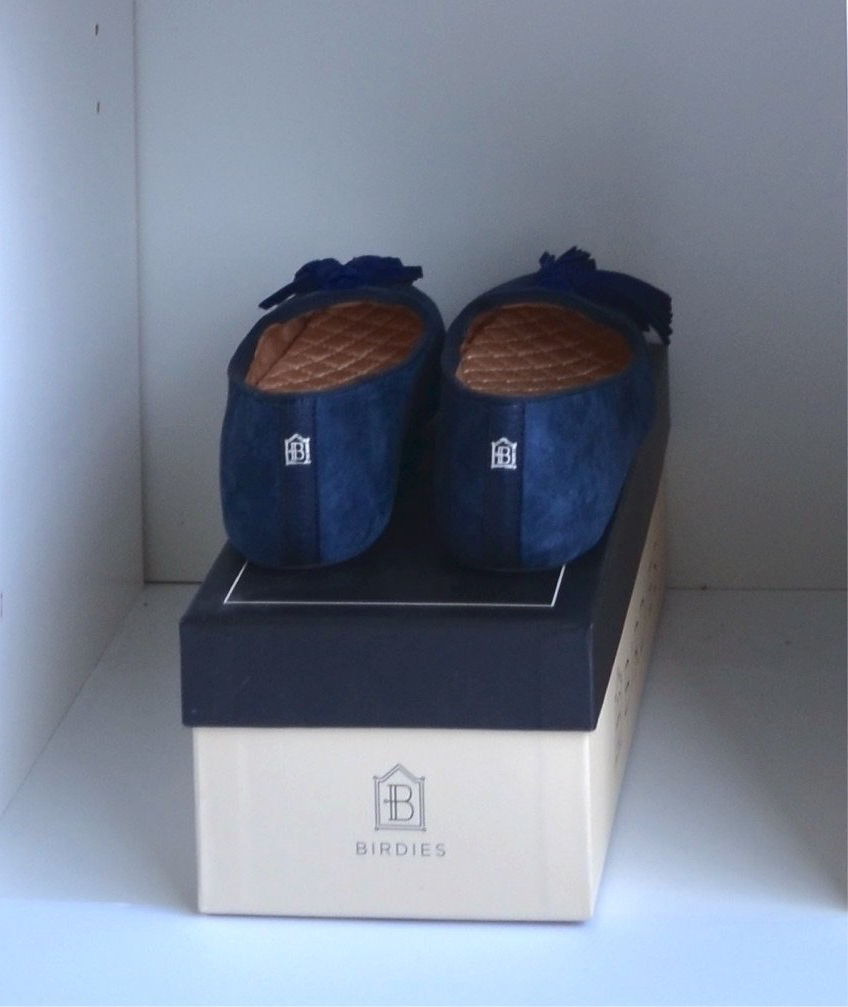
My new favorite shoe storage box is the Tall Shoe Box from The Container Store. It’s the perfect size and height for heels, wedges and booties. I happen to like the Cabo rustic wire bin from Design Ideas and the copper handled wire baskets from Target for sweater storage.
Step Five: Set & Style It
* The fun begins now! Whether you’re working with shelves at top of your closet, hanging storage or storage cubes, create a color story. Coordinating hangers, bins, baskets and folding, stacking + rolling garments by color will give you a clean, neat and stylish look that makes it easier to maintain.
* Store in style! Use bins that fit your style. Black + white is always a good idea.
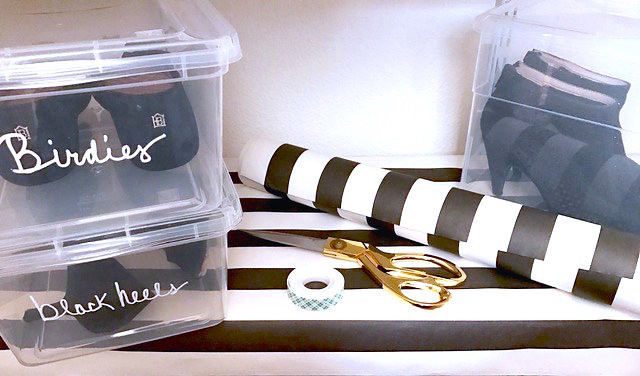
* Label storage boxes and bins so you know where to find what you’re looking for.
* Create DIY tags to add your own look and personality.
To create DIY tags:
* White hang tags.
* Black, gold or silver Sharpie pen.
* Black grosgrain ribbon (5/8″ shown here)
* Hole punch
* Scissors – cut tags to desired uniform length, if needed.
DIY Labeled Boxes:
To label shoe, boot and sweater boxes, use a white chalkboard marker pen either directly on the box or on a clear removable label. Chalkboard ink is easy to remove with water or rubbing alcohol. See the marker label for complete directions.
* Plastic storage boxes
Step Six: Maintenance
Now that that’s done, pay homage to NEATness. That feel good moment of a clean, well-organized space can last forever by following a few simple rules:
* A new item in, means an item should be donated, sold or put on consignment.
* Never say “later” when it comes to putting your clothes away. Make it a habit to put clothing away as you undress or change.
* Create a donation bin for your closet. When it’s full, drop it off at your nearest donation spot.
Need more space? Create it with storage cubes, designate it for your favorite go-to items and change it out by season.
Ready to organize your winter gear?