
It’s not lost on me that with the age of Pinterest comes the age of perfect dwellings. I see kids’ rooms, play spaces, kitchens, and yards that look fresh out of magazines. I see professionally organized drawers and cabinets that sing, “I’ve never been used.” I see gardens by mother nature herself. I’m amazed and slightly envious of course, but honestly, I feel mostly… well, indifferent.
Not because these spaces don’t register as beautiful and aspirational, they sure do. But it’s because I cannot see the way I live my life and parent my kids translate into these spaces. I want so badly for that to happen, but the reality will not let this dream materialize.
Instead, this blog post is about offering real-life organizational solutions that will help you keep your sanity when it comes to the crazy world of kids’ crafts.
The Value of Organization
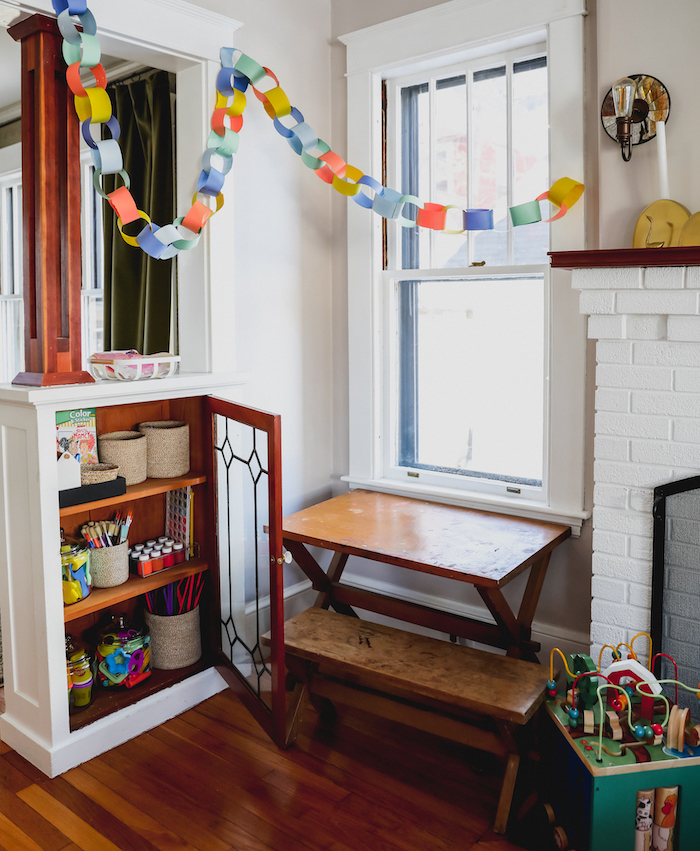
In this post, I’m offering up real, raw images of what our craft closet looked like before I implemented any type of organization. This closet is on the ground in our living room/playroom, and because of this accessibility, my toddler will come and go as she pleases. More often than not she leaves a wake of destruction in her place. And even on the instances when I’m involved in a full-fledged craft project, my stamina is zapped by the end of it.
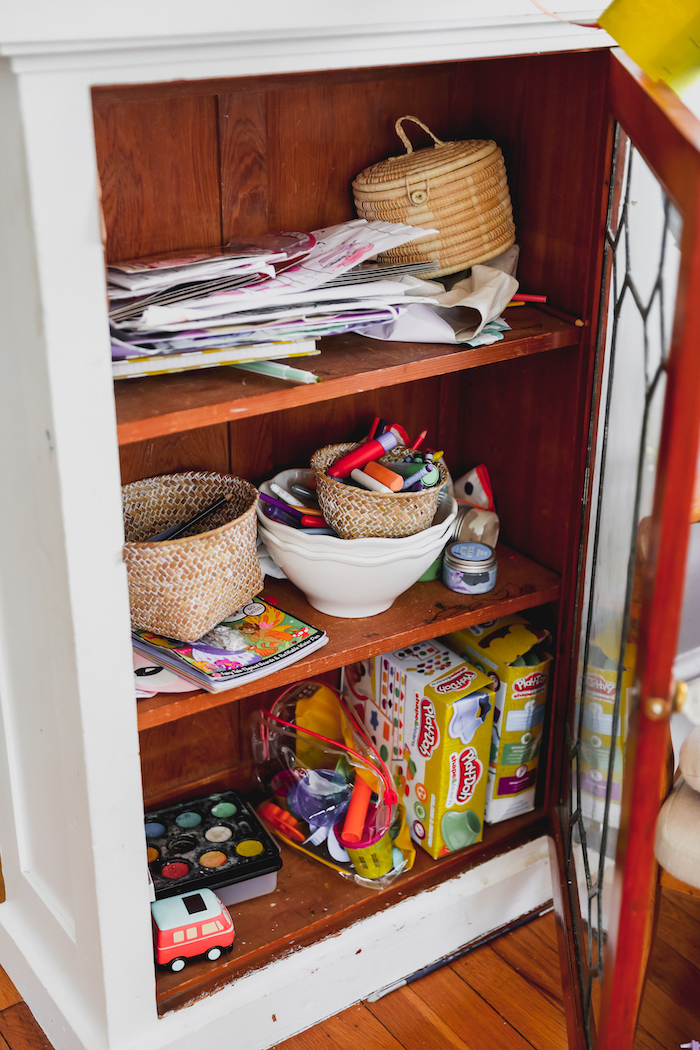
Sure enough, the crafts get put back, stacked haphazardly into no man’s land, without creating any rhyme or reason.
So, in an attempt to combat this post-playtime fatigue, I’m offering simple solutions that keep things in a place, with the flexibility to be imperfect.
1. Get Real
Donate. The first step in creating a truly functional, imperfectly organized space is to get rid of the odds and ends that have passed their peak. I’m donating miscellaneous and mismatched items that pile up and never get used anymore. I hate throwing them out because it makes me feel wasteful, so I try to organize a few boxes of crafts that can make sense together in order to successfully donate them to the next family.
Recycle what you can. Donating broken or potentially dangerous leftover crafts don’t help anyone and put an undue burden on the volunteers and employees. Try to recycle what you can (and more on using recyclables as craft supplies later on!).
Rotate. Another trick my husband and I use is the rotating craft bin. Box away toys, games, coloring books, and so on, that get exhausted from too much play. We tuck them away and bring out a new box of toys and games. Then, when you’re ready to rotate the first box back in, the excitement has been reinvigorated. It’s almost like a birthday or holiday lived out all over again, but without spending a dime.
2. Supplies
A part of our craft organizational woes was that I never really spent the time or energy planning out functional supplies. I simply threw in a hodgepodge of items we’d been gifted or randomly accumulated over time. I’d hope I could piece together some arts-n-crafts project when inspiration struck.
But mainly, I’d just pull out a coloring page and plop Lila down with watercolors, markers, or crayons depending on what she felt like using. While I still will likely do this, it’s much easier to find inspiration when you have the baseline requirements for a crafts project ready.
Here’s my list of foundational supplies. Pick and choose a few for your budget, or check off the whole list:
- Crayons – I like jumbo crayons for my toddler
- Markers – there are so many fun kinds of markers out there!
- Watercolors — my advice is to get the real deal set from the crafts store. So many amazing colors!
- Washable finger paints — washable is the keyword here
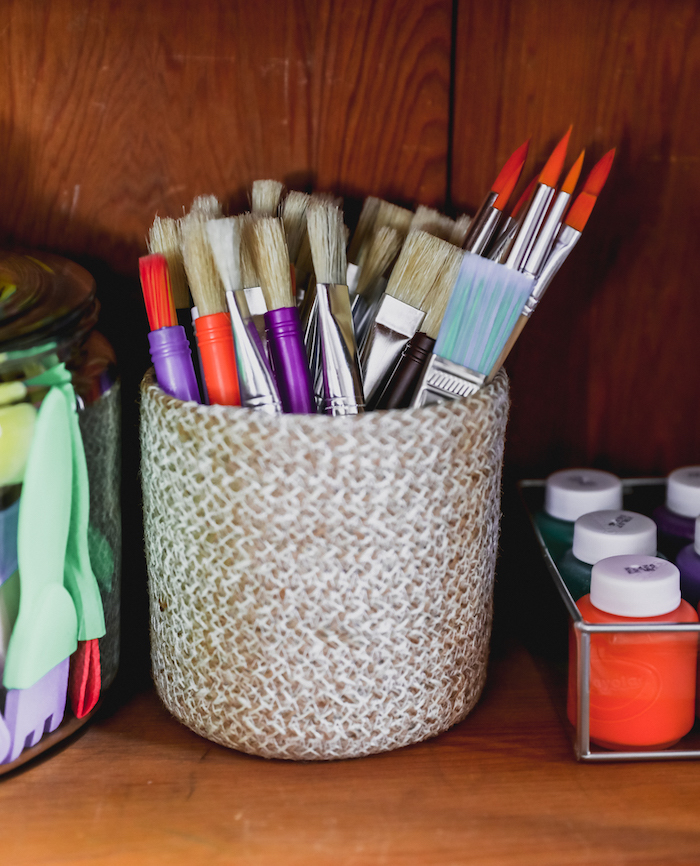
- Brushes and Stamps
- Construction paper
- Glue sticks
- Safety scissors
- Pipe cleaners & Pom Poms
- Recycled paper goods — let inspiration be your guide!
3. Organizational Solutions
I find that my biggest hang-up for keeping our small home organized is implementing the appropriate organizational solutions. I’m not talking about label makers and Marie Kondo, although awesome, I’m simply talking about setting realistic organizational goals that set me up for success. You see, I know myself, and no matter how hard I try, I cannot keep everything in its perfect place.
Imperfect organization is more my jam. And when it comes to the kids, I need an easy-to-find and easy-to-put-away situation. The harder it is for my toddler to decode, the less likely things will find a place, and the more work I have to do. Plus, I want to leave some room for normal life to find its way into our space and dare I even say, welcome it with open arms.
Here’s what I suggest. Measure your shelves so you know generally what sizes work, and then order or recycle 2-4 of the following:
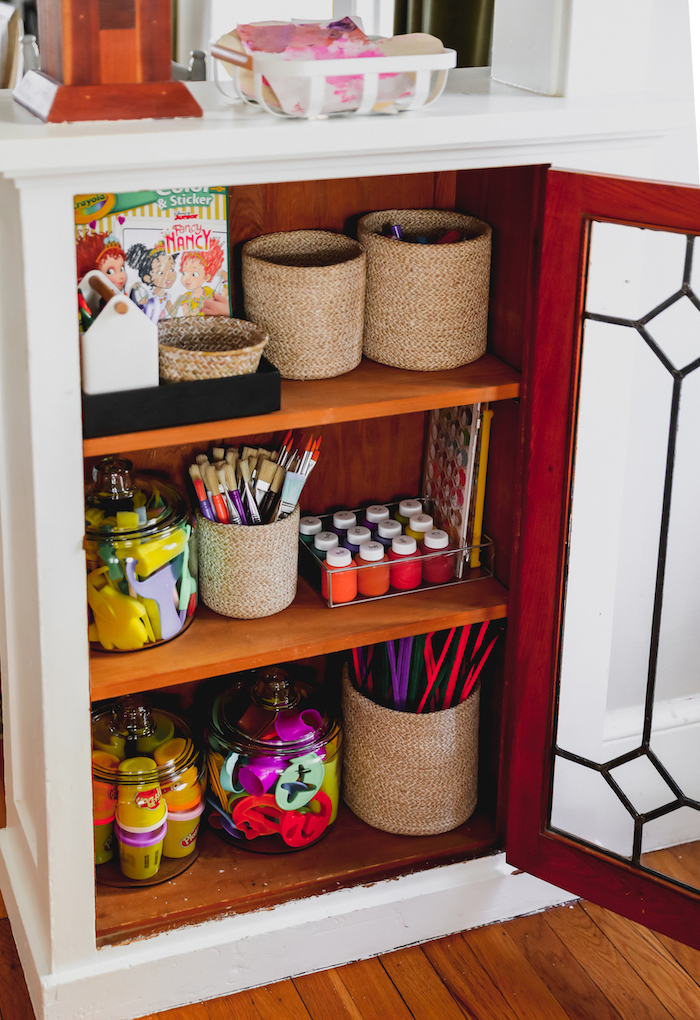
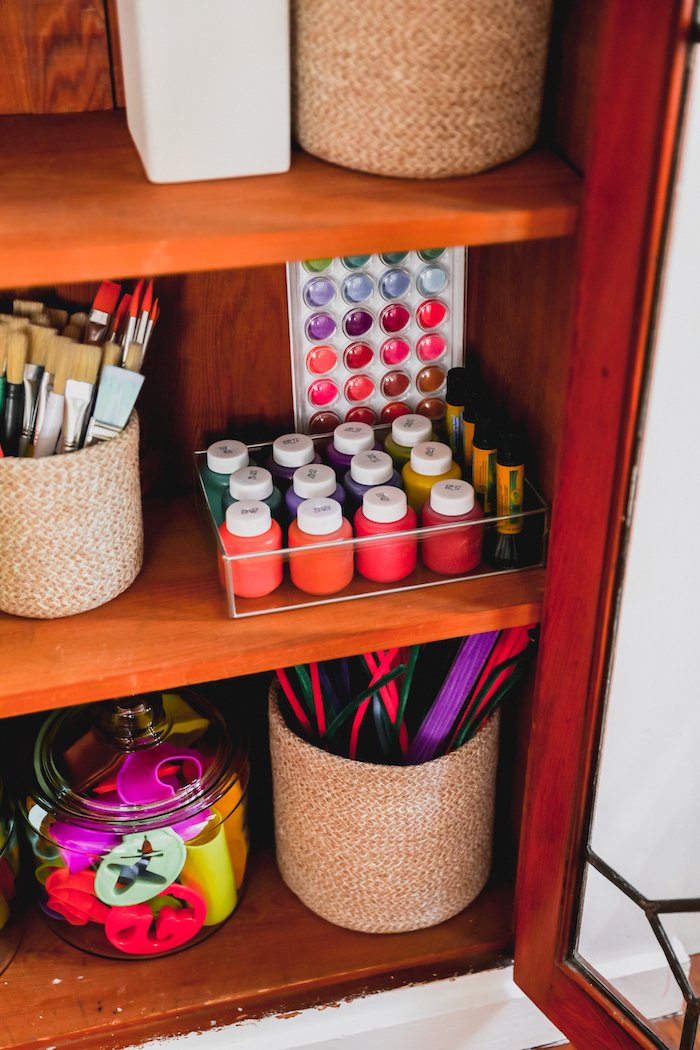
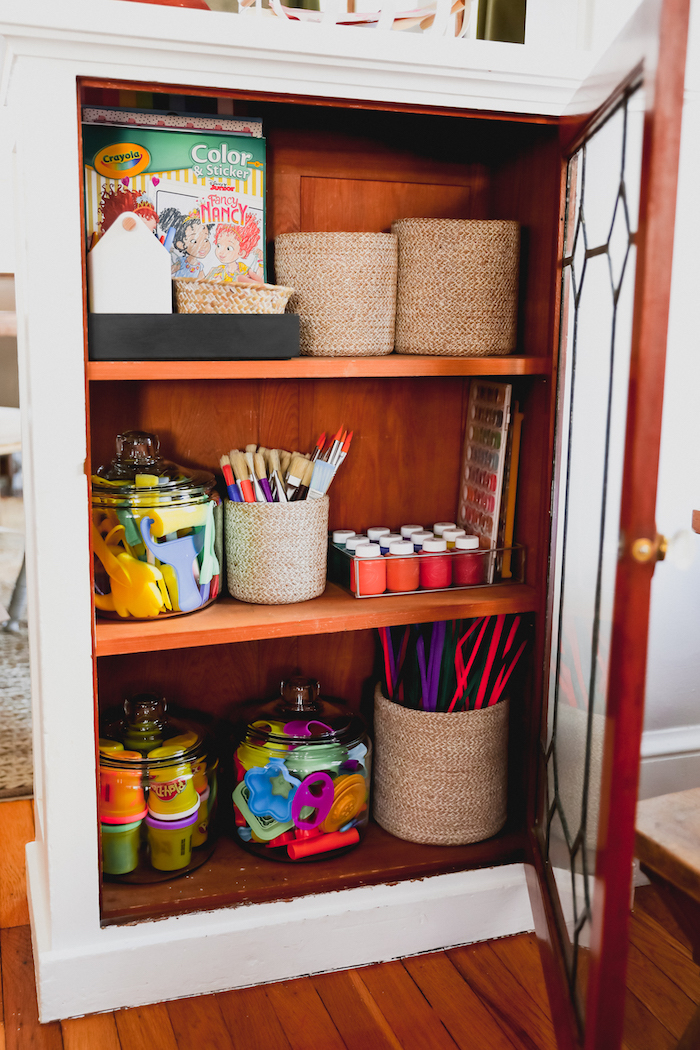
Vessels & Jars
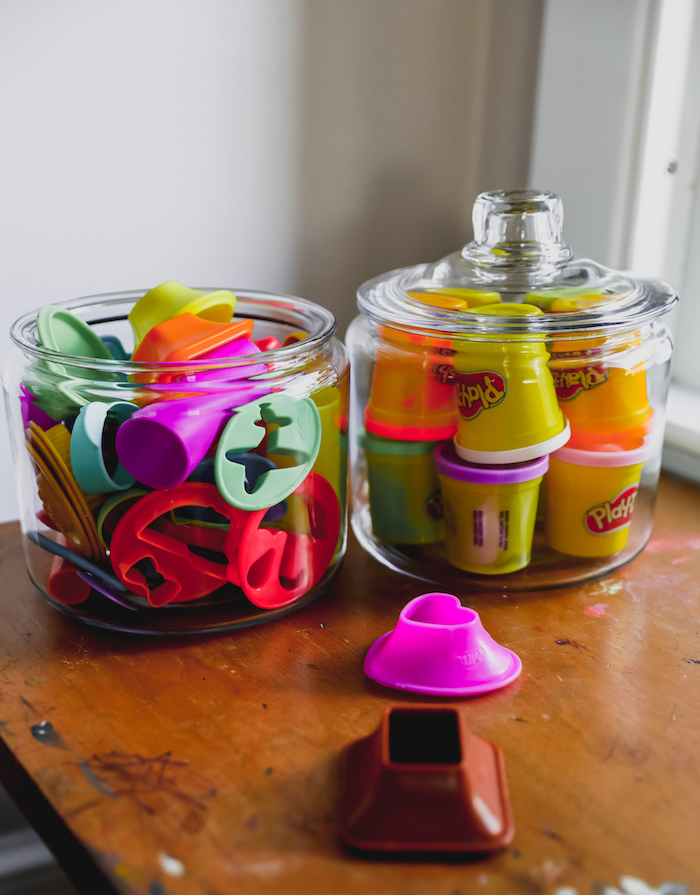
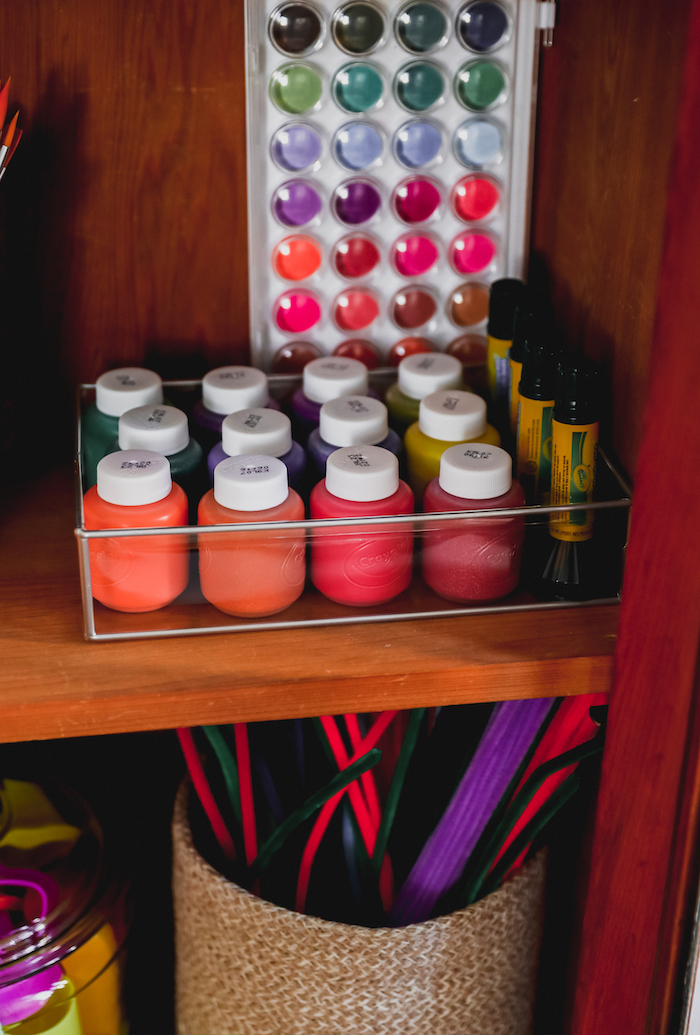
Glass Jars. I put things that are easier to first see, then grab in big glass (or plastic!) jars. This could be big items like stamps or Play-Doh supplies, or small things like pom-poms or beads. These items get used, but much more strategically than say, crayons, and can get tucked away nicely.
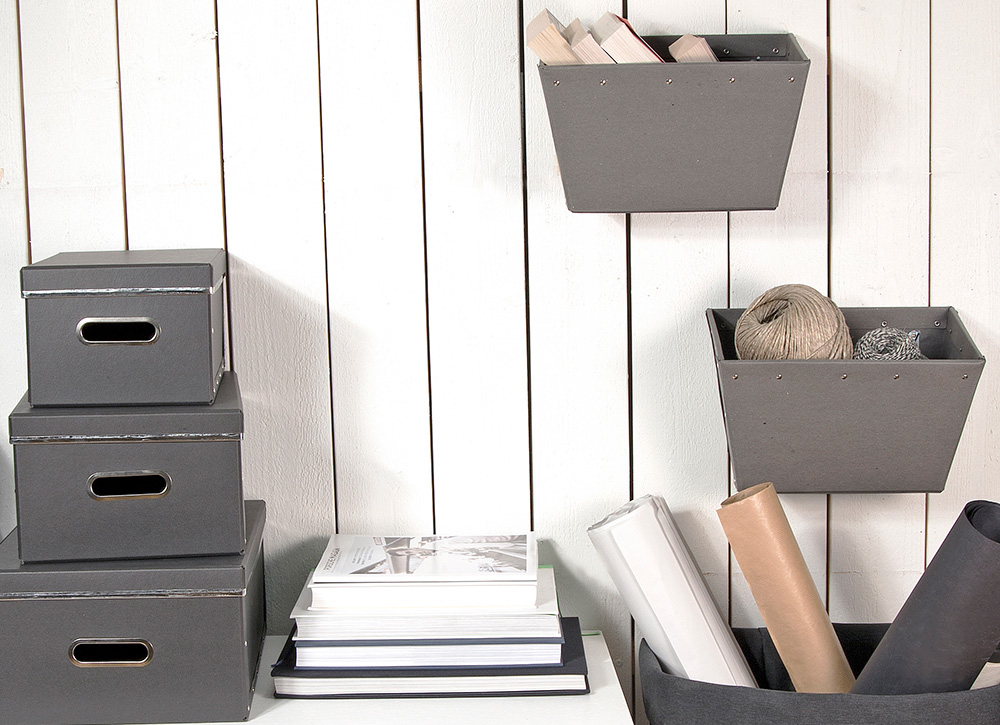
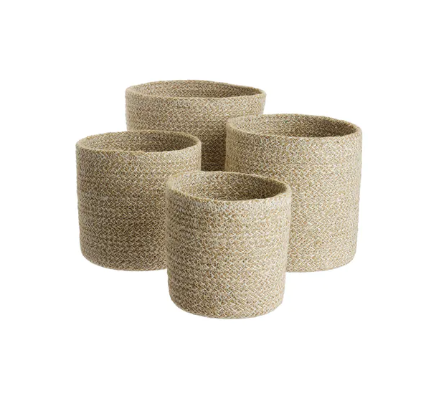
Fabric Baskets. I like fabric bins for high-traffic items like markers, crayons and paintbrushes. It keeps the supplies contained, but they don’t necessarily have to look pretty. The crayons can get broken and smudged, the markers can have bite marks or just get thrown in there, and the aesthetically pleasing bin keeps it all a nice big secret. Plus, they’re easy to transport and can take a bit of a beating.
Boxes & Bins
Clear Boxes. I love the clear box by Design Ideas that I use for our paints. Paints can get stacked back in their place relatively neatly and just need a container to hold their place on the shelf. The clear ones provide a more discrete profile while giving the child an easy view of what they want to grab.

A Few Concepts to Try:
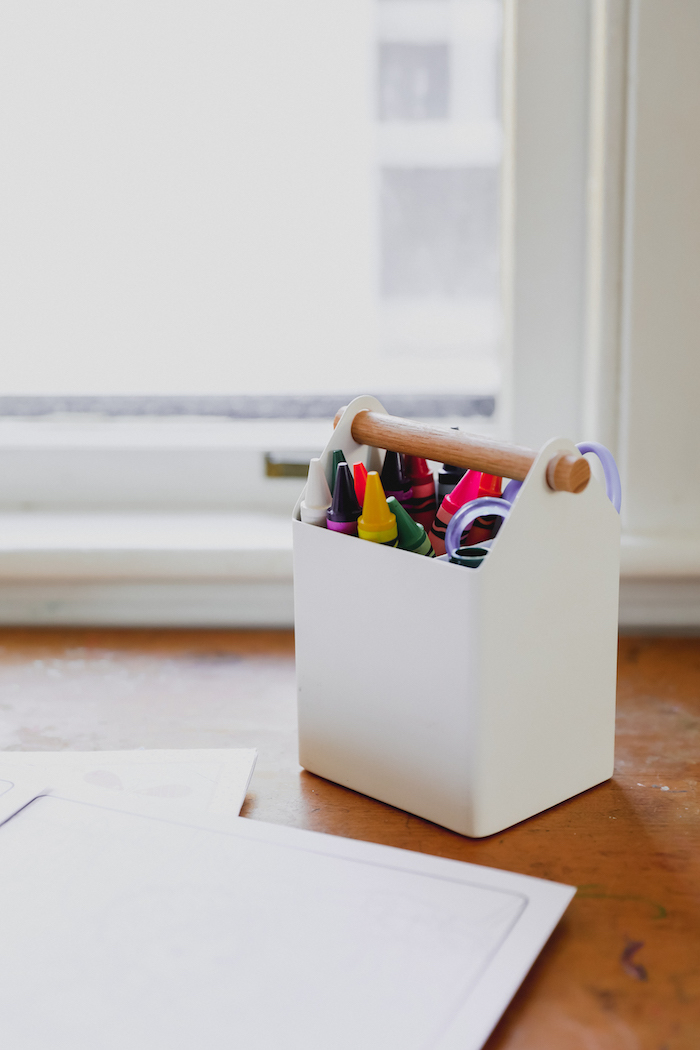
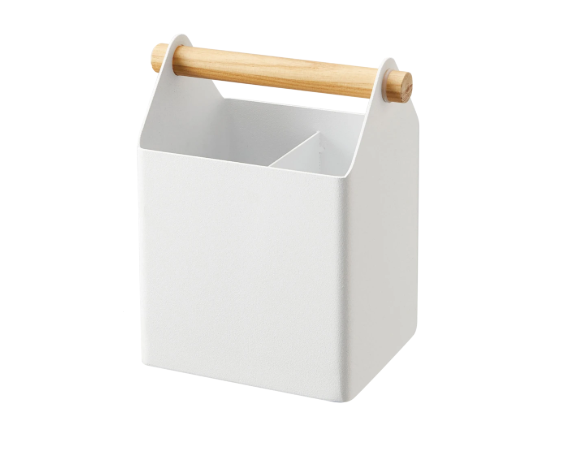
A Transport Box. Make little travel stations for your child’s most used crafts so they know exactly where to go and grab. I love the wood box that I use here for our coloring pages and crayons. It’s a neat little stack that can be easily transported to our craft table.
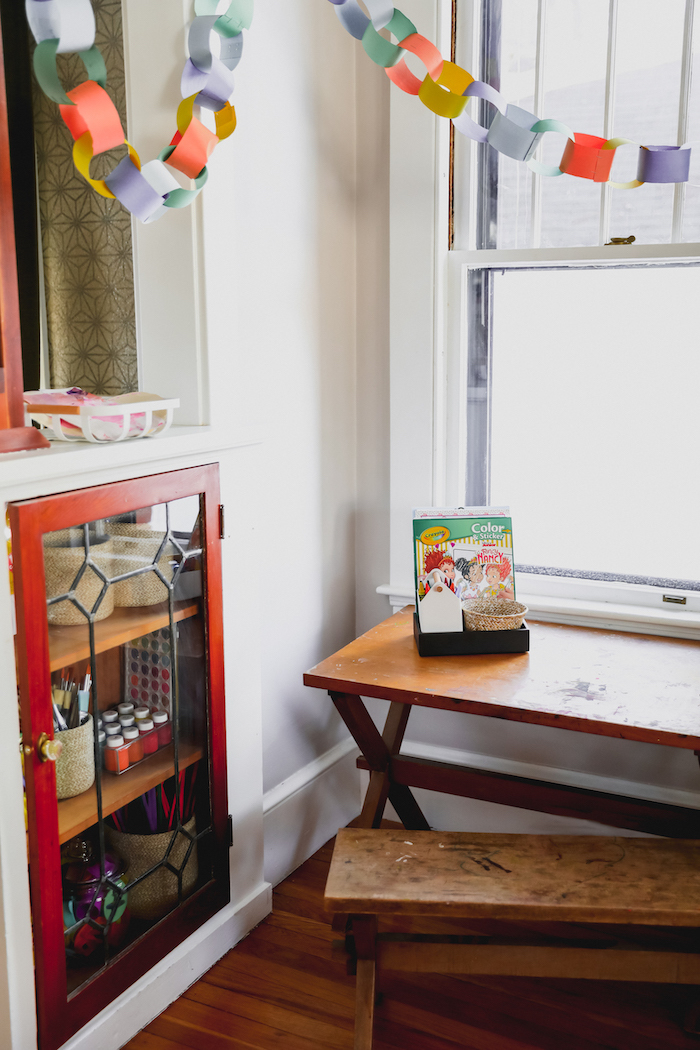
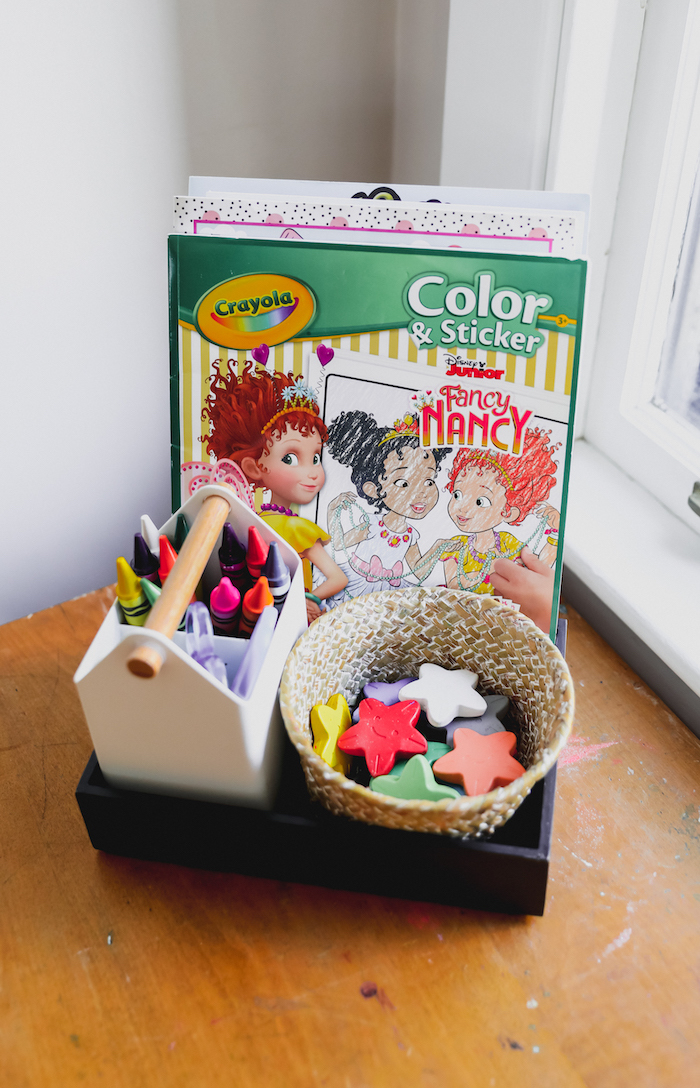
The crayons live in this beautiful pen holder that can be easily gripped by tiny hands and isn’t an eyesore if it gets left out.
Recycle Pile. I’ve learned over time to create a space for the disarray. I think a lot of people neglect to create designated space for the mess when they’re organizing because it’s pretty counter-intuitive. You’re organizing to avoid the mess, after all. But the truth of the matter is, there needs to be a space for the things you don’t anticipate.
The recycle pile is my solution for the miscellaneous craft items. This could be random coloring pages that come home from school, toilet paper rolls, construction paper scraps, etc. Anything that needs to be used again, but has no home, can find its way to this pile.
Grab a cute bin like the white wood-handled fruit bowl I use here and, voila! You have a solution. I even suggest getting an extra cloth bin to hide the mismatched tools and pencils. This way you know exactly where to put the items that have no real home.
As you can see from my pictures, our craft closet is perfectly imperfect. It’s stocked and ready to go, but with solutions that are flexible and can change with our children’s needs. There’s wiggle room, and space to throw and hide the mess, while still having rhyme and reason. Don’t be afraid to test out whatever you come up with, and change it if it’s not working.
Organizing is meant to make your life easier, and some trial and error isn’t a bad thing. I hope you have fun creating with your kids!