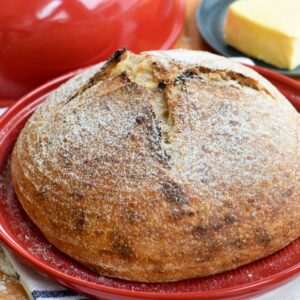
Sourdough Bread Recipe
Servings: 1
INGREDIENTS
- 250 grams healthy sourdough starter (able to pass the "float test")
- 800 grams bread flour (approximately 5 1/2 cups)
- 200 grams whole wheat flour (approximately 1 1/2 cups)
- 29 grams fine sea salt
INSTRUCTIONS
- In a large bowl, combine the sourdough starter with 700 grams (around 3 cups) of warm, but not hot, water and mix together.
- Add the flour and mix with your hands or a bench scraper until all the flour is incorporated, but do not knead. (The dough may seem dry at this point.) Cover with a clean kitchen towel and allow to rest for 45 minutes in a warm place. This phase is known as autolyse.
- Add the salt and 55 additional grams of warm water to the dough and mix well to distribute the salt throughout the dough.
- Starting at the top of the bowl, pick up the edge of the dough and stretch it over the rest of the dough in the bowl. Turn the bowl 45 degrees and repeat this stretching and lifting process with the side that is now at the top. Do this two more times so that you have stretched each side of the dough ball. (These four "turns" is how we will build structure in our dough without kneading it.)
- Cover the bowl and place in a warm spot for forty minutes.
- Repeat the four turns again. Cover and allow to rest for another 40 minutes.
- Repeat this sequence two more times so that you have done the four turns four times, with a forty minute rest between each turn. By the end, the dough should be elastic enough that you can easily pull one side up high and fold it over the rest of the dough.
- After the fourth set of turns, allow the dough to rise or ferment, covered, in a warm place for 45 minutes to an hour.
- Turn the dough out onto a well-floured board. Divide into two equal parts.
- Using your bench scraper, shape each piece of dough into a round shape. Use the edge of the scraper to push the dough into a round shape, tucking the edges under. Add more flour to the board or dough as necessary to prevent sticking.
- Allow the loaves to rest for 10-15 minutes and then shape again.
- Place the loaves top side down into a well-floured banneton basket OR a lightly oiled bowl. Cover with plastic wrap and refrigerate for 12 hours or overnight.
- To bake, preheat oven to 450.
- Turn out the loaf and place top side up in a lidded baking vessel, such as a ceramic cloche or Dutch oven. If the vessel does not have a dark or nonstick interior, coat the bottom lightly with oil and sprinkle with coarse flour, such as semolina, to prevent sticking.
- Slash the top to allow steam to escape. You can make a cross or another decorative design.
- Cover and bake for 30 minutes until loaf has risen.
- Remove cover and bake an additional 15 minutes or until you achieve the color you desire.
- Turn the loaf out onto a wire rack to cool. Repeat process with second piece of dough.
- To store your bread, do not wrap it! Allow the crust to develop and adapt. We store ours cut-side down on the cutting board.
- To freeze, wrap well in plastic wrap and then wrap again in foil. Thaw at room temperature wrapped to allow the moisture from the thawing process to be reabsorbed into the bread. Then store unwrapped.